
Have you ever tried making garden totems out of dishes, but didn’t like the way they turned out? That’s me…and more than once, too!
Sometimes, those kinds of results mean we’re less likely to try it again. But, I want to show you how to make the process fun and stimulating so you’ll love making whimsical things for your garden.
That being said, there are absolutely NO “rules” that garden totems have to be made a certain way. None at all! The whimsical shines through in any random combination of things you can think of to put together; it’s just that some people want to make something with more artistic flair. Hopefully, that’s why you’re here!
This article is geared for the intermediate crafter. It’s loaded with my own professional tips and tricks on how to take your garden totems to the next level. From the types of dishware to consider, to the way you configure them, it just takes a bit of practice.
So, I really want to encourage you. If you’re ready to try again…let’s get our “artsy-fartsy” on!
Overview: creative garden totems
WHAT’S COVERED:
- Selecting dishware for color and style
- Theme
- How to balance your art piece
- How to troubleshoot uneven surfaces
- Glue techniques
- Use of accent pieces
- Motion and movement in sculpture
HELPFUL ITEMS TO HAVE ON HAND:
- Isopropyl/rubbing alcohol (for cleaning)
- Q-Tips
- small, art paint brush (an inexpensive or disposable one)
- small level (4-5 inches in length)
- old towel or rag
- Camera (the one on your phone)
ADHESIVE:
- 100% Silicone (clear, for Exterior)
- E-6000
Scouting out your materials
The dishware is your “building blocks” so-to-speak. The best places to find inexpensive dishes and household goods are thrift stores and garage sales. Since items are cheap, pick up a few more pieces than you think you’ll need so that you’ll have more selection to play around with once you get home.
Don’t be in a hurry. The “hunt” itself is part of the process. Although it’s entirely possible to find most if not all of your garden totem pieces in one outing, do not be discouraged if you don’t. Locating more unique and decorative pieces takes time and patience. You may have to shop several thrift stores and more than once, so relax and let it be fun. It’s worth it in the long run to find those “special” items AND also because you’ll start to train your eye as well.
TIP: Be sure to pick up a sturdy, salad-sized plate to use as a base for your totem. A base helps to stabilize your art piece so it won’t easily get knocked over.
Dishware that makes an artistic impression
Now, it goes without saying that if you want to make pretty garden totems, use pretty dishes. If you’ve made one before, you might have selected ordinary dishes just to experiment with. I did that, too. Nothing wrong with that.
But this time, I not only want YOU to love what you make, but for others to love it, too!
Color & style
Great garden totems consist of dishware that looks “gardeny”. So choose dishes with bright colors, and collect both solid-color and patterned dishware. Fortunately, floral and leaf designs are quite popular in dishware. For artistic impression, try to collect items around 2-3 primary colors.
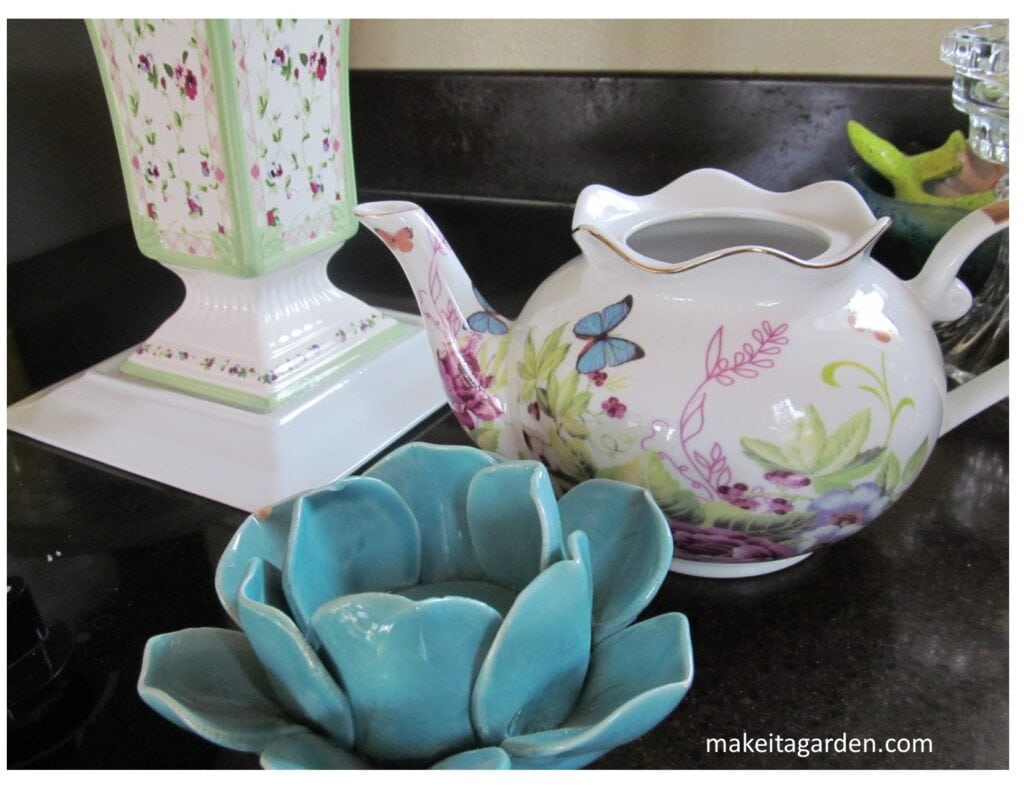
Look for unique shapes and fun, scalloped edges in cups, saucers, and bowls. Scout around for a pretty, decorative vase or tea pot.
*TIP: Make any solid color plate or tea pot look whimsical by painting on polka dots or other simple design or stencil. Use enamel craft paints (Folk Art brand etc.) that won’t wash off in an outdoor environment.
IDEA:
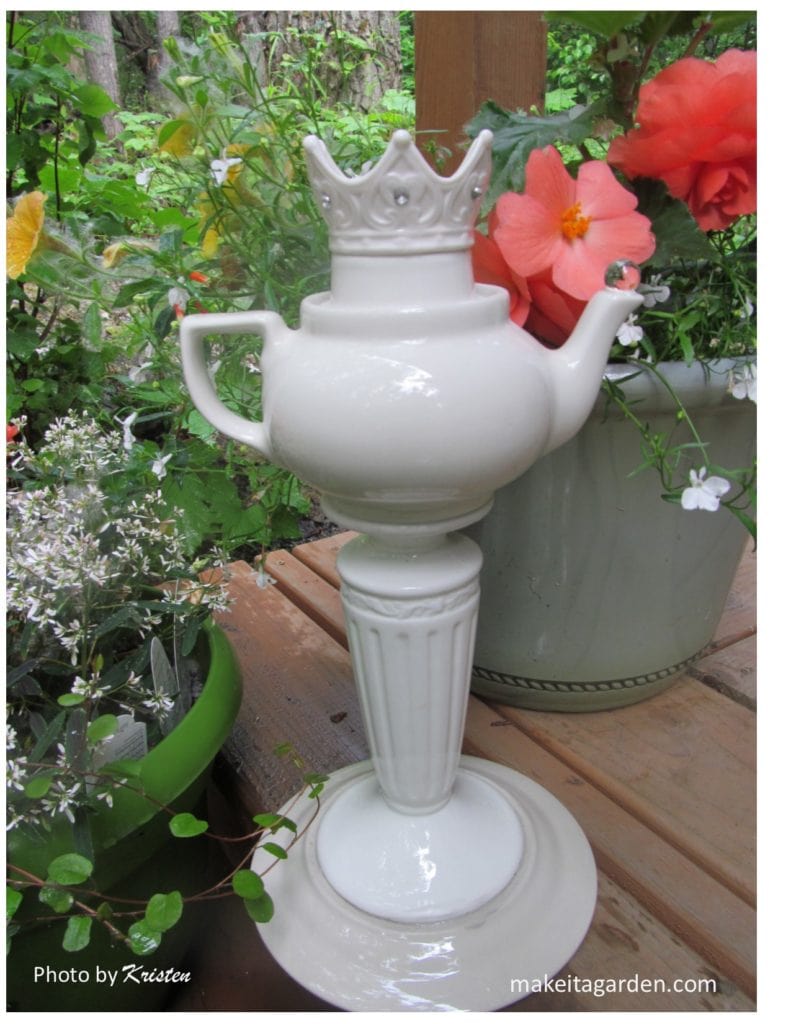
Don’t disregard plain ‘white’ dishes. They really pop against other colors and really stand out in the garden.
A single (monochrome) color scheme is another way to make something appear ‘artistic’.
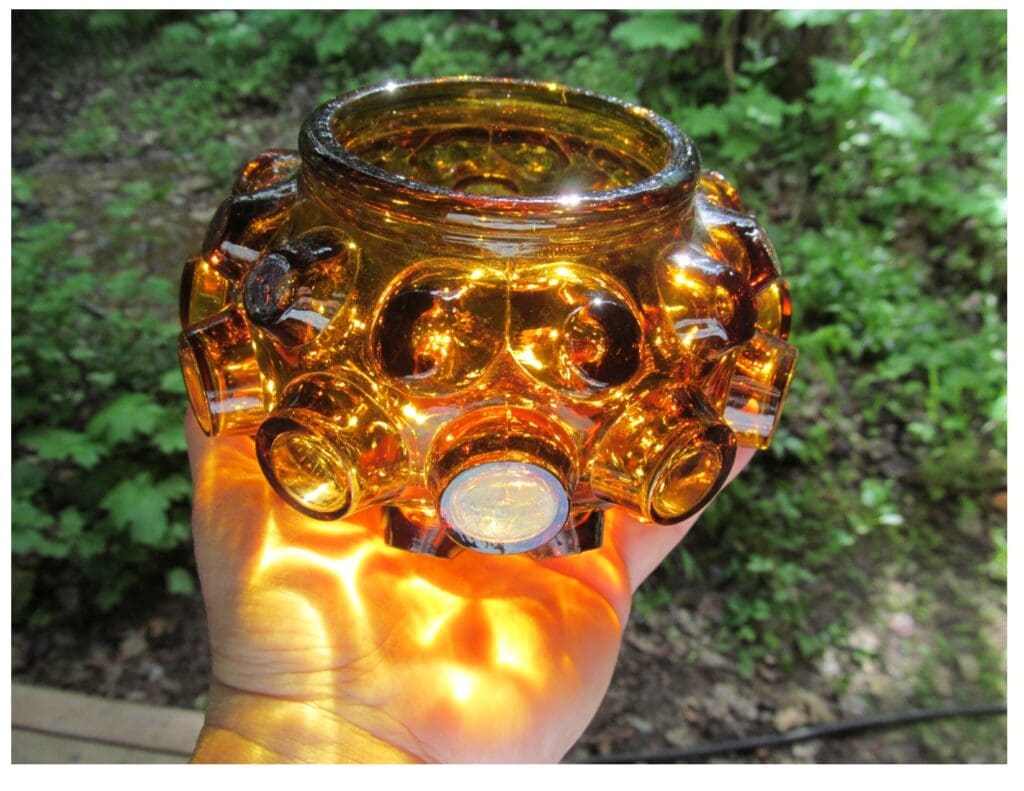
Glassware selections for garden totems
When it comes to glassware, look for colored glass or thicker, cut glass dishes that will sparkle in the sunlight. If you plan on displaying your finished totem outside, avoid glass that is thin and fragile. (wine glasses etc.)
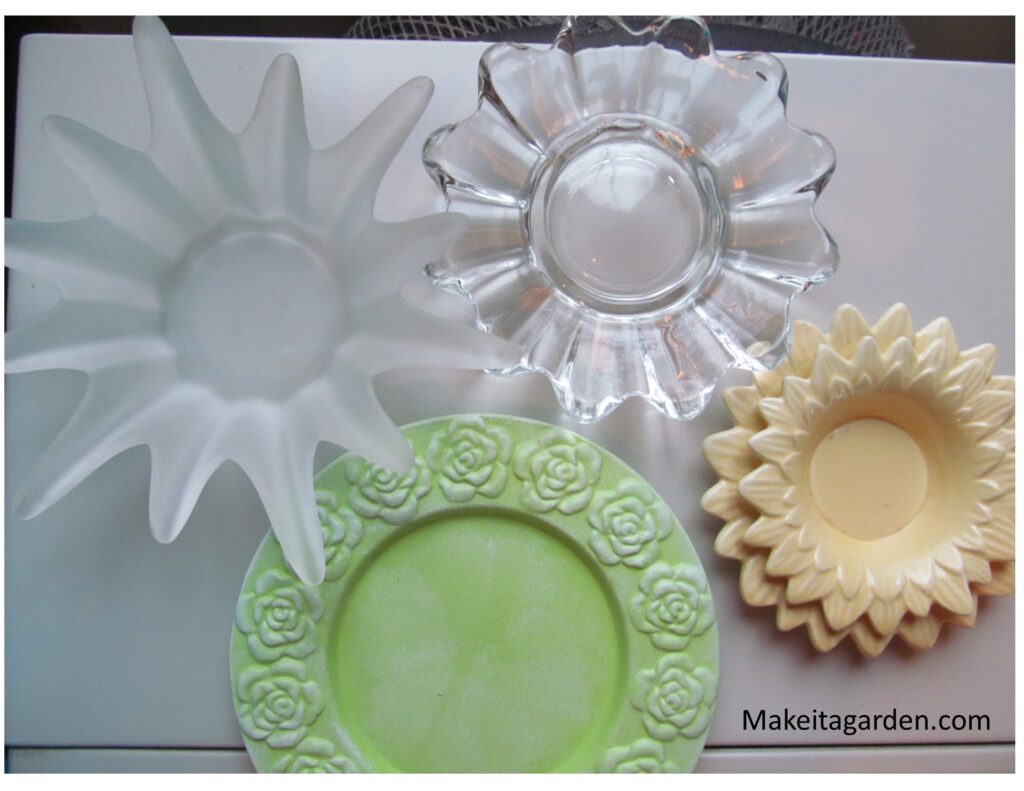
Candle ware
Always browse through the candle decor. There, you’ll find ornamental pillars, plates and votive candles holders ideal for garden totems. Household decor is frequently made with seasonal themes: a sun, piece of fruit, a flower, etc.
Vases and accent pieces
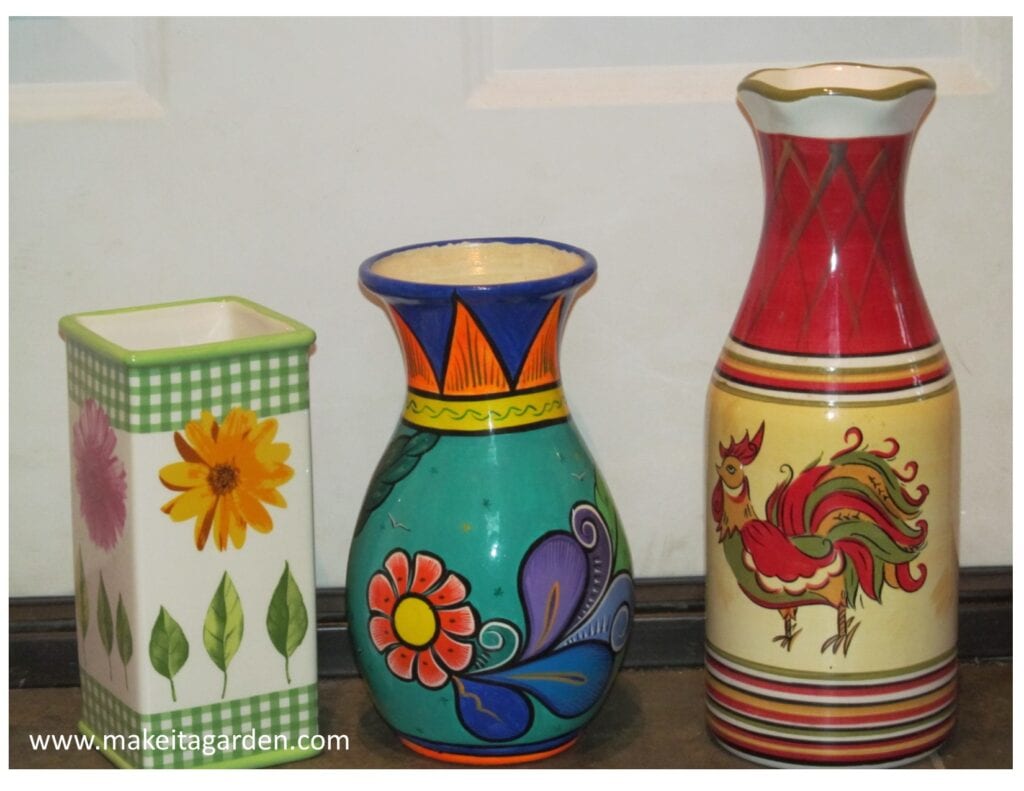
Brightly colored or patterned vases add a lot of artistic flair to garden totems as they already have an element of artistry to them.
YOUR TURN: Look at the vases below. Can you get a sense of the different styles and “themes” conveyed by each one? What about their shape?
TIP: Give your totem an extra bit of security. If using a vase for the base of your sculpture, fill it part way up with sand (use DRY sand). A little extra weight on the bottom provides stability so it’s less likely to get knocked over by a cat or dog (or your neighbors cat or dog).
Be sure to pick up a few accent pieces, too! Keep an eye out for little ceramic or resin figurines that are garden related such as a bird, a frog, a butterfly or a fairy. These are wonderful to enhance a “theme” or provide a charming, eye-catching topper (like the star or angel on a Christmas tree)
Themes for your garden totems
Keep these ideas in mind as you shop for materials.
- A “theme” should always be whatever YOU like.
- ONE main, attention-grabbing feature
- 2-3 main colors
A “theme” really gives garden totems a wonderful personality. There’s really nothing more to it than simply grouping things together with a common denominator such as color or style. It incorporates “emotion” or “mood” such as Playful, Regal, or Comical. Formal or informal.
If you’ve ever decorated a child’s bedroom, you already know about themes: “Care Bears”, superheroes, jungle, Disney etc. Interior decorating revolves around a “theme”: Farmhouse, French-country, mid-century modern. Because of that, dishware and home decor reflect popular decorating schemes.
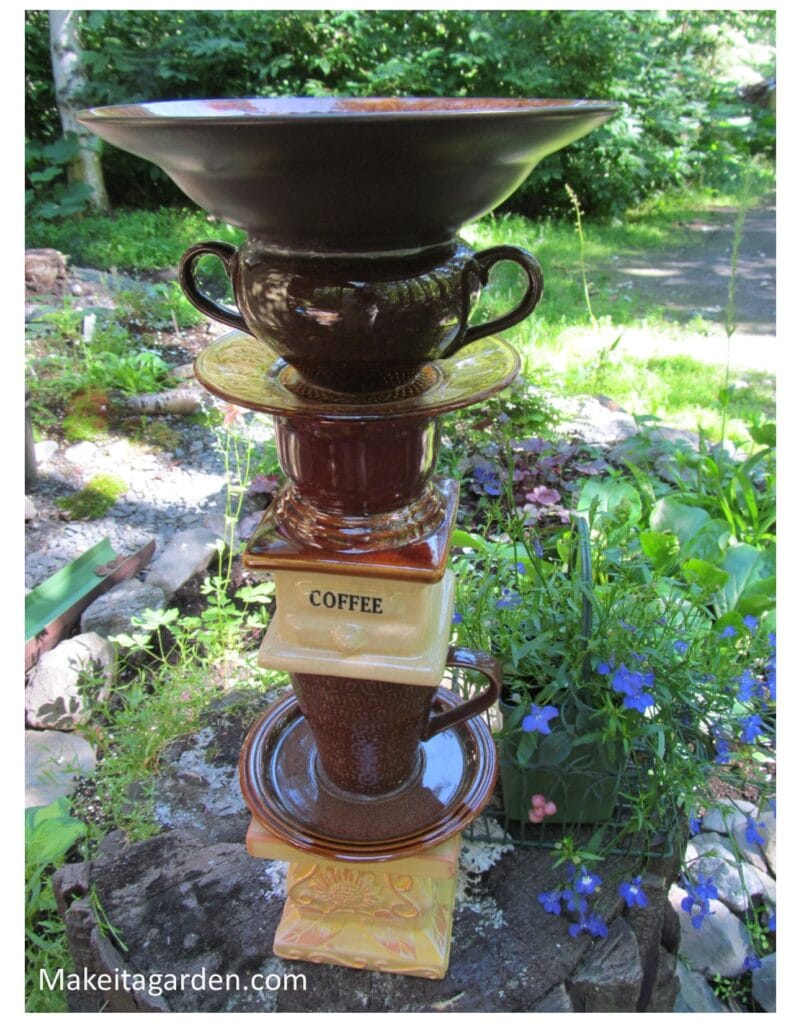
Here’s a fun, coffee-themed birdbath totem I made a few years ago. The “coffee grinder” (left) was a small floral vase. The genuine Starbucks collector mug (right) with coffee beans depicted on it, was the ultimate find!
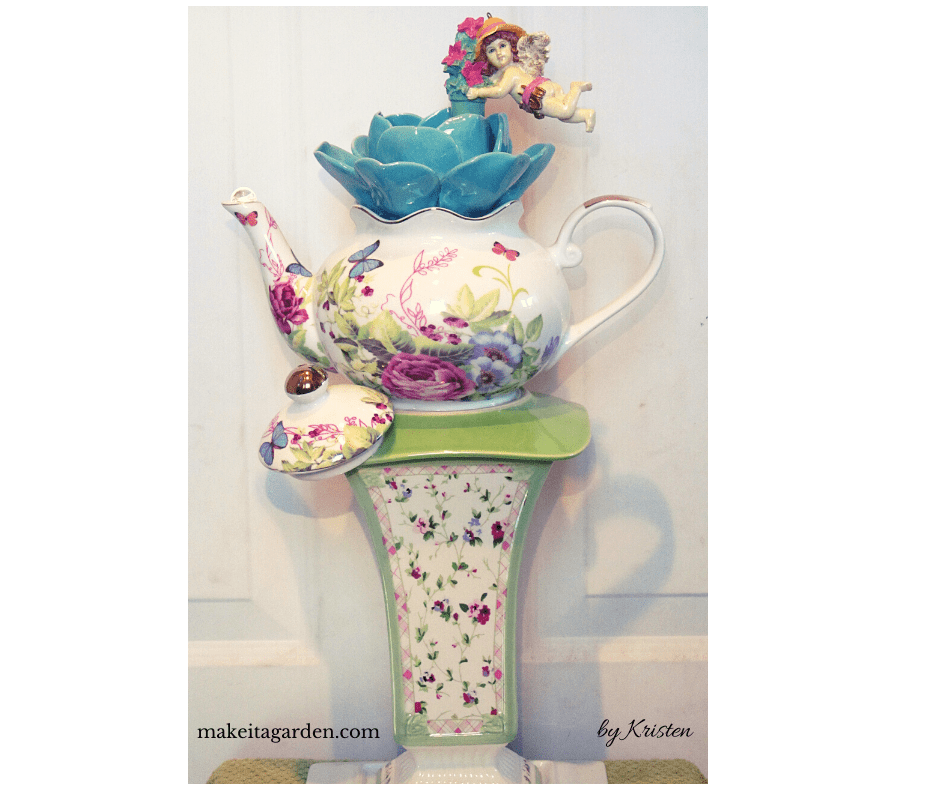
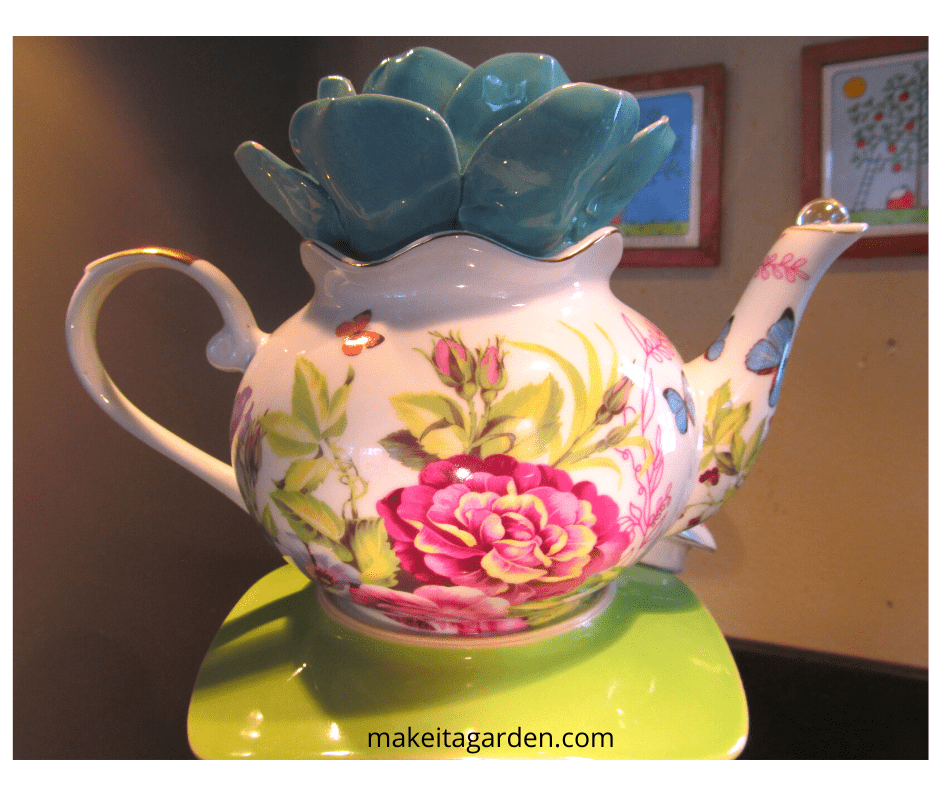
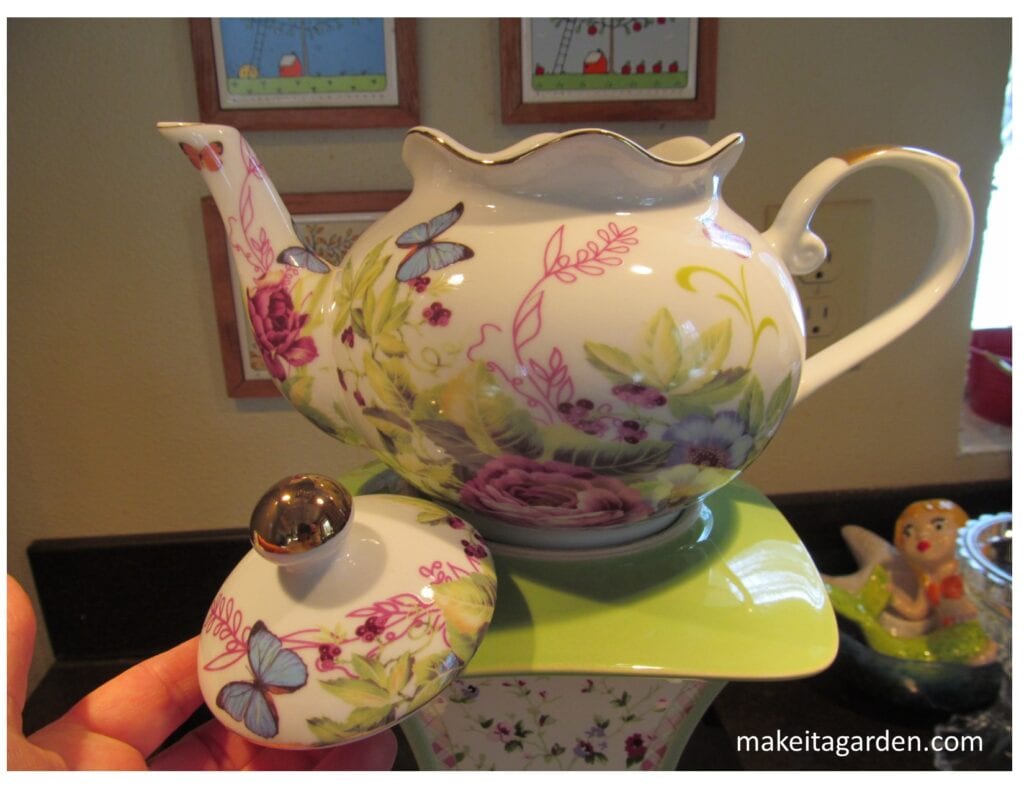
Your totem should have at least ONE main, attention-grabbing feature. This will define your “theme”. In the case of my garden totem featured here, it’s the curvy teapot with bright flowers.
Collect dishware/house ware items in 2-3 primary colors. This is where you’ll mix and match colors and patterns. Then, start combining those building blocks, swapping them around to see what works with your theme; whether it’s western or beach (or whatever captures your fancy). Top it off by adding embellishments: a figurine, jewelry piece, hand-painted design, buttons etc.
Balance: the art of stacking your pieces
NOTE: Totems DO NOT have to be tall. Most of mine average about 15″ to 18″ inches tall.
Balance doesn’t only mean fitting pieces together for weight distribution. From an artistic perspective, “balance” also refers to the scale of the artwork, or it’s “line”. Sometimes it’s referred to as “harmony”. So, get your main pieces together, and begin experimenting with different configurations, both for fit and appearance. Try using things both right-side up and upside down. It may produce a surprising effect.
Here’s a short video I made that demonstrates this process:
Once I have all my pieces together, I re-arrange them dozens of times with different variations to see which I like best. I ask myself questions like…does this dish look better in the middle, on top of another piece or below it? Which arrangement has a better ‘harmonic’ balance? I try all kinds of things because…ya never know!
TIP: Use your camera to snap photos. Then you can scroll back thru the various combinations you’ve tried and compare them. If it will be a few days before you can work on gluing it together, a photo reminds you of how you had it assembled.
Working with un-even surfaces
Ideally, you want dish combinations that provide the best surface to surface contact for gluing. The most common thing you’ll encounter is wonky glass or ceramics!
It’s the nature of the beast…glass and ceramic dishware is notorious for its imperfections. Surfaces are NOT level. But that doesn’t mean you shouldn’t use that item. Most of the time, it’s so minor that it doesn’t even show in the finished artwork. There are solutions, but sometimes the attempt to correct it isn’t worth the time and effort.
Some things I’ve tried to compensate for uneven surfaces:
1: “Spacers”. Something small or thin (glass or ceramic) placed underneath a surface to ‘shore it up’. (be sure to glue it in place) This way, it’s level for applying glue and sealing.
2: Level a piece applying extra layers of silicone adhesive. Let dry in between adding layers
Glue techniques for garden totems
Hands down, the best glue/adhesive to use for outside garden art is 100% silicone-clear, for Exterior. Because I want to jump right into TIPS & TRICKS, I’m skipping the ‘which and whys’ of glue. However, if you’d like more insight into what makes silicone and E-6000 superb glues for garden art, here’s a link to my article on the subject: 2 Best Glues for Garden Art
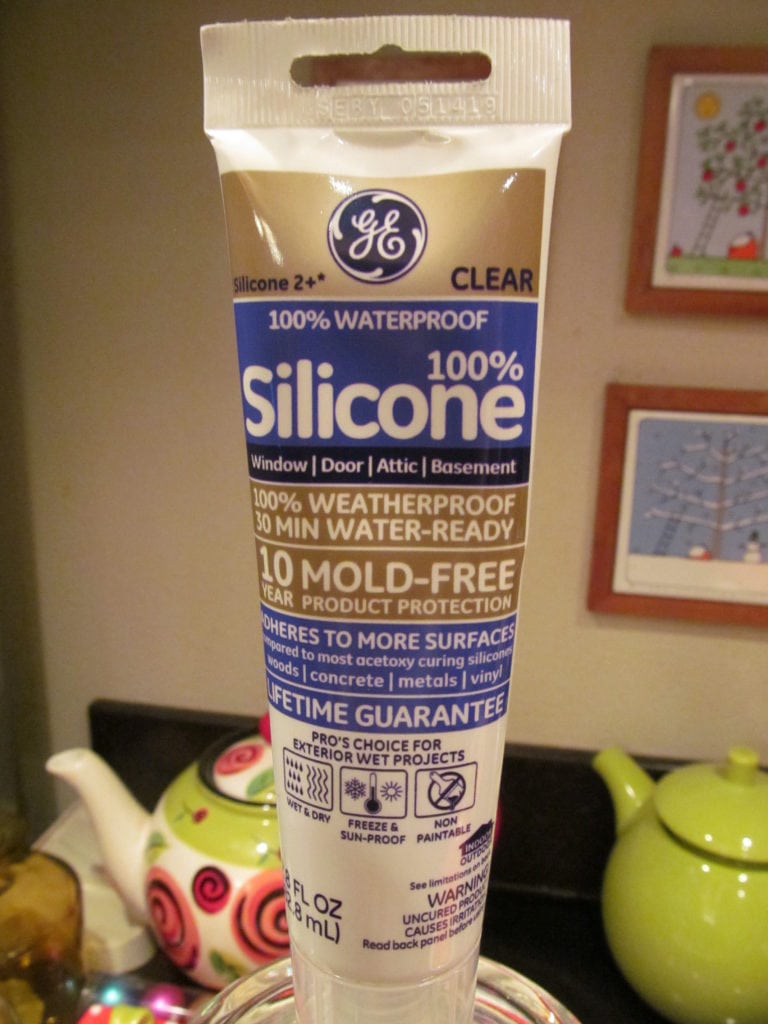
The nice thing about silicone is that it doesn’t have a strong odor. The bead is thick and not runny which makes application a breeze.
According to the package, it can withstand temperatures from minus -60 to +400 degrees. That’s good news if you live somewhere with hot summers!
NOTE: Even though it says “clear” on the package, silicone is not perfectly clear. It has kind of a cloudy, milky tone. Some people actually get upset because the product was not as “clear” as they expected it to be. But that’s as “clear” as silicone gets. Besides, it’s not all that obvious to the finished product. If you want something practically invisible E-6000 is completely clear. That makes it ideal for glass. It can also withstand higher temperatures, but not as high as silicone.
Centering
Off-centered artworks are more of a problem than wonky glass. And it gets me every time. It happens when I get lazy (or proud) and attempt to ‘eye ball’ it, and the next day, I’ll notice the error. Doggone it!
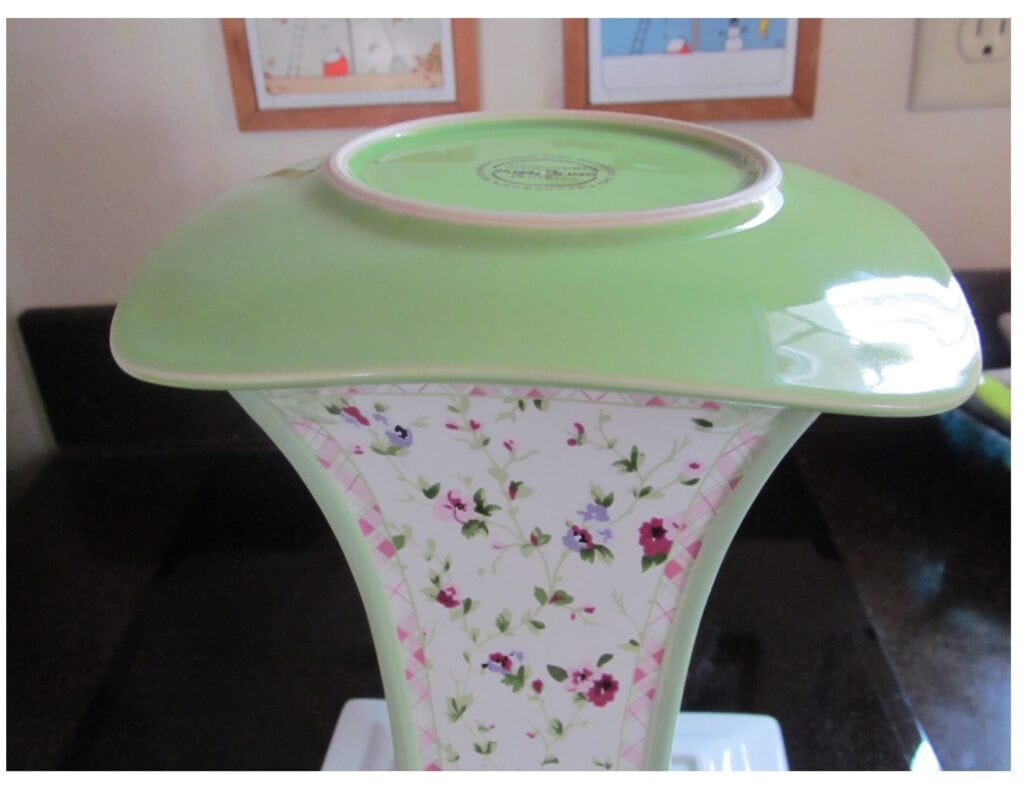
TIP: Turn it upside down! In this position, it’s easier to center the plate on the vase than when it’s right-side up. It’s also MUCH easier to apply the silicone and smooth out the bead with your fingertip.
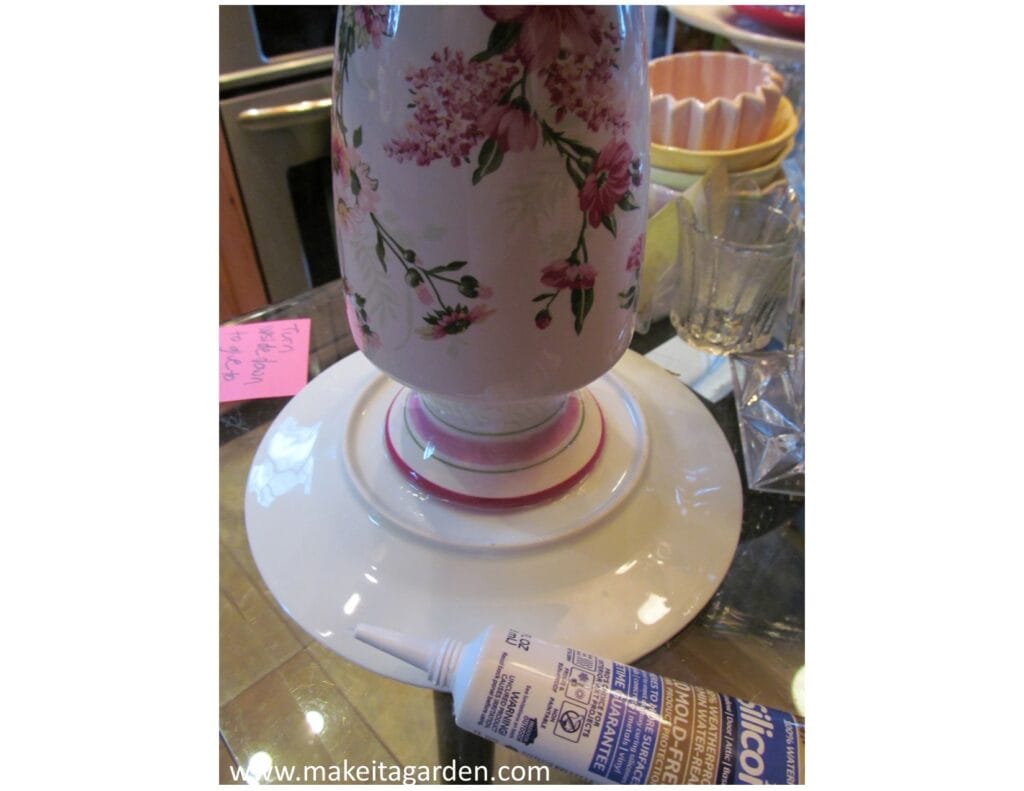
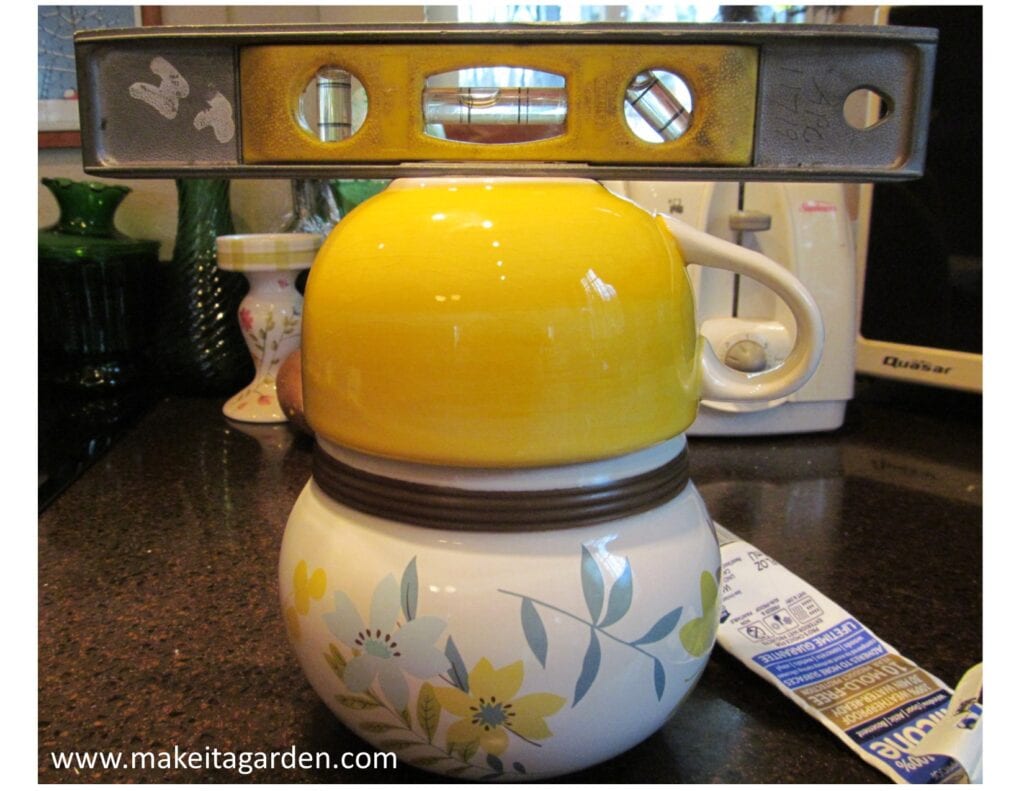
Pieces also have a tendency to slip and slide out of place once glue is applied. This is where a small level comes in handy.
YOUR TURN: Can you tell from the picture how the cup is a bit crooked over the pot beneath it?
Good gluing practices
Place a bead of silicone along every edge that will contact the surface of whatever piece you’re gluing it to. When connected to another dish, it will squish out the sides. This is GOOD! Next, use your finger to smooth the bead out between the two surfaces and remove excess. If you prefer, use a rag or gloves.
SEE 2nd Demonstration on video for Totem Glue Techniques
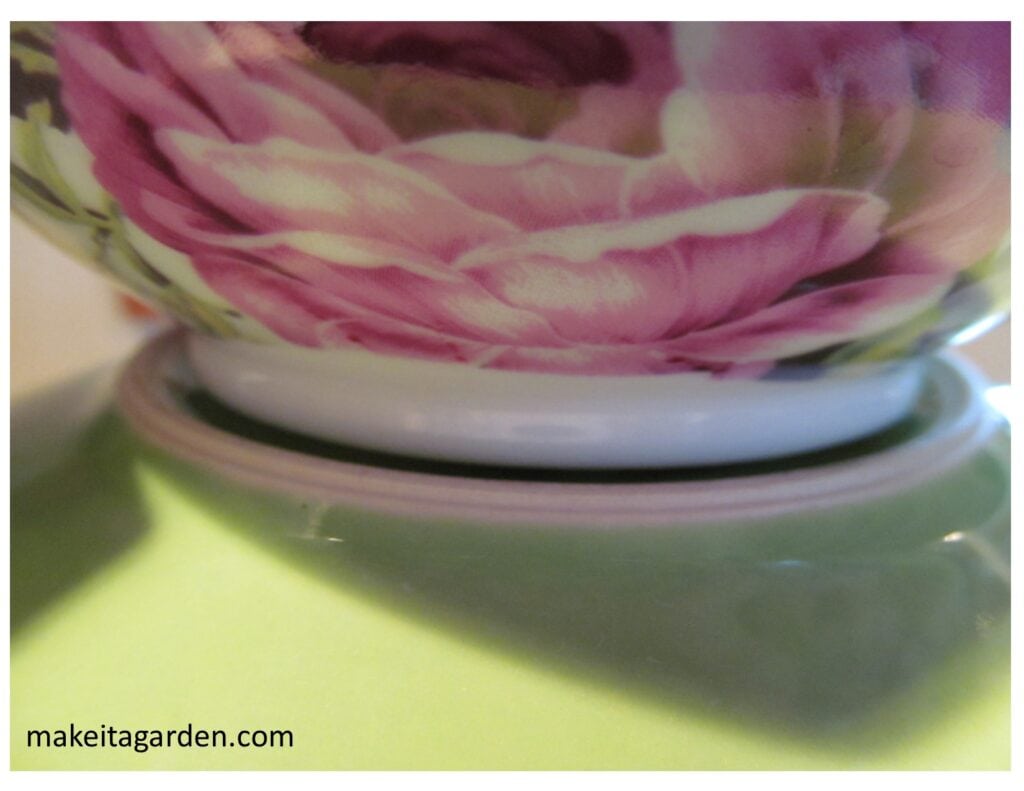
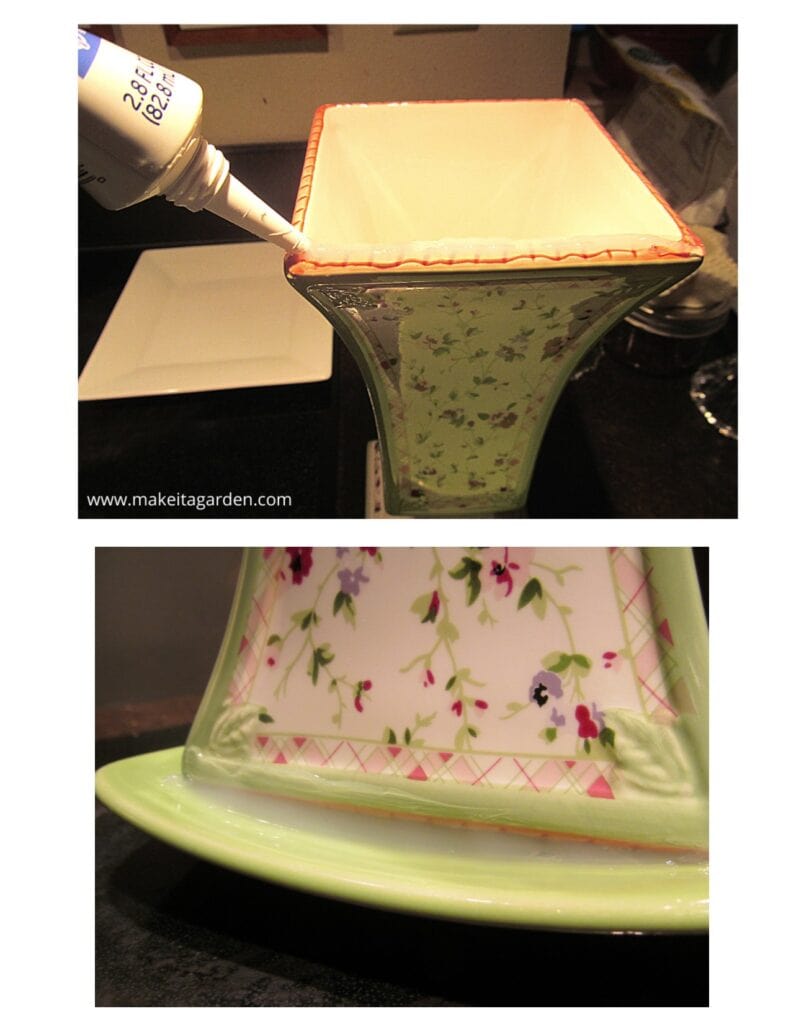
SEALING GAPS: Here again (SEE above), I turned the vase upside down when gluing the green saucer. The saucer is curved, leaving a gap between the edge of the vase and the saucer. Such openings allow water, bugs and debris to get down inside the artwork where it can’t easily be cleaned out.
For that reason, I like to seal small openings and gaps. Notice above how I smoothed the bead of silicone for a professional finish. When turned right-side up, the glue won’t even show.
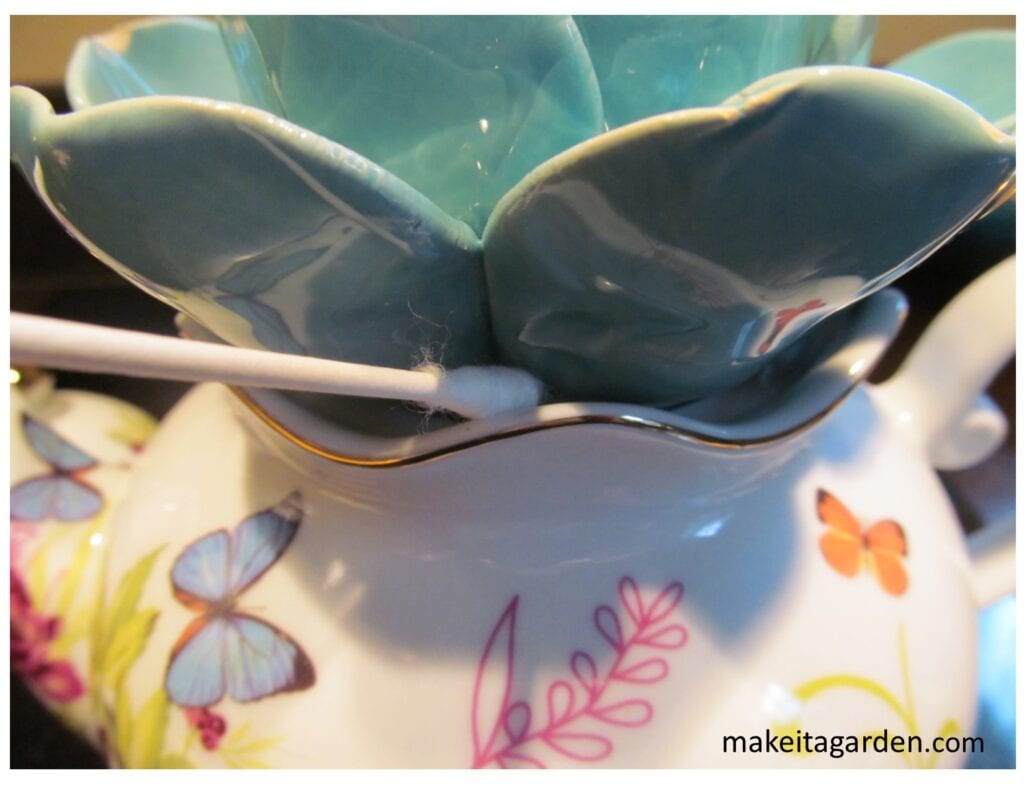
Here, again, (SEE below) I wanted to smooth the bead of silicone between the flower and the teapot. Since I was unable to reach with my finger, the Q-tip comes in handy. You could also use a small disposable paintbrush, which does a better job of spreading and smoothing the glue, but I didn’t have one at the time.
Glue pieces together one by one. Always give glue the proper time to set up. Don’t be in a rush to finish something. I speak from experience. More than once when I got in a hurry, I tried to add more pieces too quickly. Then, of course, something would get bumped, or slip or slide out of place. It’s harder to fix once the glue has started to set up, though not impossible. It can be re-positioned IF you notice it right away.
TIP FOR TEAPOTS: use silicone to seal over the spout. This keeps water and insects out. You can also glue a glass bead over the spout, which looks cute!
Fun Accents for Garden Totems
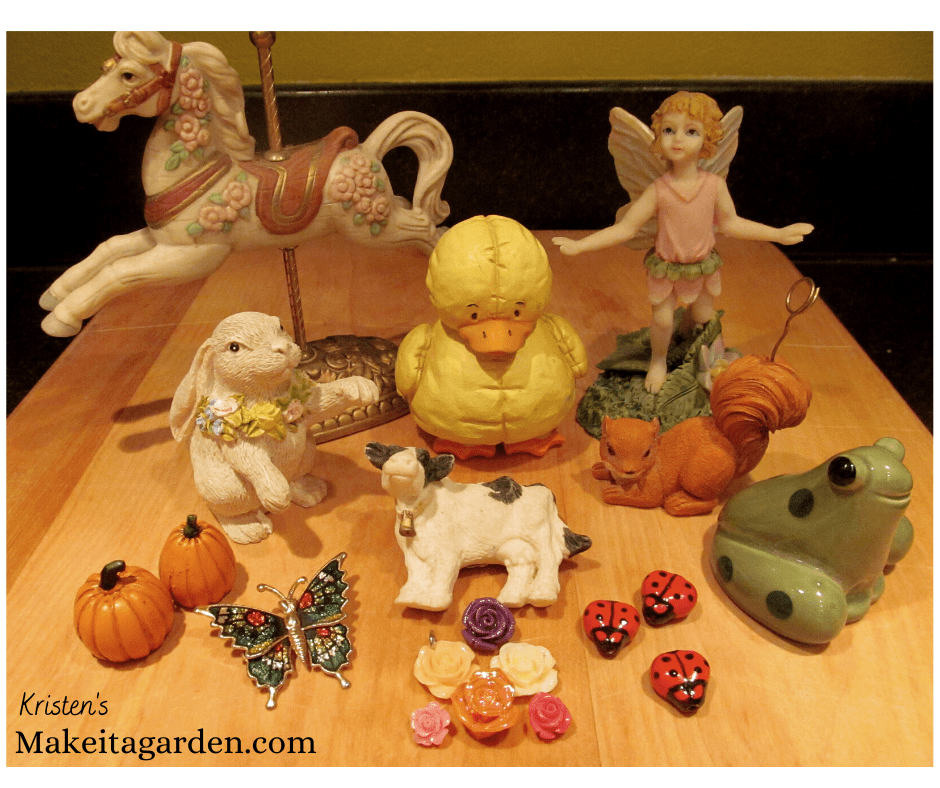
Embellishments add a touch of whimsy to garden totems. They’re like the cherry on top of an ice cream cone. Always use items that will hold up in outside conditions (unless your totem will be displayed indoors) And select items according to your theme: glass beads, sea shells, jewelry pieces, ceramic or resin figurines, buttons, birds, lady bugs, butterflies, fairies, fish, owl, cowboy boot…there’s no limit to your imagination!
You can also paint on a solid colored dish to give it a more whimsical look. Something as basic as polka dots–using a dauber–gives fun character to a plain vessel. You might also try experimenting with stencils. Always use an enamel/high gloss craft paint such as Folk Art brand. Why? Because enamel dries super hard and will not fade or wash off in the rain.
Motion & Movement in Sculpture
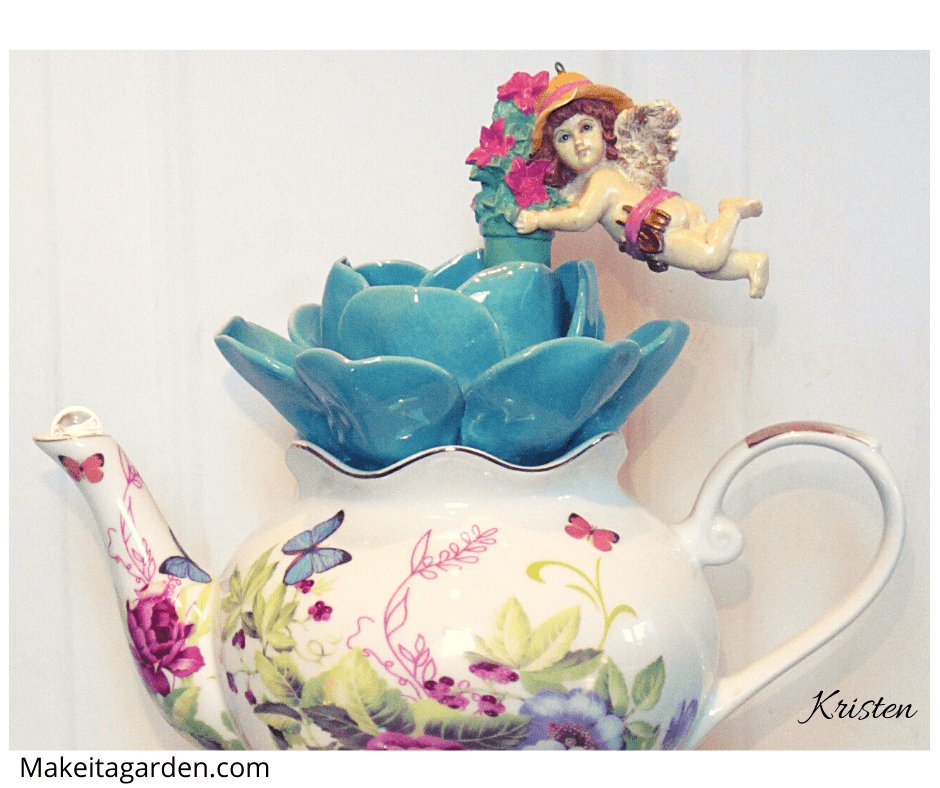
The gravity-defying teapot lid and the flying fairy added unexpected motion and movement to my totem sculpture. When I made this artwork, I had no idea what to do with the lid, and it was so pretty with the butterfly on it. It was just one of those “eureka” moments. I let it dangle precariously off the saucer as if held there by magic!
Motion and movement is impossible to plan in advance. In my experience, it’s simply part of the artistic process. It’s usually that ‘out-of-the-blue’ inspiration that comes along as you work on your piece. For instance, I always try to use the lid someplace on a teapot totem; often gluing it on top of the handle. In this particular case, I have the fairy by the handle and anything else would compete with her. So, I stuck it on the edge of the plate.
I really wrestled with how to position the fairy, too, or whether to use her at all! The figurine totally changes the personality of the sculpture and adds to the light-heartedness of its mood. At first, I placed the fairy smack-dab in the middle of the flower. And it looked fine. We tend to line everything up. However, you should always move things around just to see how they look in other positions. Sometime turning one piece at an angle yields a surprising result.
With the fairy in the middle, her knee rested on a petal. When I slid her over so the flower pot was on the far right, it made her appear suspended in mid-air! The result achieves a sense of motion: a flying fairy. To me, that just made the whole piece purely enchanting!
Extra tid-bits (editor approved!)
Before you start gluing your totem materials together, hand wash in hot soapy water to remove grease and grime. Dry with 100% cotton towel. Wiping glass down with isopropyl (rubbing) alcohol gives it a nice, bright sparkle.
Kristen’s pet peeve: Remove price tags, even on the bottom. Someone will see it and you don’t want that ugly thrift store or garage sale price tag on it that says $2.98.
Pay special attention to any candle ware items. They may have wax on the surface that your eye doesn’t see. So feel for wax residue. Soak in hot water to remove the wax. The presence of wax deters from the beauty of your sculpture and may prevent the glue from adhering well to the surface.
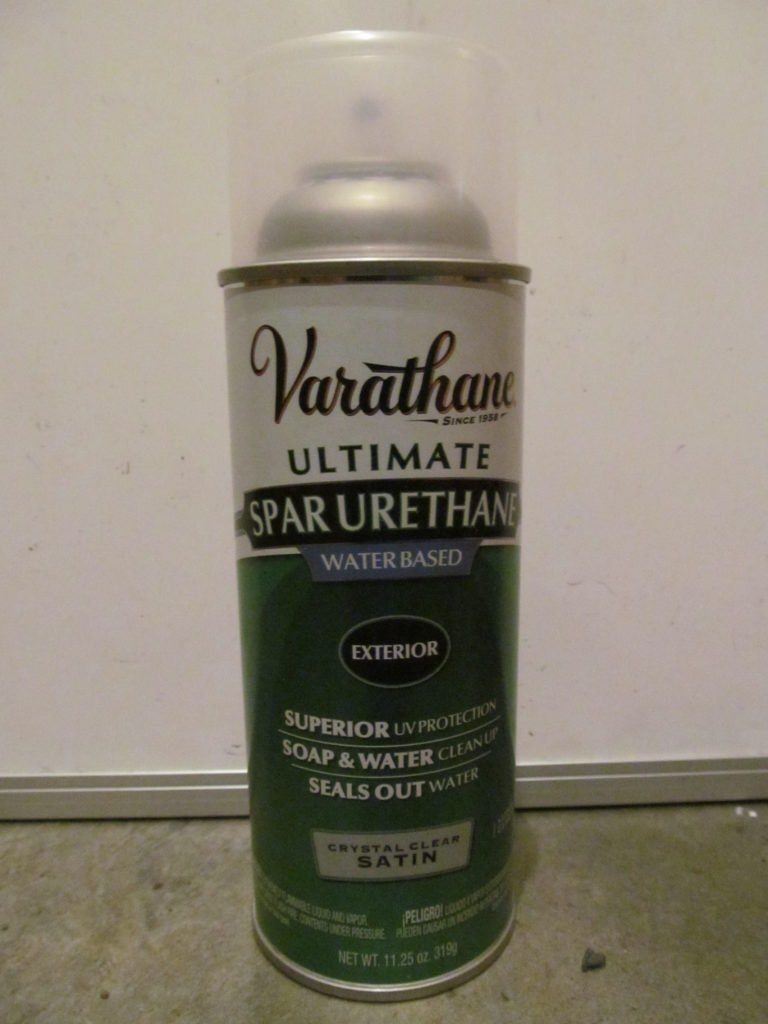
Spar Urethane prevents resin accent pieces from fading when your garden totems are out basking in the sun. If you are using resin accent pieces, as I did in this totem, spray them with three (3) coats of this product to prevent color fading. Your totem will look nicer, longer.
Final encouragements
I didn’t have an eye for art when I started making my garden totems and dish flowers. Like anything, it takes practice. But it sure is a lot of fun to create! And unlike other art forms, this is fairly inexpensive.
Remember, there are no rules what-so-ever. So, I really want to encourage you, if you’ve tried in the past, don’t give up! I want you to love what you make for your garden, and maybe make something to bless someone else’s garden, too!
One request? Please let me know if this was helpful in the comments below. Was it too long? Too much detail? Or just right? Is there anything I should have covered and didn’t?
Finally, I’m always happy to respond to your questions so drop me a line where it says “Get in Touch”. (under the search bar)
Thanks for dropping by and happy crafting!

My favorite garden art tutorials
Gotta love those whimsical Dish Flowers
The form you have selected does not exist.
I like this article a lot, Kris! Just the right length. I agree that placing some of the items off-center is attractive to the eye and very pleasing. Good job!
Thank you for taking the time to comment. It’s very helpful to me.
I’ve been reading your articles. Thank you so much for all the Great advice!!! I started my birdbath obsession last summer, but so discouraged when glue became a problem! I gave up, but kept all the dishes, bowls, vases . . . Now I’m motivated to try again with Silicone!!!
Thank you!!
Thank you so kindly! One of my goals is to help others make the garden art they love with the right techniques and materials. There are several glues on the market made for glass…it’s just that they are not made for outside. I’ve learned a lot myself over the years. Have fun and let me know how it goes. I think you’ll love working with silicone. Drop me a line if you have any questions. – Kristen
Love your garden art! Thanks so much for the tutorial, it’s appreciated.
Oh, thanks so much! I appreciate that. I really labor over these tutorials to make them the best I can. ~ Kristen
I learned a lot from your tutorials. Thanks for sharing your knowledge.
Thanks so very much for the feedback. I always hope they are helpful…so it’s especially nice to hear back from the reader. ~Kristen
Thank you so much for all of your tried and true suggestions!
You’re very welcome! Thanks for the feedback. It’s the best way to know if my posts have been helpful! ~ Kristen
Thanks so much, this was very helpful and inspiring. I have been wanting to make these and have been gathering dishes, but wasn’t sure on how to attach them to posts, thanks for your experienced advice!
One question…do you think just glueing the dishes from Dollar General(that hard plastic kind) would be good enough vs. drilling to the post? Since it isn’t near as heavy as glass or ceramic…maybe use the flattened spoon idea?
If you are using hard plastic for your materials, gluing them ought to work just fine. ~ Kristen
Really enjoyed reading your tutorial. Have never tried this but would like to. Will have to be looking for things to use. You do a good job of explaining things. Thank you.
Thank you so much for your kind remarks. It’s VERY important to me to explain things well; to be clear and easy to understand. Harder than you think! I know what I’m TRYING to say…glad it’s working on the reader end! ~Kristen
Thanks so much for your very informative article. I’ve been having fun collecting h to he dishes. Now I get to start putting them together.
Thank you so much, Kristen, for all your information and helpful advice! Your articles and pictures have inspired me and I have now created several pieces for my garden following your tips, especially regarding the types of glue to use. Now I just have to convince my wonderful hubby that I need a bigger garden to house all my new creations! 🙂
Aw…thank you so much! It’s so inspiring to me that my tutorials are helpful. It’s what Make it a Garden is all about, and “helpful” was the #1 thing I envisioned the blog to be when I first started it. Because I had to learn once, too! That’s why I include all the little tips and details that were helpful to me and the kinds of questions I had when I was just beginning. I want making garden art to be a fun and satisfying experience!
Greetings Kris!! So happy to have not only found your beginning blogs but also to find you still here passing on such great info. You should write instruction manuals for appliances or the “some assembly required” items we all find outselves attempting to put together 😄. Thanks for sharing your hard earned knowledge with all of us in such an understandable manner!
oh, wow. Am speechless. Best compliment anyone could give! Thank you. I always HOPE my tutorials are easy to understand and follow. I hesitate between providing too much detail for those who already kind of know what they are doing, and at the same time, remembering those who are brand new to a craft—particularly one that isn’t the easiest. Extra tips seem to help. I think back to the time I was first learning, and what kinds of details and tips from others were most useful to me. Thanks for visiting my site and hope your projects are fun and turn out beautiful!
Thank you for sharing these creative ideas for elevating garden totems! I’m intrigued by the various designs and materials that can be used. When selecting materials for garden totems, are there any specific considerations to keep in mind to ensure they withstand different weather conditions and continue to look vibrant throughout the seasons
Thanks for the feedback and good question! Totems displayed outside should be of materials that are durable out in the weather. That would include most ceramics and thick, sturdy glass. These are products that are sealed so they won’t fade. Most dishware is generally oven proof and microwave and dishwasher safe, similar to weather conditions. Occasionally, you might find a pottery piece that is not sealed. So if you wanted to use it for an outdoor totem, you could apply a couple coats of a good ceramic sealer. If you plan to use something that is made of resin (like a figurine), it definitely needs to be sealed with a product that is anti-fade…because resin fades easily in the sun. I have used Spar Urethane–for exterior– or any product that prevents wood from fading.
Wow! Thank you so much for this thorough walk thru on how to create garden totems! Reading this was like being on a walk with a friend! You covered every possible question I’ve wondered on making these, complete with glued, paints, embellishments, and things to be aware of before it spoils our creations!
Thank you so kindly…I truly value your input. You see, it’s real dilemma between brief and-to-the-point or getting bogged down in too much detail. Some readers do better with bullet points and others like yourself appreciate the details. I’m a detail person myself with thoughts towards someone who is just beginning or that person who has found making garden art a delight and now wants to improve. So I try to cover all the basis and include lots of helpful tips that someone maybe hasn’t tried before that would yield better results. I’ve learned sooo much just by doing this over the years, and enjoy helping others make pretty things.
Just delightful and inspiring. You also are very positive and encouraging for us to give it a try. Great tips.
I love rusty metal – but also use many other materials to add my personal stamp on my hidden garden. 🤓
Plan to ponder what items in my collection would make an interesting totem. Many thanks for sharing!!!
Kris,
This is JUST the kind of help/information I’ve been looking for to make some garden decor! I’m excited to try this and with your suggestions and tutorials, I think I will be successful! Thanks so much for sharing and here’s to good crafting!
Becky
my pleasure!
Kudos to you for sharing your tips, tricks and products used. Many crafters won’t do that. Especially ones who sell their work. At first I was leery too, as I thought it was a disadvantage for my business. I took a step back and thought why wouldn’t I share. I want everyone to have the feeling I do when I create something special. There’s so many materials, ideas, products and vendors out there we should all share. I had to close my business personal reasons, but one day after I retire, I hope to reopen. I had done some research, but you have made a wonderful comprehensive guide and I thank you for it. Your pieces are as beautiful as your heart. Bless you
Thank you for all your helpful tips.
You do beautiful work, very creative
thank you kindly…it’s a joy to create!