
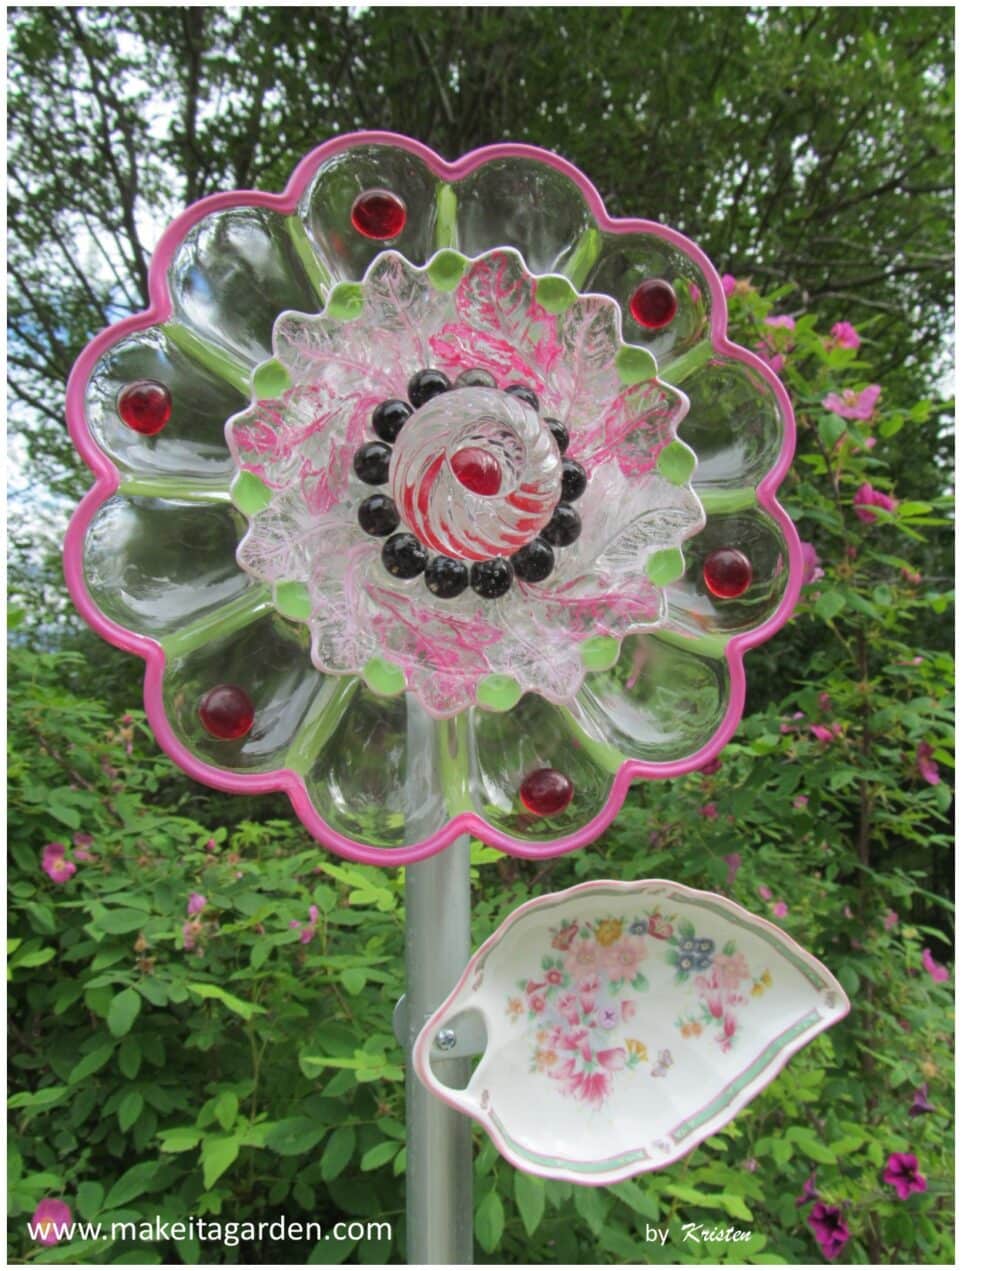

“That’s different, I love the leaf!” and, “You never see them with a leaf.” That’s how my customers react every time I make a dish flower with a leaf. It just adds to the whimsey of the piece and makes my artwork stand out.
Sometimes, people who have never seen dish flowers before wonder what they are. All they see are a bunch of dishes on a post. With the addition of a leaf, the art is immediately recognized as a flower.
Even so, I do not put a leaf on every dish flower I make. Why? Well, artistically speaking, it doesn’t always look right. Sometimes, a leaf just doesn’t enhance the piece but rather detracts from it.
Secondly, it’s not easy to find a dish that makes a suitable leaf. Although when I come across one while thrifting, I’ll snatch it right up.
What makes a great leaf?
Fortunately, the leaf motif is common in household decor; particularly for summer and fall. So start by looking for something that looks like a leaf such as leaf-shaped candle ware or small serving dishes. I find most of my dish flower materials at thrift stores.
But try other things, too. For whimsical appeal, consider a spoon, a fork, or both. Anything could be a “leaf”. Don’t limit your creativity!
Ceramic, plastic or metal are good choices for a leaf as they will hold up better in an outside environment. Avoid the ones that appear thin and fragile. If you don’t like the color or pattern, remember that most things can be spray-painted. The leaf in the photo below was originally white.

Attaching the leaf to the post
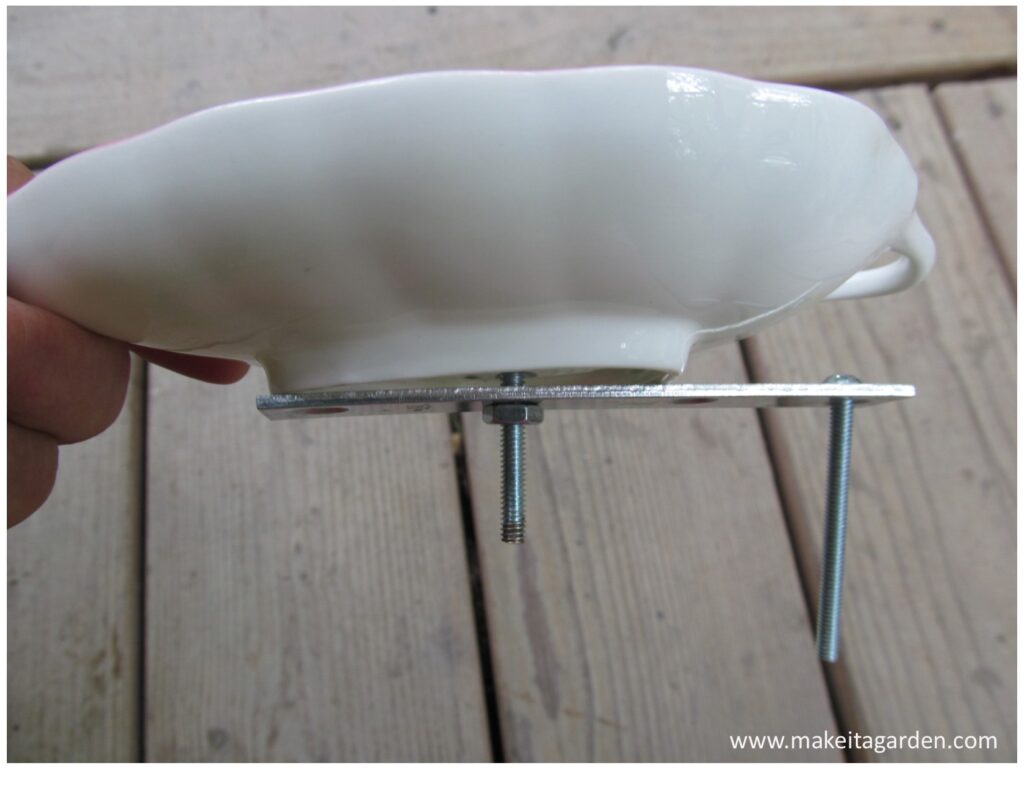
It’s a fairly straight forward process to add a leaf to your dish flower. I use a simple mending brace to attach a leaf to the post because it’s good and sturdy.


Because I make my dish flowers using the drill method, I do the same when I attach a leaf. It’s better assurance that the leaf won’t fall off if the glue fails. But if you would rather glue, use GE 100% Silicone.
How to position the leaf:
Place the flower head on the post. Hold the leaf next to the post to determine a good position for it. Mark that location with a sharpie pen. That’s where you’ll drill a hole for the leaf attachment.
This is why using a mending brace works so nicely. When the leaf/bracket unit is attached to the post with a screw, it’s there to stay!
TIP: If using a metal or aluminum fork or spoon or cooking utensil, just drill a hole thru the handle. No need to use a bracket.

Materials
- drill and circular tip drill bit (sized for #8 hole)
- 1 #8, 2-1/2″ long machine screw
- 1 #8 3/4″ to 1″ machine screw (depends on thickness of leaf)

Directions
- Measure for correct positioning of the leaf, both on the post and on the bracket, so it looks right after it’s attached to the post. Use a sharpie pen to mark your drill hole on the backside of the leaf.
IMPORTANT: Always drill in water! Place your ceramic leaf face down in any container that holds water…like a dish pan. The depth of the water should just barely cover the piece. The water cools the drill tip and prevents breakage.
2. Drill a #8 hole through the leaf.
3. Insert machine screw and attach to mending brace. Fasten the nut.
4) Drill a hole in the post to receive the leaf/bracket unit. If you’re using a 3/4″ post, you’ll need a #8, 2-1/2″ long machine screw.
5) Attach the bracket/leaf unit to the post and fasten the nut.
Professional Tip: Paint the screw head to match the dish, so it doesn’t show.

Paint the screw (center of dish) so it doesn’t show
Final Thoughts
I hope you’ll see there are great reasons to add a leaf to your dish flower that make it worth the effort. For one, a leaf is unique in this art form. If you sell your craft as I do, adding a leaf to some of your creations makes your stuff stand out. Secondly, a leaf helps your piece look like a flower so it can be readily enjoyed by everyone!
I love making dish flowers. One of the things that I like the most is that it’s not a cookie-cutter craft. Sure, lots of crafters make dish flowers, but what are the chances of any of them looking alike? Besides, people’s design and artistry vary as widely as the plates do!
Although the construction process is the same, there’s such an endless variety of dishware, colors and patterns. There’s modern and vintage dishes; glass and ceramic. Endless possibilities of combinations that keep the creativity flowing. Besides, people’s design and artistry vary as widely as the plates do!
More garden art crafts
Straight talk about glue and garden art
Dances with Dish Flowers: a gallery
How to make a birdbath from dishes
How to make Cute Hub Cap Flowers
The form you have selected does not exist.
Very nice pieces with leaves! I can’t even tell that the yellow leaf has a screw in it. Good job painting over it!
Truthfully, that was an earlier creation that I glued with silicone. But there was a problem of it wiggling loose. At the time, I thought it may have been the zink in the mending brace that the silicone didn’t jive with. So I used a thick application of silicone and sealed all the way around the leaf where it connected to the brace and let it completely cure. But that’s why I drill my leafs now. Thanks for visiting MIAG!
Okay! Right on. So, do you still have the Sunflower one or have you sold it?
Sorry, the sunflower is sold.
Oh! Well, that’s great! I’m glad you sold it. I was just drooling over the green and gold bees!