

To be completely accurate, Silicone is not actually a “glue”, it’s a caulk. Just wanted to get that off the table. It doesn’t really matter how you think of it because 100% silicone might just be the best glue for garden art.
A professional’s perspective:
NOTE: This post is intended to provide helpful information to the reader seeking to learn which glue will work the best for their garden art project. Not a paid endorsement of the product. The author is not related to anyone associated with sales or manufacturing.
As an artist who makes and sells my own dish flowers and other garden art, I use silicone more often than other adhesives. For me, it’s more than developing a good reputation. I simply love what I make and sincerely want my customers to be able to enjoy their art piece for many years without it coming apart.
That required doing a good bit of on-line research. And over time, experience has proven that 100% silicone is the way to go. Though, perhaps even more influential are the stories about glue issues from people who love re-purposing and making their own art for the garden.
Glue for Garden Art
Without the right glue, your whimsical craft project won’t be very successful. I’ve lost count of how many times someone asks “What glue do you use?”
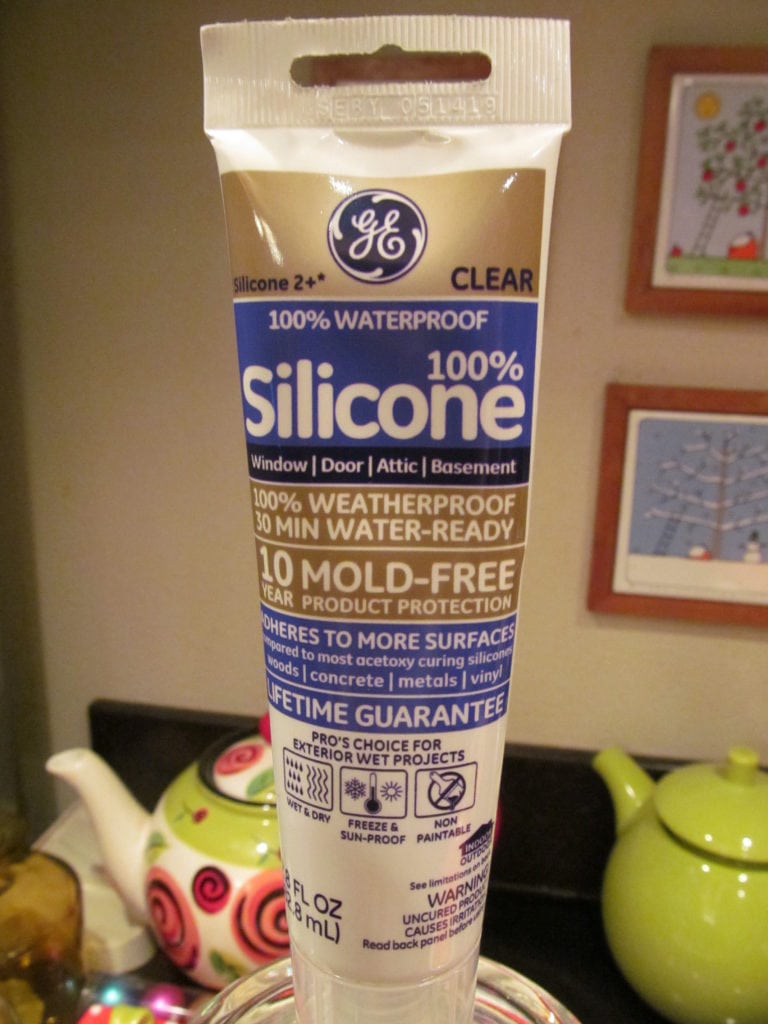
For garden art that’s going to be living outside in the weather, the glue needs to be 1) strong and 2) waterproof. But some people forget it also needs to be 3) sun-proof. 100% Silicone–rated for 400 degrees–is the best product that meets all three requirements.
Other glues/epoxies are strong-bonding. They may even have some weather resistant qualities. But in super hot climates, some glues, (even E-6000 which is another popular glue for garden art), can liquefy like melted butter after days in the blazing sun. It’s not the fault of the glue, but rather that its limitations are exceeded.
What’s good about 100% silicone?
Silicone is a sealant…a caulking product. If you’ve ever had a window installed, this is what the contractor used. Silicone’s primary purpose is to seal around the exterior of a window and fill in the gaps. Therefore, it is made to be waterproof and stick to glass. When dry, it has a rubbery look and texture. But it’s most valuable quality is that in extreme cold or extreme heat, it remains flexible.
100% silicone will not dry out and crumble apart. Nor will it become soft and mushy in hot weather. And it’s strong, too!
Silicone does for garden art, what it does for windows. And it’s especially nice to work with if you’re making crafts:
- it’s thick, so your bead stays in place
- no strong odor
- fills gaps to seal, keeps water out
- spreads easily with finger for nice professional finish
- Strong-bonding and grips items together snugly
Silicone is available at hardware stores like Lowes or Home Depot in the paint section.
A minor complaint about silicone
The only complaint some crafters have concerning silicone is that it’s not as “clear” as they would like it to be. But it’s as “clear” as silicone can possibly get, according to the manufacturer. I had the same reaction, too at first. Silicone is kind of a cloudy-clear, and it is somewhat visible when fully cured, but it’s not that noticeable. But the high qualities of silicone outweigh the color.
How to correctly apply silicone
TIP: Be sure to use the silicone for EXTERIOR. Some is made for kitchen and bath. You want the stuff that says “doors and windows.”
When it comes to making dish flowers or garden totems, your artwork benefits from the proper application of silicone.
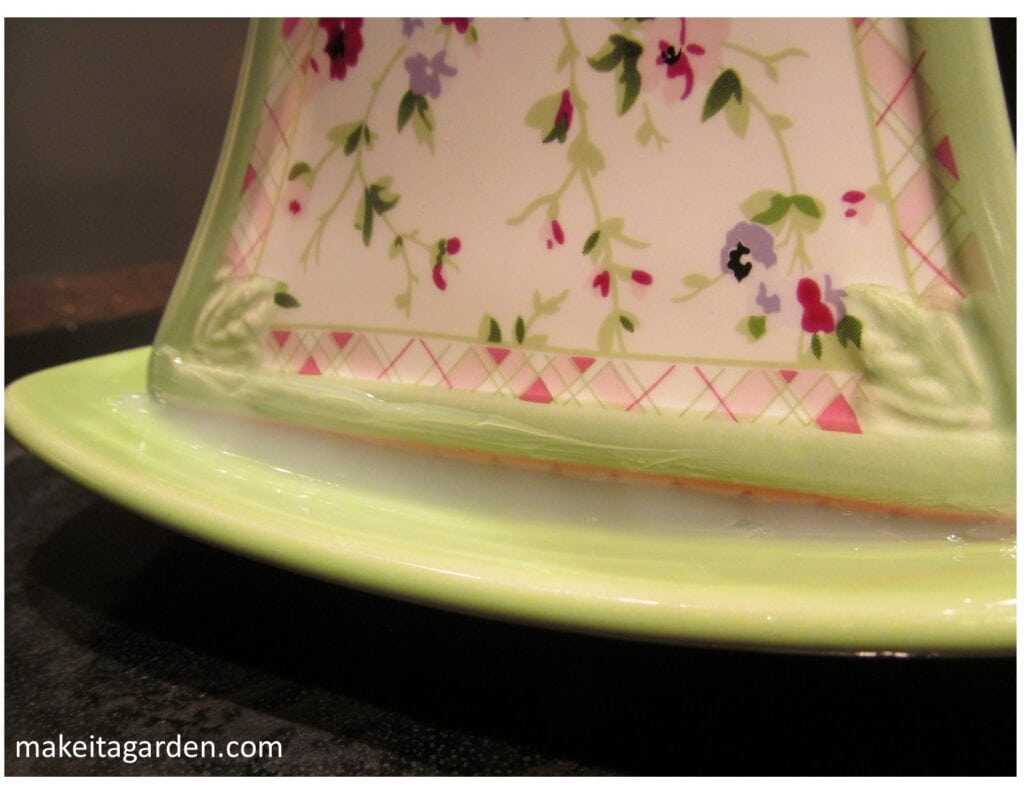
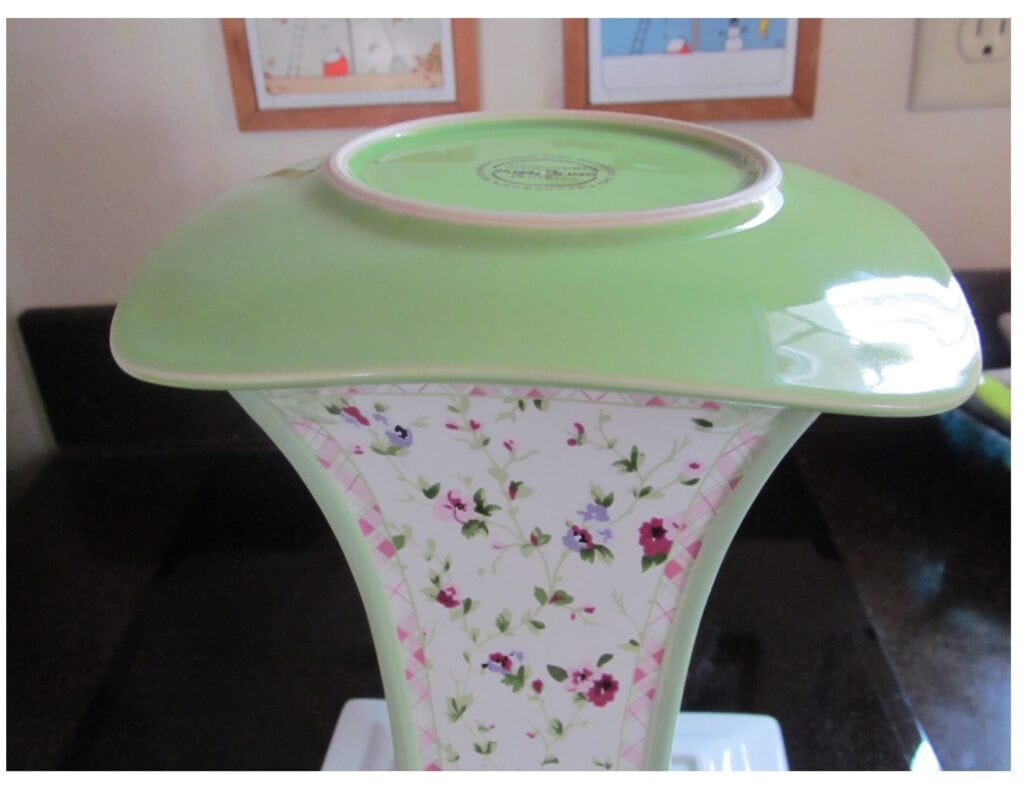
When attaching a smaller plate to a larger plate for dish flowers, apply the silicone as shown below. Place a bead all the way around the rim. This will ensure optimum surface contact.
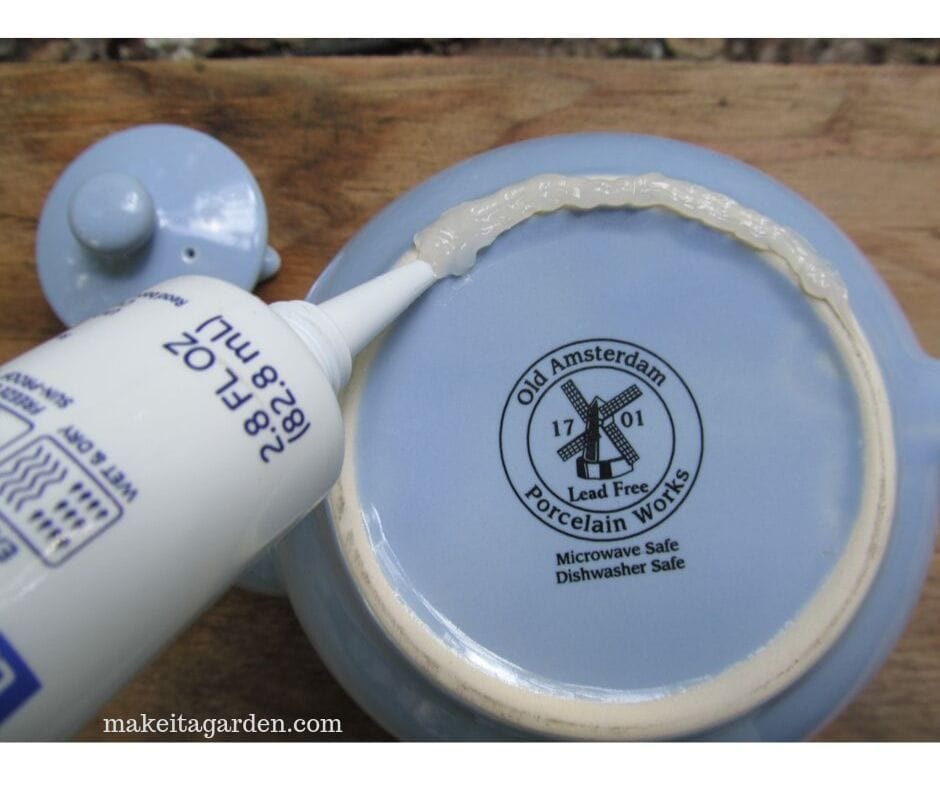
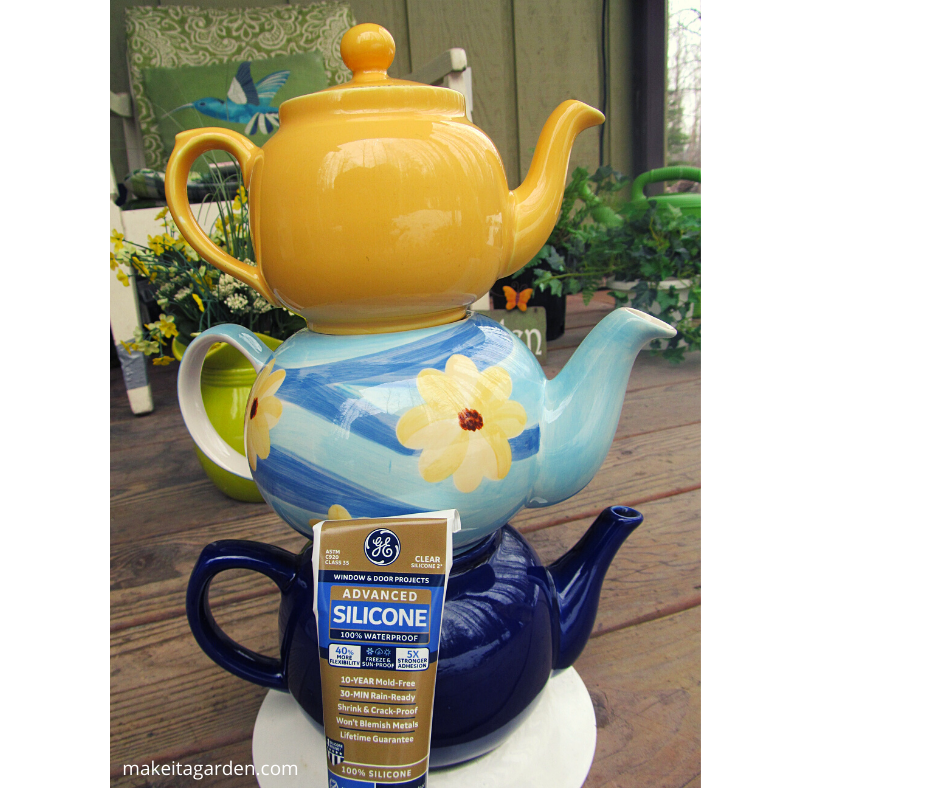
When stacking dishes for a garden totem or tower, squeeze a bead of silicone all the way around between the two surfaces. Sometimes, it’s easier and less messy to turn things upside down when applying the ‘glue’. (SEE example below). Then use your finger to smooth the bead for a nice professional look. The silicone gives tight, waterproof seal at the seam, bonding the two items together.
Key Points to remember
Silicone is not a glue, but it is used like one for making garden art. Since Silicone is made for windows and exterior weather conditions, it’s ideal for glass and ceramic crafts such as dish flowers and totems.
You can have confidence using silicone because it won’t dry out and crumble apart. Nor will it become soft and mushy in extreme heat. After all, cupcake pans and oven mitts are made from silicone. Plus, for this artist, it’s just plain nice stuff to work with; it’s thick, spreads smoothly, and has no strong odor.

If you’ve had glue issues with whatever you’ve been using previously, I hope you’ll give silicone a try. I believe it will make a huge difference. I’d love to hear your impression of this article. I value your feedback so please leave a comment below.
Kristen’s Garden Art Instructables
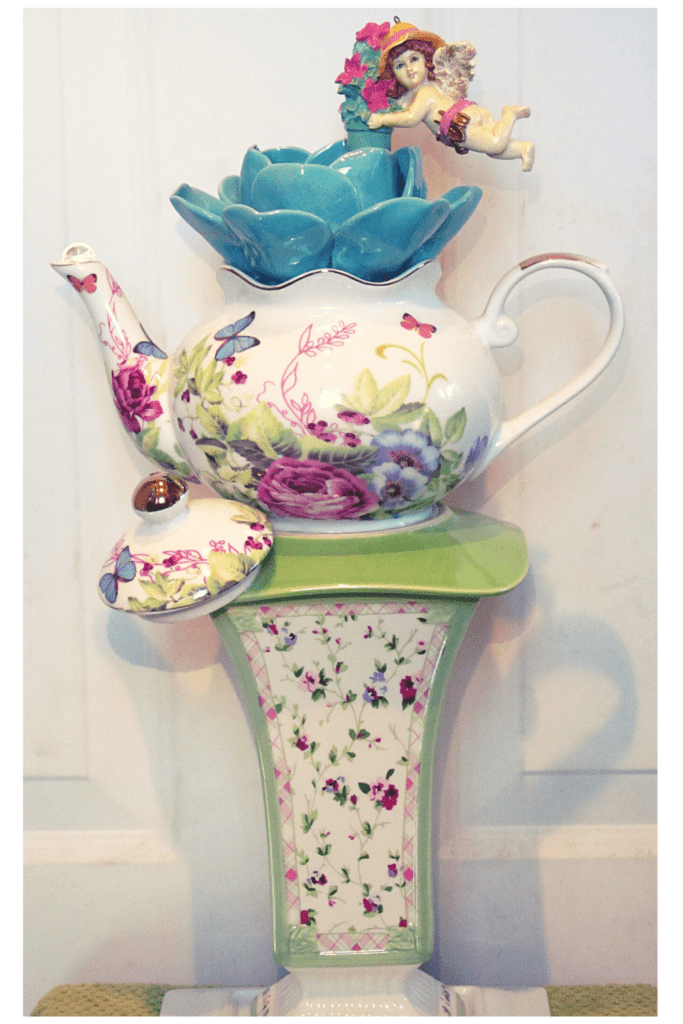
Artistic Totems: color, style and balance
The form you have selected does not exist.
Thank you for this great information. Do you have an idea of how much weight the silicone will hold? I am going to try using silicone.
I have done a few yard flower plates that have been heavy. The 6000 came apart after a year in my egress window from the hot and cold, I think. Now I drill holes when I can and secure the pieces with adhesive and a bolt & nut.
When you do the yard flowers, what do you use for a hook? I have been using a flattened spoon which doesn’t always work for heavier plates. I would like something that can be adjusted.
I would greatly appreciate your thoughts. Thank you! Rhonda
Great questions! Silicone is heat rated for 400-F. It is very strong as it is actually a caulk and not a “glue” (like E-6000). Make sure to use the “clear” for Exterior doors and windows. It dries to a rubbery consistency that remains pliable. It doesn’t dry out, crack and crumble apart in heat or cold. It’s very strong and really grips. And it is very long lasting. I’ve had flowers for years out in all kinds of weather and they’re fine! I sell my stuff, so I have to have confidence my artworks will hold up. Here’s a link to a you tube video I made to demonstrate silicone https://www.youtube.com/watch?v=Gbp2Bq4xglA&t=21s. As you know, I drill my dish flowers, so I’ve never used a spoon or anything like that. I drill the larger, back plate and insert a bolt. Then I drill a hole through a length of galvanized pipe and attach the flower head. That way, the weight of the entire piece rests on a bolt. I have no experience using any other method, so sorry I can’t advise there. Come to think of it, I have seen one person drill the spoon with a small diameter bit and the same bit to drill hole in back plate, and then hook the spoon. So then the flower head is physically attached to the spoon. That might work for you (?) Thanks for visiting the garden. I’m happy to answer further questions. ~ Kristen
What can I use to remove dried or excess silicone after the glass to glass is set?
Depends on what you are making…dish flower or garden totem? If gluing a plate onto another plate and some of the silicone squishes out the side, it may be hard to reach. A long Q-tip swab (the ones on a wood stick) might work. At least it would smooth it out. Otherwise, I just leave it as is because it doesn’t really show. If you are making a garden totem, it’s much more accessible to smooth the bead of silicone with your finger to remove excess and create a seal between two pieces. If you are gluing glass beads onto a smooth surface, just use your finger or Q-tip to smooth around the edge of the bead and collect excess. If the silicone has already dried, try using a razor blade or small pocket knife (very carefully) or kitchen tool with an edge to scrape it off. Silicone cures soft and rubbery and comes off fairly easily without too much effort. Of course, it’s always best (and easiest) to examine your piece while you’re working with the glue to smooth out/wipe the excess before it sets up. Hope this helps. If not, please feel free to contact me anytime!
Hi Kris,
When glueing multiple items together with silicone, like a totem for example, do you have to let each piece cure completely before adding the next?
Thank you🌸
No, the silicone does not need to cure completely, but it does need to set up a bit before adding the next piece so nothing slides out of place. It’s tempting to get in a hurry. On occasion, I have done that and ended up with a piece that was slightly off balance, or that was just a bit off centered because it can slide around and it’s not always readily noticeable. You can also use something as a weight to hold it more firmly while the silicone is setting up.
Hi would u by any chance say how you got to start selling?? I’d appreciate it I’m in Long Island ny
Not exactly sure what you mean by “how”? I’ll try to keep it short but here’s an article I wrote about selling: https://makeitagarden.com/how-to-sell-your-dish-flower-art-with-confidence/. I intended from the beginning to start a small craft business and then deciding what to make and sell. Since I love to garden, am interested in garden design/landscaping and saw how art impacts outdoor spaces, I decided to make dish flowers and other up-cycled/repurposed things in the whimsical genre. After that, it’s just a matter of finding out where to sell in your area. Getting a state and city business license. (check your local laws on that). Some people (not me) sell their things on-line like Etsy or EBay, or their local facebook Marketplace. Since there are not very many craft shows in my area in summer, I also sell my garden art on consignment at local shops. You don’t get full price, as you split with the store, but I also don’t have to pay for a booth and hope for nice weather. In the store, more people will see my art with the idea of more exposure. Hope that answers your question. Feel free to contact me anytime. Thanks for dropping a line!
Hi, don’t have a question yet, just wanted to thank you for providing such detailed instructions and advice. It’s very, very kind of you and I’m sure VERY much appreciated by everybody who visits.
*Lisa
Thank you. I’ve read (and heard) about so many failures from those who love making their own garden art, only to get the wrong advice and have their pretty works fall apart. Before I started making and selling dish flowers and totems, I researched extensively and followed on-line threads where makers exchanged ideas about glue. It needed to be strong bonding and waterproof…but everyone forgot about the heat! So I purposed to be thorough and to provide not just the “what”, but the “why” when I write my articles, so folks might try again and have success!
What glue do you use to glue the beads? Silicone or E6000. Can I paint the back of beads? Should I bake the dishes after I paint with enamel paint? Thank you so much in advance.
If you are talking about GLASS beads, then yes, you can paint the backside and the color shows through. The only thing to keep in mind is that the paint comes between the glue and the glass, so the glue is actually sticking to the paint. I’ve never had a bead come off, but technically it’s a little less secure. I think there may be less of an issue with the enamel because it dries hard and is made for use on glass. I have painted beads, but I generally try to use the colored ones. As for glue, it kind of depends on your summers. I prefer to use E-6000 on glass because it’s clear. But my area has very mild summers temperature-wise. If your summers get really hot for weeks on end, the E-6000 may not hold up and the beads might come off. In that case, use the silicone. You don’t have to use very much on a little glass bead and it shouldn’t take away from quality. I have used Silicone on beads as well.
Bake the dishes AFTER they are painted. Follow directions on back of bottle. The purpose of baking is to speed the cure process by pulling all the moisture out of the paint. Place it in a cool oven while it heats up and allow it to stay in the oven to cool down gradually after you turn the oven off.
Thank you for the great information.
You’re very welcome! We want you to have the most success with your project and as such, we aim to be helpful. Thank you so much for visiting our site!
Thank you so much for this article!!! I am 100% going to use this silicone for ANY projects I make for the outdoors. I have been collecting vintage glassware for making window art and I have been seeing all these wonderful ideas for garden art/totems as well!!! I am working on my first window art with glass gems and glassware. After I finish this project I plan on making some totems so this article is invaluable to me. Thank you again!
I picked up some older windows to play with. Would I use the silicone for glass dishesn on the glass if hanging outside? Just ran across your site & woul like to hang a window at each end of the front porch. I am assuming i might need to add some caulking around the panes where it is chipping away. Will tha make it safe for adding the glass pieces? Love the look of thosesince I first saw them.
Thank you for sharing such good information that you have accumulated and learned
I have not done the large windows yet, but it’s on my radar! I have done a smaller version using picture frames. I recommend 100% silicone-clear- for exterior (doors & windows). Clear silicone is not “as clear” as E-6000, but it is strong-bonding and seals as well. The most important factor would be the heat your pane is exposed to. If it will hang in a place that gets direct sunlight and the regular high outdoor temperature it will be exposed to. Glass absorbs heat, and retains heat. E-6000 just isn’t made to hold up to high heat levels. There may be other forms of silicone I read about on mosaic fb groups that are clearer than GE silicone. You might try asking a local art glass shop about what to use in your area for something that will be displayed outdoors. You are wise to inspect the window itself and make any repair and make sure it is good and secure, (nothing rotted or loose) before creating your artwork.
Really good article and info here. I have been an e6000 stalwart for years…that is some tough stuff. I have never thought about using silicone before. I’m in the Southeast and along with the hot summer days we have the added burden of high humidity. If silicone can stand up to that I’d be sold!
100% silicone is actually made to be applied to the exterior of doors and windows exactly because the product withstands the weather. And that’s why so many people making glass garden art are using it. E-6000 is good stuff, but it’s a “glue” and just wasn’t intended for outdoors use.
Thank you for this wonderful information!!