
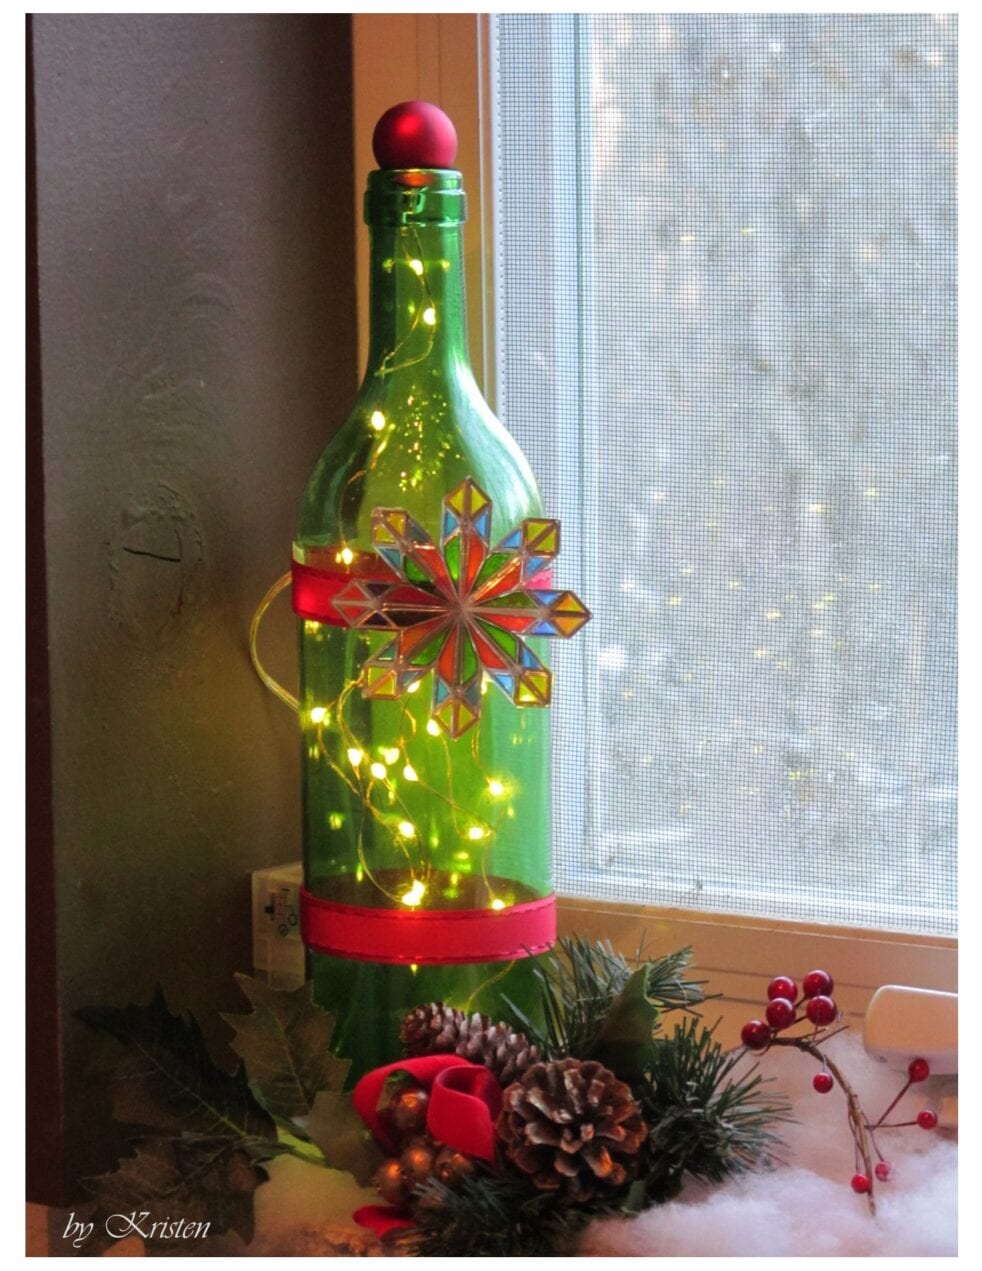

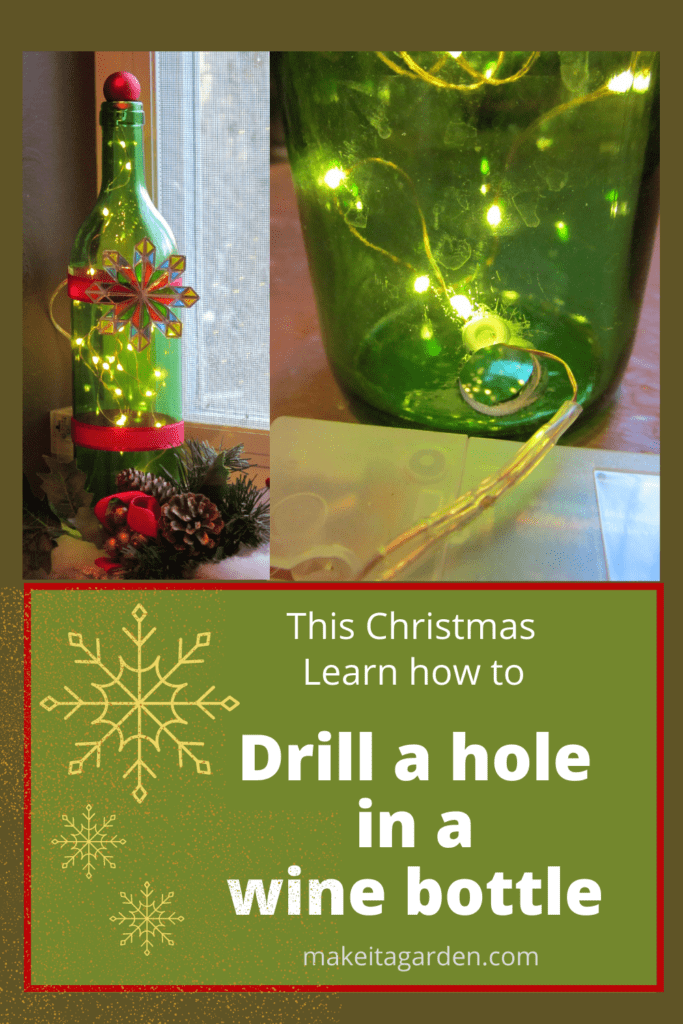
Don’t you just love colored glass? And those wine bottles with the mini lights inside make such pretty Christmas decor. As a centerpiece, their warm glow brings a festive mood to the table. In this tutorial, you’ll learn how to drill a hole in a wine bottle, along with the proper tools and technique to use so you can make your own holiday decoration like the one above.
I’ve really enjoyed working with glass since I began making dish flower garden art a few years ago. So, when a neighbor offered me a couple of cases of un-used bottles left over from a wine-making hobby, I gladly accepted. I’m captivated by the many beautiful crafts on Pinterest using wine bottles and this is one of them!
Drilling a hole in a wine bottle
The quick, get-to-the-point answer is to submerse the bottle under water in your sink. Water is the “key” to success when drilling a hole through glass. The friction of the drill bit heats the glass causing it to shatter. Water, therefore, acts as both a lubricant for the drill bit and a coolant for the glass.
I’ve drilled glass plates countless times when making dish flowers. The difference is that plates lay flat, whereas wine bottles are cylinders and tend to roll from side to side. It’s a bit tricky to hold the bottle steady with one hand, while operating the drill in the other. If you’ve not done this before, stay with me for some great tips.
While there are many ways to accomplish this (you can also check out some You Tube videos on the subject), the technique in this tutorial is easiest for the home crafter. I’ve provided some important details about drilling a wine bottle that will make the process less intimidating and more doable for you!
Tools for drilling a hole in a wine bottle
- Cordless Drill (do not use an electric drill around water)
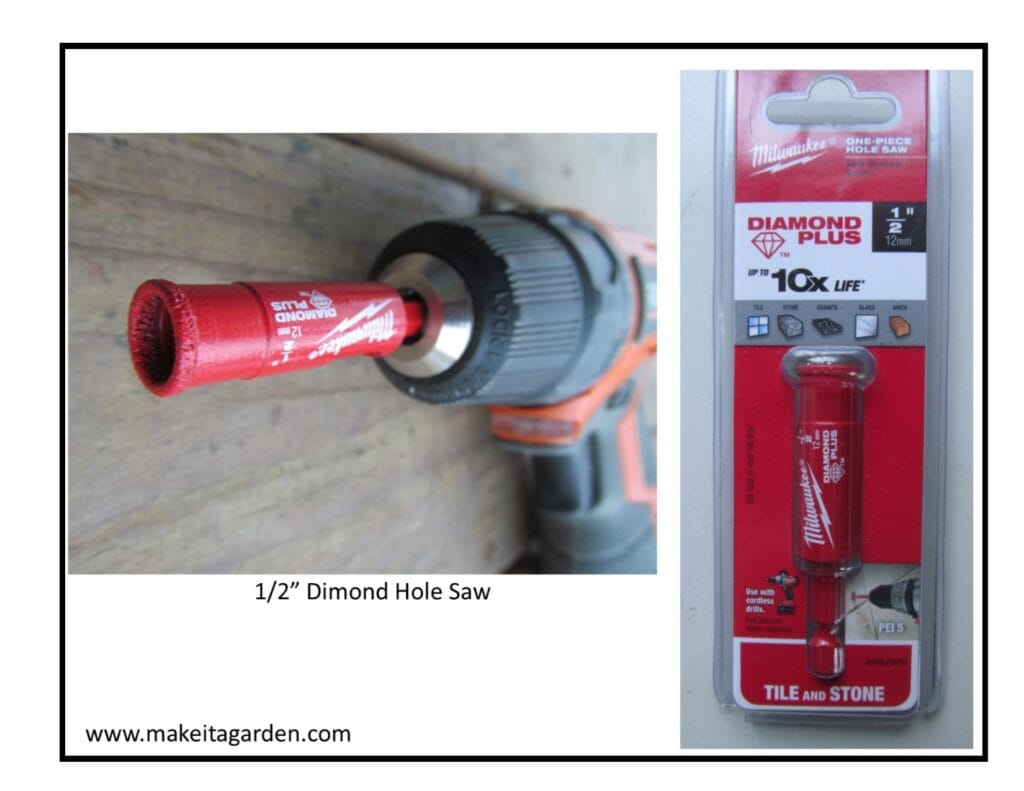
- 1/2″ Hole Saw made for glass/ceramic tile
- Protective eye ware
The right drill bit makes all the difference in the world for a faster, easier process. For wine bottles, I recommend a 1/2″ Hole Saw made for glass and ceramics. A “hole saw” is a drill bit that fits into a cordless drill, even though it’s called a “saw”. Make sure it’s a circular, diamond tip.
It costs anywhere from $25-$30 at places like Lowes and Home Depot. You can drill quite a few bottles, however, and once you get the hang of it, the purchase will be more than worth it!
*NOTE: It’s always a good idea to wear a protective eye-covering or goggles, just to be on the safe side. (Wine bottle glass is thick and usually does not break when drilled)
Keeping the bottle in place while drilling
Personally, I prefer to drill in my sink. I don’t have a garage or workshop. Doing it in my sink allows me to stand in a comfortable position which gives me more control while operating the drill. And in the rare case the glass breaks, it’s all contained in the sink for an easy clean up.
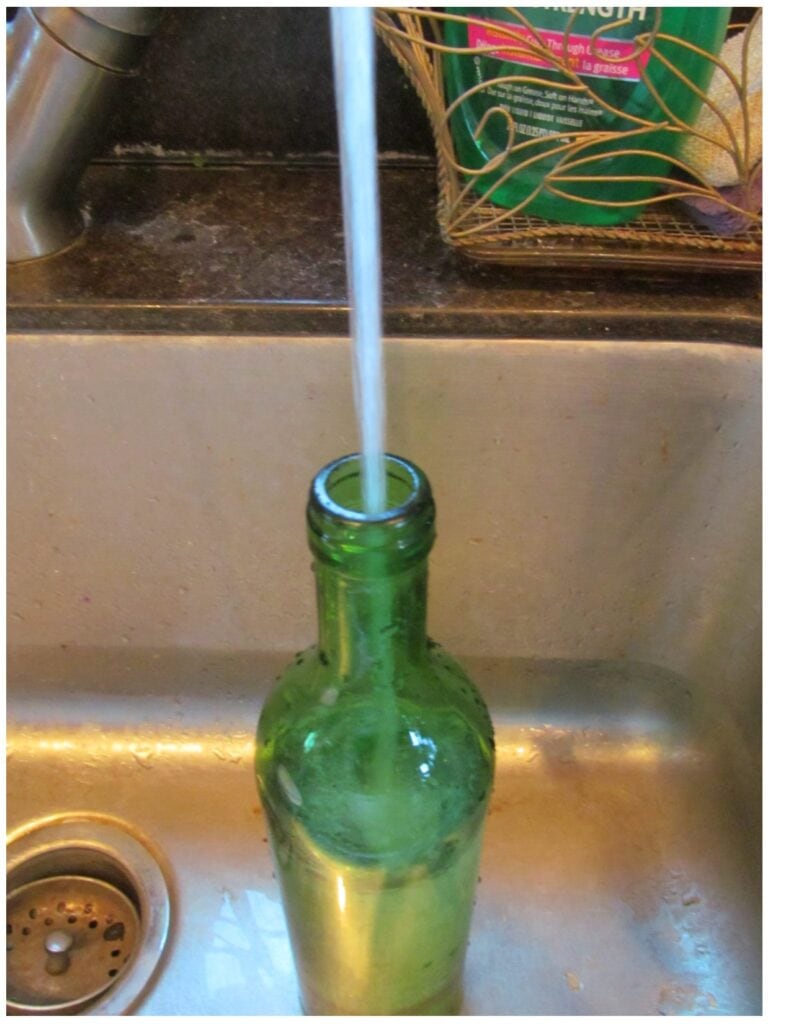
STEP 1) Fill the bottle with water. That gives it weight so it doesn’t float and helps it to stay in place.
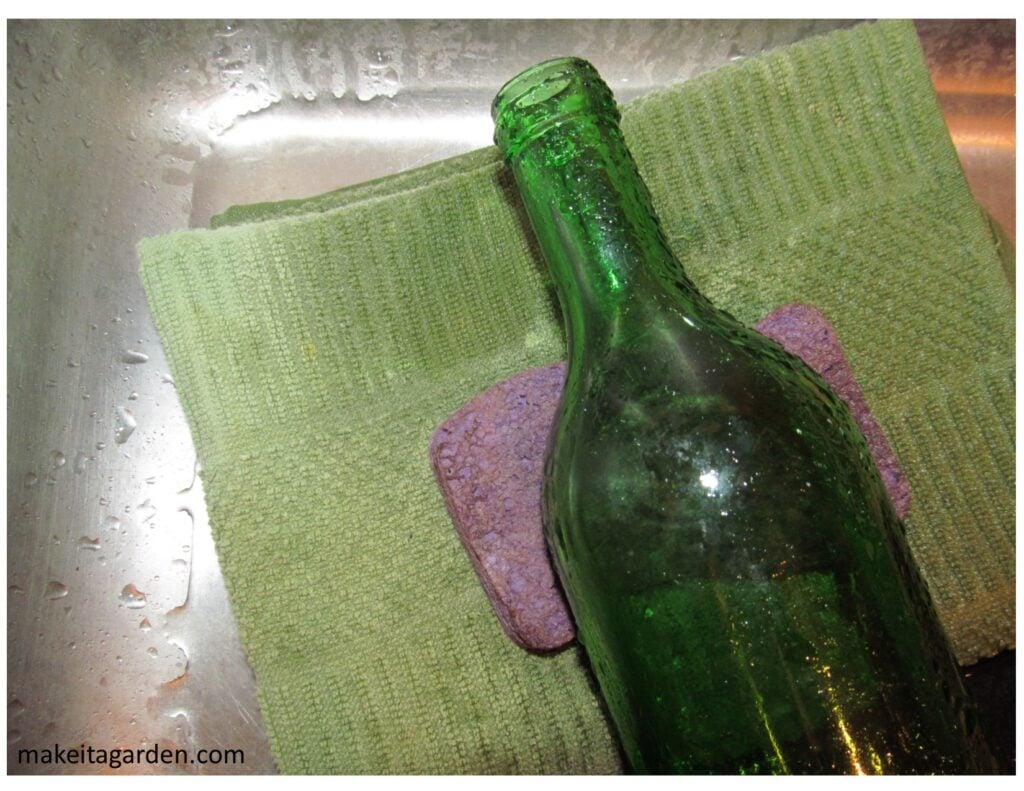
STEP 2) Fold a rag or old kitchen towel and place it in the bottom of the sink. Lay the bottle in the sink and place a sponge under it. The sponge also helps keep the bottle in position.
STEP 3) Fill the sink with cold water so it just barely covers the top surface of the bottle (if your faucet will reach, you can just run a trickle of water over the bottle, just above the drill point.)
Note: Different craftsmen have their preferred methods for keeping water on the drilling hole. Some have a spray bottle handy and just wet it down frequently throughout the process. Others use plumbing putty to create a shallow “wall” around the area where the hole is being drilled, so it holds the water in like a little pool.
At “Make it a Garden”, my method is to just submerse it in a sink or plastic tub filled with water.
STEP 4) How to start the hole
Depending on your drill, it may take anywhere from 5-10 minutes to cut your hole.
You may wish to use a dish washing glove to get a better grip on the bottle. You won’t have to hold it very tight at all! The weight of the bottle filled with water really steadies it. I just kind of hold it with two fingers on top. You’ll discover the way that works best for you.
TIP: DO NOT press down hard. The weight of the drill is enough against the glass to do the work. All you have to do is just hold the drill in place.
With one hand on the bottle, position the drill tip at a 45 degree angle against the glass.
Slowly engage the trigger and run the drill. Keep it running slow at low speed. At first, it’s going to want to roll back and forth across the bottle, so just hold it as steady as you can. After 30 secs, you’ll see and feel the horizontal cut in the glass. Try to keep the edge of your drill in that cut and it’ll establish a little ledge for itself.
After about a minute, a small divot will form in the glass. That gives your drill bit a little half-moon anchor rest so it will stay in place. Once that pocket is deep enough to hold the drill tip in place, the rest goes quickly.
Run the drill slowly at the 45 degree angle and slowly raise the drill to a straight, up and down position where the whole drill tip makes contact with the glass surface.
A circle ‘trench’ will form in the glass and will likewise hold the drill tip in place while you finish the hole. At that point, you can run it full speed until you feel it drill through.
After the hole is drilled
Rinse the bottle out well to get rid of any tiny shards of glass that can occur during the drilling process. Rinse your sink out well, too!
DON’T FORGET YOUR FREEBIE! Get “10 Artistic Ways to Make Your Yard & Garden Beautiful”, Free, when you sign up for our monthly newsletter. Scroll down just a bit to sign up. No spam or ads, just fun art & garden related content!
Cleaning glass
If you bought a bottle from the thrift store and there is residue on the inside that doesn’t come off with normal washing, there are a few things you can try such CLR or vinegar. I use a blow dryer pointed into the bottle so it dries with fewer water spots.
This extra step may or may not matter to you. Sometimes, if making something just for myself, I don’t worry about it too much. However, it’s a whole different story if I’m making a wine bottle craft for a gift or to sell at a holiday bazaar. If that’s the case, you want it to look professional.
Decorate the wine bottle
There are numerous ways to decorate a wine bottle for the Holidays. Here are just a few ideas:
- paint snowflakes, a wintery scene or figure like a snowman
- paint a bold pattern, fun polka-dots, or simple lines or shapes
- Use paint markers to draw or write words/phrases like “Peace on Earth”
- Use holiday-theme stickers from the craft store
- Glue on glass beads or add a fabric trim such as lace
- Add a glittery ribbon or bow
Wrap up and Review
I hope this little tutorial gives you the confidence to drill a hole in a wine bottle. Like anything, it takes a bit of practice…but you’ll get the hang of it quickly as you drill a few more bottles. I really want to encourage you because it’ll open up a whole new avenue of crafts. You’ll be drilling everything you can get your hands on!
Remember to always use water when you drill a hole in glass. The fastest, easiest way is to simply plunge the bottle underwater in the sink. Use a rag or old dish towel and a sponge to keep the bottle from sliding around while you drill. Start the drill slowly at a 45 degree angle and make a little divot to hold the drill bit in place while you complete the hole.
Add the warm illumination of mini lights, and the colored glass brings a sparkle to the holidays. And now that you know how to drill the glass, you can give a decorative bottle as a gift to that special person on your list. For sure they’ll be impressed when you say “I made it myself!”
More fun crafts for you to try:
Winsome Wine Bottle Flowers for the garden
The form you have selected does not exist.
Awesome! I think I will try this. I have a Dremel tool that I should be able to find a glass bit for. I love the blue “Winter Skol” bottle you decorated! Gorgeous!
Guess I need to work on finishing a bottle of wine….
Go to Lowes and get the bit and use a drill. Dremmel will work I’m sure but you want that bit NOT turning real fast. I use low speed on my drill when drilling bottles. The bits are diamond faced
Will this technique also work for home dentistry? kidding
Is this technique successful for a hole at the bottom of the bottle (I think it’s called the punt)?
Yes. Drill your hole where ever you want. This is the standard process for drilling glass whether it’s a wine bottle or a platter, glass block or a thick glass vase. Whether one uses a hole saw or round, diamond tip drill bit.
I look forward to visiting your garden! I’ve lots of “possibilities” in the garage, yard, in the patio much to my husbands dismay 😉