
Do you love colored glass? Have you always wanted to learn how to create art with glass, but don’t have tools or money to spend on classes? This picture frame glass art craft may be just what you’re looking for!
OVERVIEW:
This craft project is so pretty, yet so easy. Best of all, it doesn’t cost a lot and no special glass-oriented tools, (such as nippers), are required because there’s no cutting!
By starting on a small scale, you can play around and experiment with different designs, patterns and color combinations. You can always expand to a larger windowpane as you learn and grow!
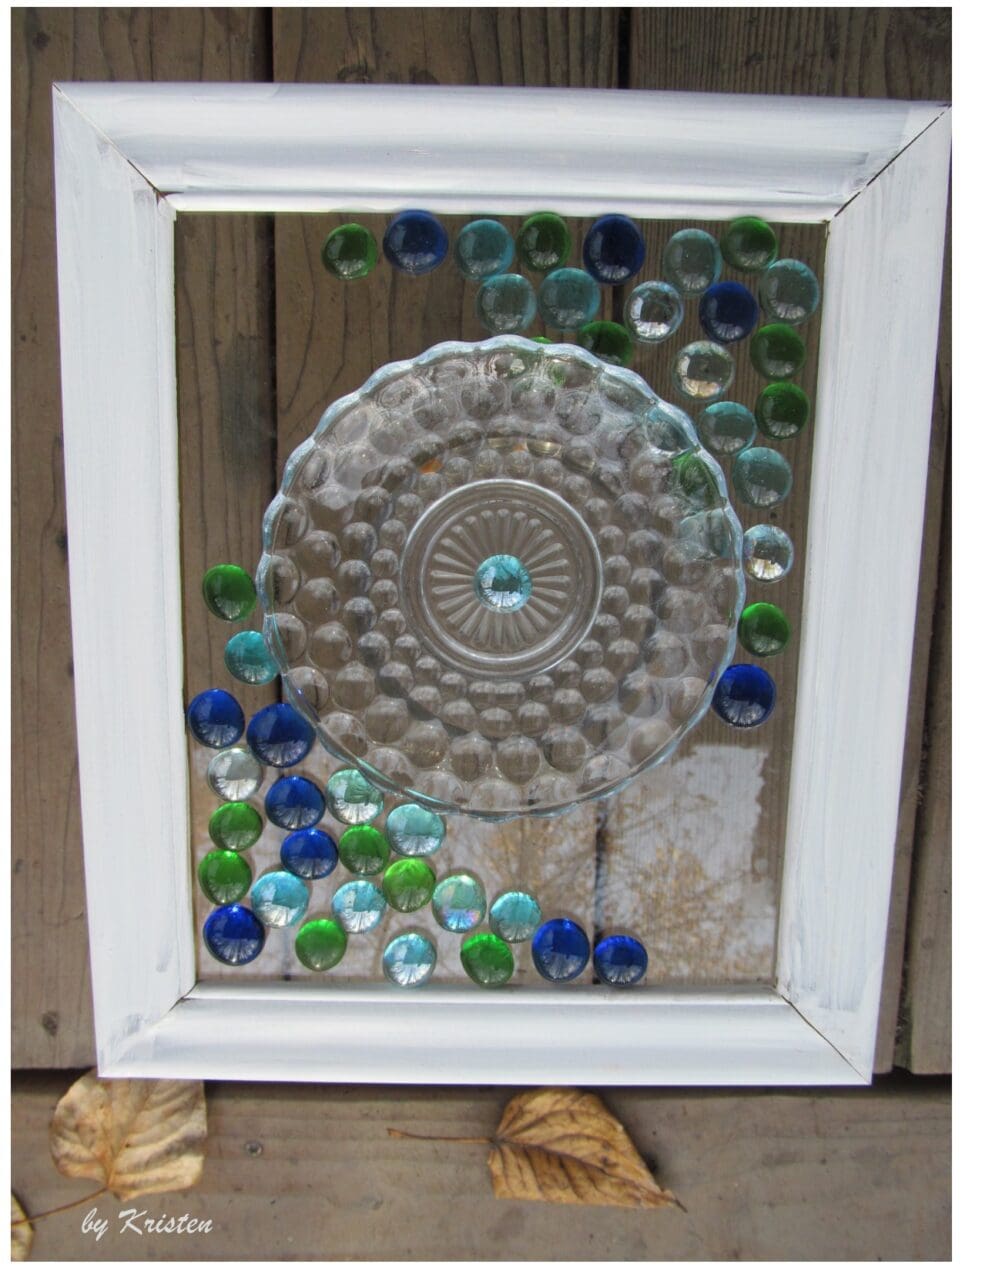
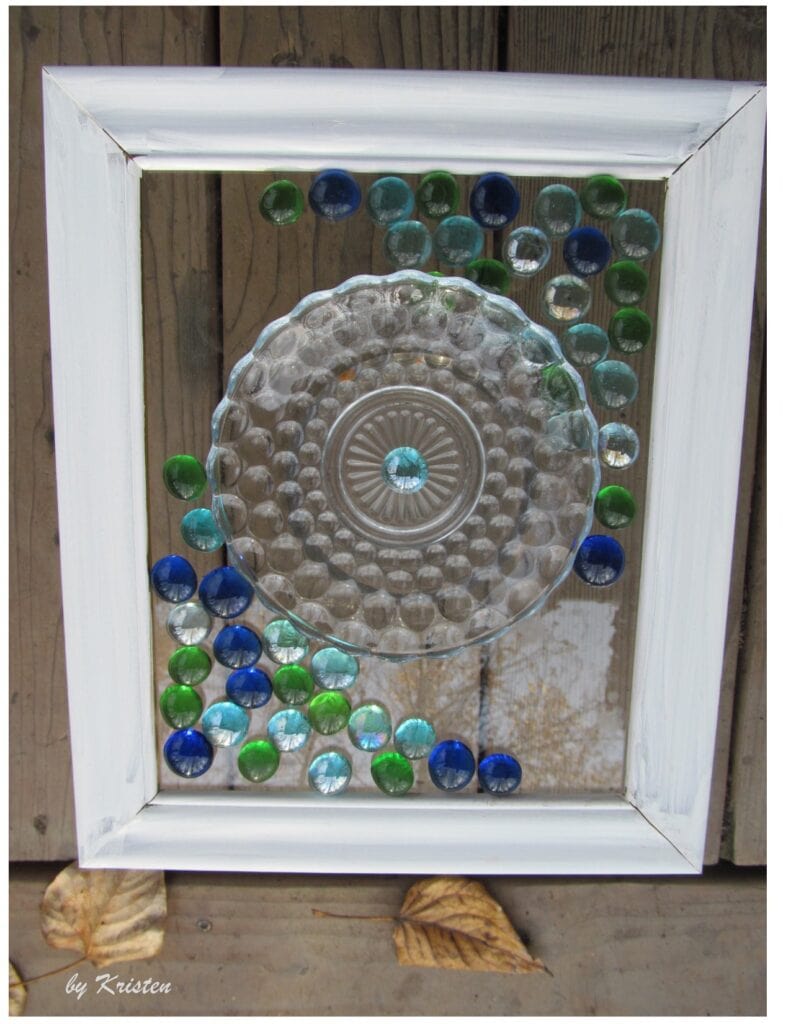
Picture Frame Glass Art
SUPPLIES:
- Wood Picture Frame from Thrift Store (I started with a 10″ x 12″)
- Colored Glass Beads (check a thrift store and save $)
- small decorative glass saucer (optional)
- Craft paint (optional – if you wish to paint the frame)
- E-600 glue
- Small eye-hooks (for hanging up in a window)
Step 1) Prep the frame
REMOVE CARDBOARD BACKING & GLASS PANE:
Turn the frame over and on the backside, remove the cardboard and discard. You’ll have to flip the tabs up. Sometimes, they can be tough. Don’t break a fingernail! If one or two are hard to flip, use the flat edge of a screwdriver. Be very careful not to damage the glass.
Remove the glass pane and set it aside someplace safe.
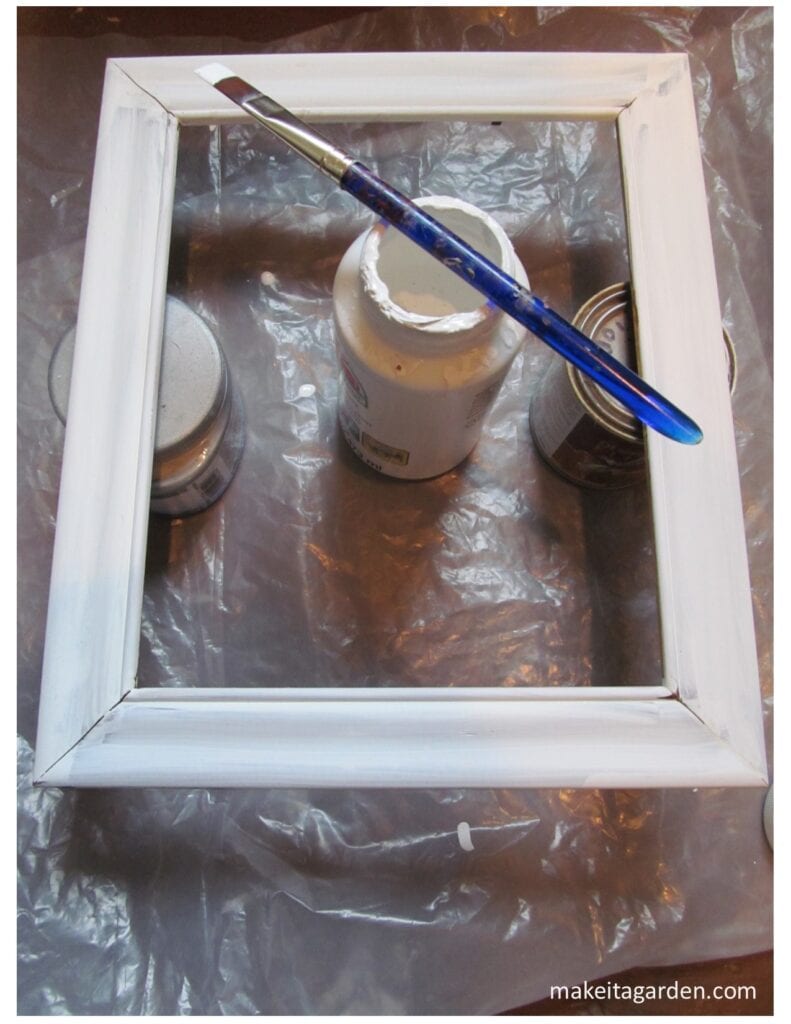
PAINT THE FRAME: (optional)
You’re the artist! If you like the natural wood look of the frame, there’s no need to paint it. If you do wish to paint it, I recommend going with plain white. Why? Because white is crisp and clean and makes the colored glass really stand out!
Any ordinary craft paint will do. You can also use spray paint if you prefer. I went an extra step and decided to add a little ‘distressing’ for a bit of a weathered look. When the paint had dried thoroughly, I used light-grain sandpaper on the sides and edges of the frame. But that’s completely up to you.
ADD EYE HOOKS:
If you want to hang your finished piece in front of a window with twine or ribbon, add two small eye hooks. Decide beforehand, if your want your picture frame glass artwork to hang vertical or horizontal. TIP: Use a skinny drill bit and drill starter holes to make it easier to screw in the eye hooks.
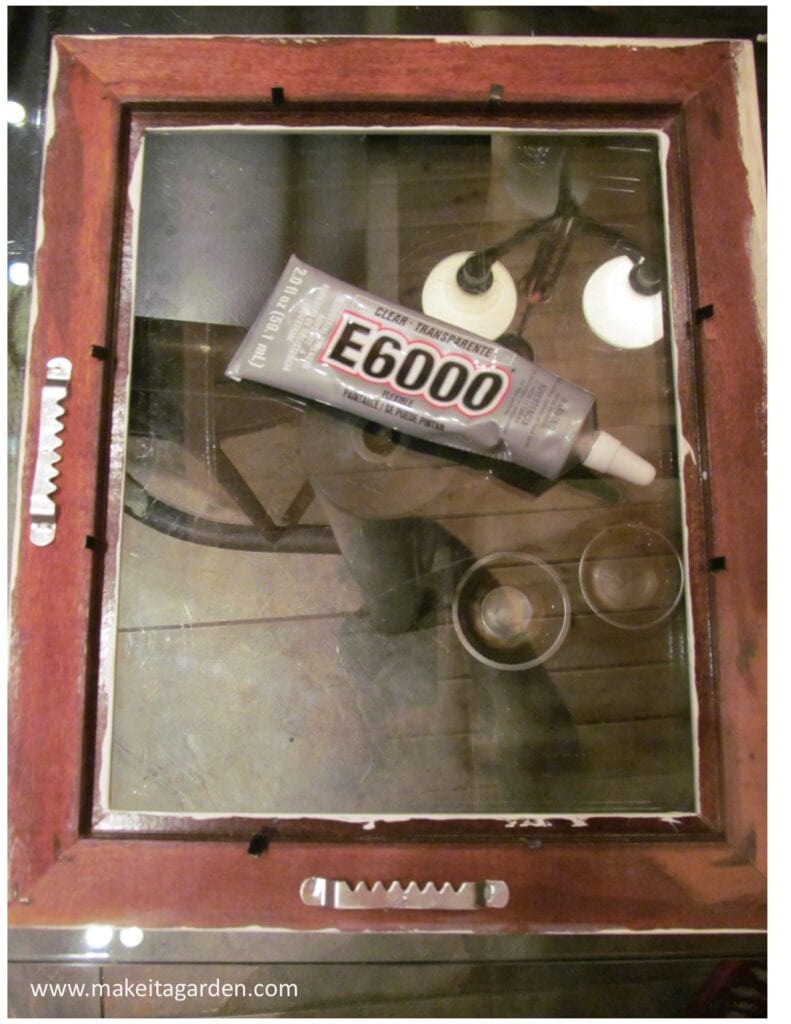
Step 2) Glue the glass pane
CLEAN GLASS PANE:
Hand-wash the glass pane and dry with a water-absorbing, lint-free towel. Don’t use window cleaner or paper towels.
GLUE GLASS PANE TO WOOD FRAME:
Using E-6000 glue (superb for glass crafts!) place a bead of glue around the edge of frame that holds the glass. A thin application is fine. You don’t want the glue to squish out onto the front side of the glass. Carefully lay the pane of glass in place.
Let it dry overnight.
If glue gets onto the surface, it is quite easy to remove with a razor blade when dry. Gently–no pressure needed! E-6000 dries to a rubbery consistency and small bits of it are also easily removed with friction simply by rubbing your finger over it. It will come right off the surface.
Step 3) Create your design
Now comes the fun part! With your glass beads and little glass dish (optional), create your picture frame glass art design. But DON’T glue anything in place yet!
Here’s your opportunity to play around and experiment with different colors, shapes and patterns until you come up with something you really like! Because when they’re glued down, you won’t be able to make any changes.
TIP: Once you’ve settled on your design, take a photo so you’ll have an easy reference to look back on, when you begin gluing things down permanently.
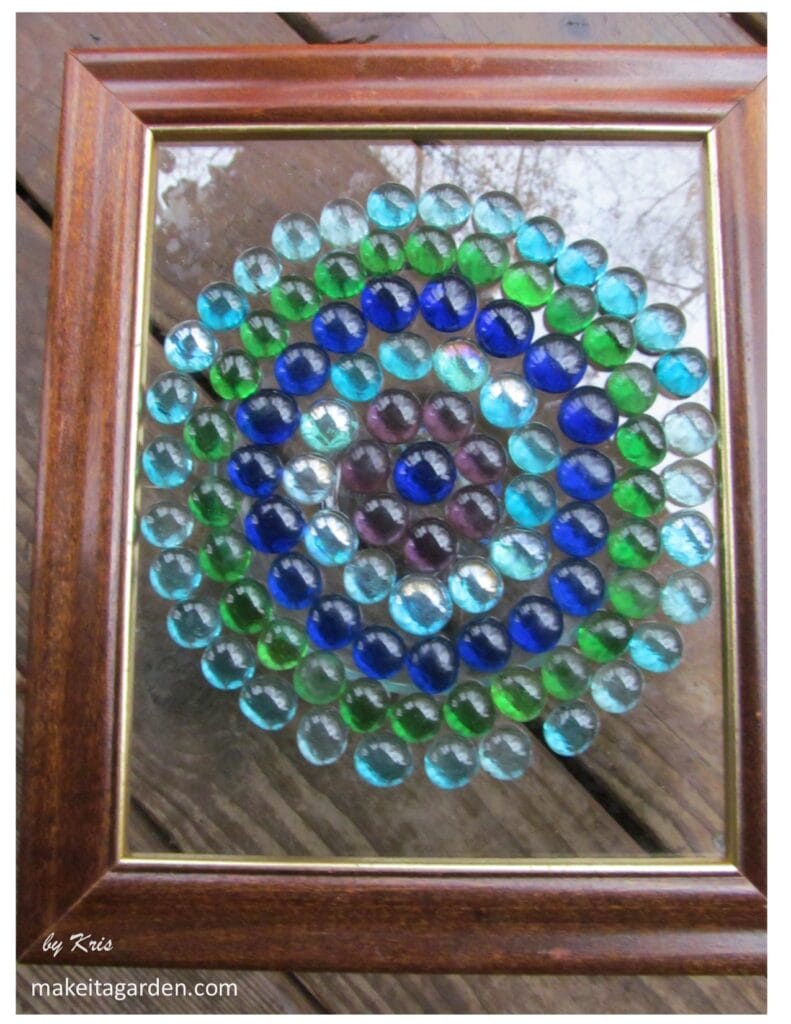
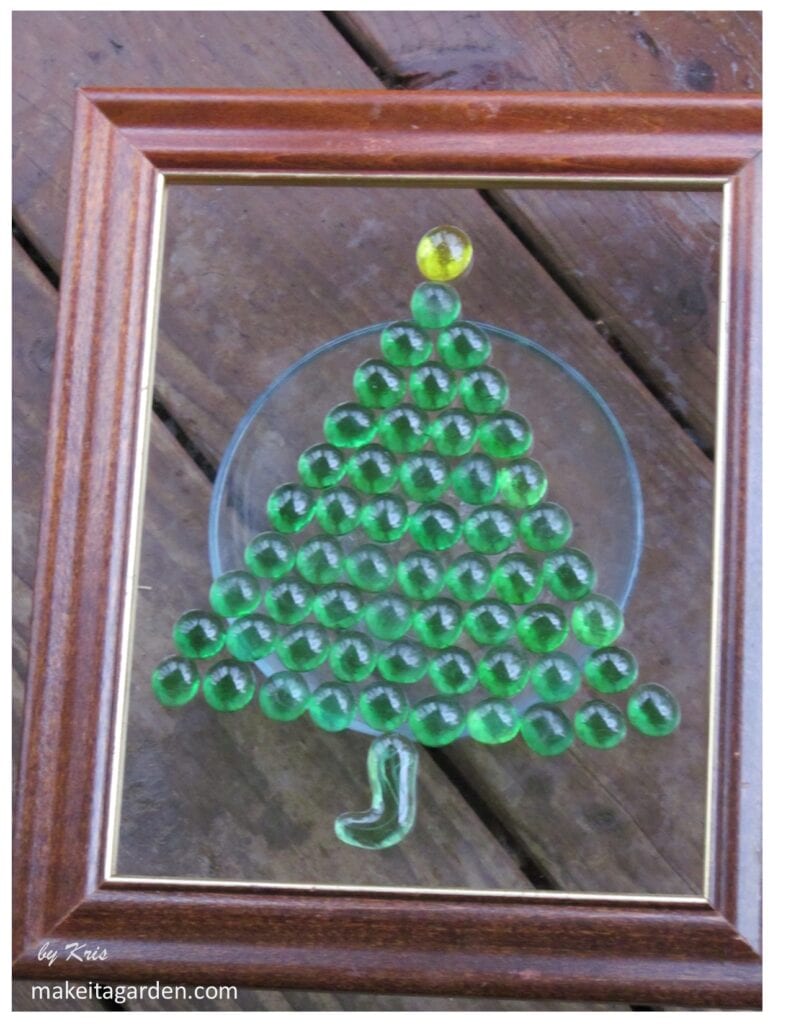
Here’s some examples to get the creative juices flowing:

DON’T FORGET YOUR FREEBIE! Get “10 artistic Ways to Make Your Yard & Garden Beautiful” Free, when you join our community. Scroll down just a bit to sign up. No Weeds (or spam), just relevant garden and art content.
Step 4) Glue beads in place
Now, glue your glass beads in place. Lay the frame on a flat surface while you do this.
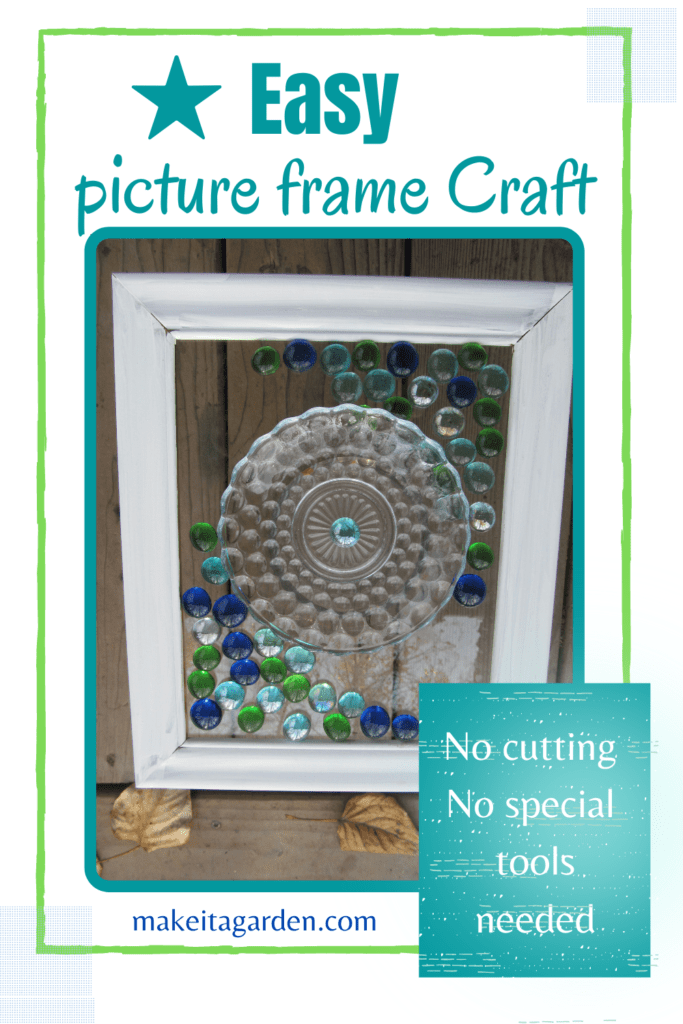
If you’re using a small glass dish, as I did, glue it in place first.
Use E-6000 a product that’s specially made for glass. I like it because it dries so clear that you can’t even see the glue. When it comes to window glass and an art project like this, you want the glue to be invisible! E-6000 is available at craft stores or in the paint section of local hardware stores like Lowes or Home Depot.
After gluing, let your finished artwork sit overnight as the glue cures. Then hang it or prop it up next to a sunny window and enjoy!
Final thoughts
I hope you’ll have fun experimenting with this little craft project. It’s one the cheapest ways to get your “glass fix” and end up with something pretty that’s sure to bring on the compliments!
Then, go back and pick up some more picture frames and glass beads as this makes a lovely hand-made gift.
If you love stuff like this, please ‘like’ the Make it a Garden Facebook page. Or scroll down just a bit to join our art and garden lover’s community. Thanks for stopping by and happy crafting!
Check out these other unique crafts
Winsome Wine Bottle flowers for the garden
Simple garden flowers from plastic dishes
The form you have selected does not exist.
Sweet! What better way to make something the sun will catch without having to try stained glass classes!
Ah…thanks for your comment. Yes, at MIAG I try to introduce crafts that are inexpensive and so simple, anyone can do it. And it’s pretty, too!
HI, love this craft. Do you glue the beads on the front of the glass?
Yes, the glass beads are glued to the surface of the glass. I use E-6000 b/c it dries clear. You need just a tiny drop of glue on the back, it’s very sticky! ~Kristen
I am so excited to make these with my class my only question is, if you use a dish of some type should it be glued to the same side as the gems? Probably a silly question.☺️
Yes. Same side with gems (like the pic in the post) so that it will hang or prop up against window properly. Like if it’s set on a window sill. A dish gives it some dimension that makes it interesting. You can also use seashells, sea glass, driftwood, glass beads (always use glass as plastic ones will fade). Your class can play around with the gems first to see what they like before committing to glue it down. NOTE: Use E-6000 VERY sparingly when gluing the glass to the frame…don’t lay out a bead b/c when the glue shrinks, it could crack the glass! I need to edit my post. I actually had that happen. So just use small dots of glue along the surface. E-6000 is quite strong so it doesn’t take much to bond the glass to the frame.