

A Tutorial for Beginners
UPDATED 2024
Note: This Tutorial only covers how to paint on glass plates. Not about making a complete dish flower. SEE links at the end for complete dish flower tutorials.
What’s Covered?
- Selecting glass dishware for garden art
- Prepping glass before painting
- The right paint
- Easy paint techniques, ideas and inspiration
- Bake-cure process
- How to prolong vibrant paint colors
This might make you laugh, but when I first began seeing dish flowers on Pinterest–with those vibrant colors and elaborate patterns–it made me wonder where the crafter got her glassware? A little perplexed, I thought, “Where is she getting all this colored glass?” Of course they had been hand-painted, but I didn’t know that at the time. I thought they were using some type of vintage or antique dishes. The kind that are pretty pricey to buy for use as garden art!
Since then, I’ve been having all kinds of fun painting my dish flowers. I’m happy to pass on what I’ve learned from others and from my own experience. I want you to have fun painting on glass plates, too!
Why paint on glass plates?
Clear glass by itself doesn’t show up very well in the garden. It’s like a window. You don’t actually ‘see’ the window; you see through it. A glass plate is practically invisible outside. So, if you’re going to use clear glass, you almost have to put something on it so that it shows up in your garden.
Yet, something wonderful happens when paint is applied. It gives that stained glass effect that’s so pretty! Hence the name “Sun catcher”.

From a creative standpoint, painting on glass lets you make any whimsical dish flower you can imagine! You can paint a little or a lot. Any color. Any pattern. Whatever strikes your fancy!
But first things first. Start with the right glassware that will hold up better outdoors in your garden.
Selecting the Proper Glassware
I cannot stress enough that the most important part of your glass garden art project is the glassware itself. If you use dishes that are too thin or fragile, there’s a higher chance it will break.
Here are some good choices:
- Common, everyday table ware. Clear glass used for dinner plates is usually fine. It’s the type that can go into the oven or microwave. You’ll be surprised what pretty dish flowers can be made from the most ordinary dishes.
- Dishware with flower shapes or scalloped edges
- Cut glass or crystal. This is thick, sturdy glass that makes great garden art because of its beauty and strength. It sparkles in the sunlight. Bottoms should be flat and smooth. Stay away from super heavy pieces, though.
- Decorative glass plates, serving platters, bowls and smaller dishes that are thicker and less fragile. Sturdy bakeware/cookware.
Collect your plates from the dollar store or garage sales. You might already have something at home that will work. You’ll need at least two pieces. A salad-size plate and something to use as a “flower” center piece. Candle ware…little glass candle holders make nice centers. Shot glasses work well, too. Just see what you can find!
A little prep work before painting on glass plates
NOTE: If you are using the drill method to attach the flower head to the post, drill your hole first, before painting on the dish. SEE my: how to drill a plate for garden art.
Wash by hand in hot, soapy water. Dry with a 100% cotton dish towel (don’t use paper towels). Examine closely as some dishware from the thrift store may still have grease or gummy residue from a price tag or ‘mystery’ substance that’s hard to get off. By the way, if you every find out what that mystery substance is, let me know! (Wait, I might not want to know)
It’s important for the glass surface to be free of grease and oils so the paint will stick better. Including the oils from your hands! So, try not to handle it too much, at least on the side you are painting.

After I dry a plate, I typically give it a quick wipe-down of isopropyl (rubbing) alcohol as a final degreaser that leaves the glass sparkly clean.
Brushes
You don’t need expensive brushes. A cheap set of seven should do just fine and give you a little variety to play around with. You may already have craft paint brushes at home you can use.
Some people find it easier to use paint pens for creating designs on glass plates. Pens may provide you with better control if you’re not used to painting with brushes. Those with wider tips work better and have more fluent paint flow. I have found them to be a little pricey, but feel free to experiment and decide if you like the results.


The Right Paint
Not all paint sold as “glass paint” is the right paint to use on outdoor garden art.
Glass paint has numerous applications, so you need to read the label. Some glass paint gives a stained glass appearance, but it’s made for decorating window panes–a house or a store window– so, it will easily wash off.
When I first started making my sun catchers, I made the mistake of buying a stained-glass kit. It said on the label that it was made for glass. A few days later, after experimenting with it, I discovered that it was more for indoor crafts or decorative window painting, than for garden art!

High gloss enamel paint
The type of glass paint you want to use is High Gloss Enamel. Gloss paint dries super hard and it’s tough. It can endure pouring rain without washing off. Doesn’t fade either. By the way, this is the exact same stuff that artists use to paint pretty designs on wine glasses.
If you’ve seen the decorative, hand-painted wine glasses at craft shows, the artist will tell you it won’t wash off, even if you run it through the dish washer. True! That’s because of the inherent properties of high gloss paint. They are typically thicker paints, but water-based so you can thin them if you wish to make the paint flow more smoothly and easily wash your brushes afterwards.
Brands:
There are several brands that are easy to find at the craft stores like Michaels. Deco Art, Martha Stewart, Folk Art. In my opinion, they’re all pretty close to the same as far as performance goes. I read somewhere that a some of these brands are now under the same manufacturer.
They cost a bit more than regular craft paint. I’ve noticed gloss paints have a more limited color selection, at least at the craft stores in my area. But you can always buy them on line, too. If you get them at the store, it can be hard to tell the two different kinds of paint apart because they look the same. More than once when I wasn’t paying attention, I got back home with the wrong stuff.
So be sure to check the label on the front to make sure it says “Gloss” enamel. The Folk Art brand packaging is nice because they have an image of a wine glass on the top, so it’s easy to recognize and stands out on the shelf as glass paint.
Finally, painting on glass plates does not require a lot of paint. Save money by mixing primary colors at home. With a red and a white, you won’t need pink. Blue & yellow make green etc. Be sure to get a white to lighten darker colors.
DON’T FORGET YOUR FREEBIE! Get “10 Artistic Ways to Make Your Yard or Garden Beautiful” when you sign up for our newsletter. Be part of our garden and art lovers Community!

l
Easy brush strokes for beautiful flowers
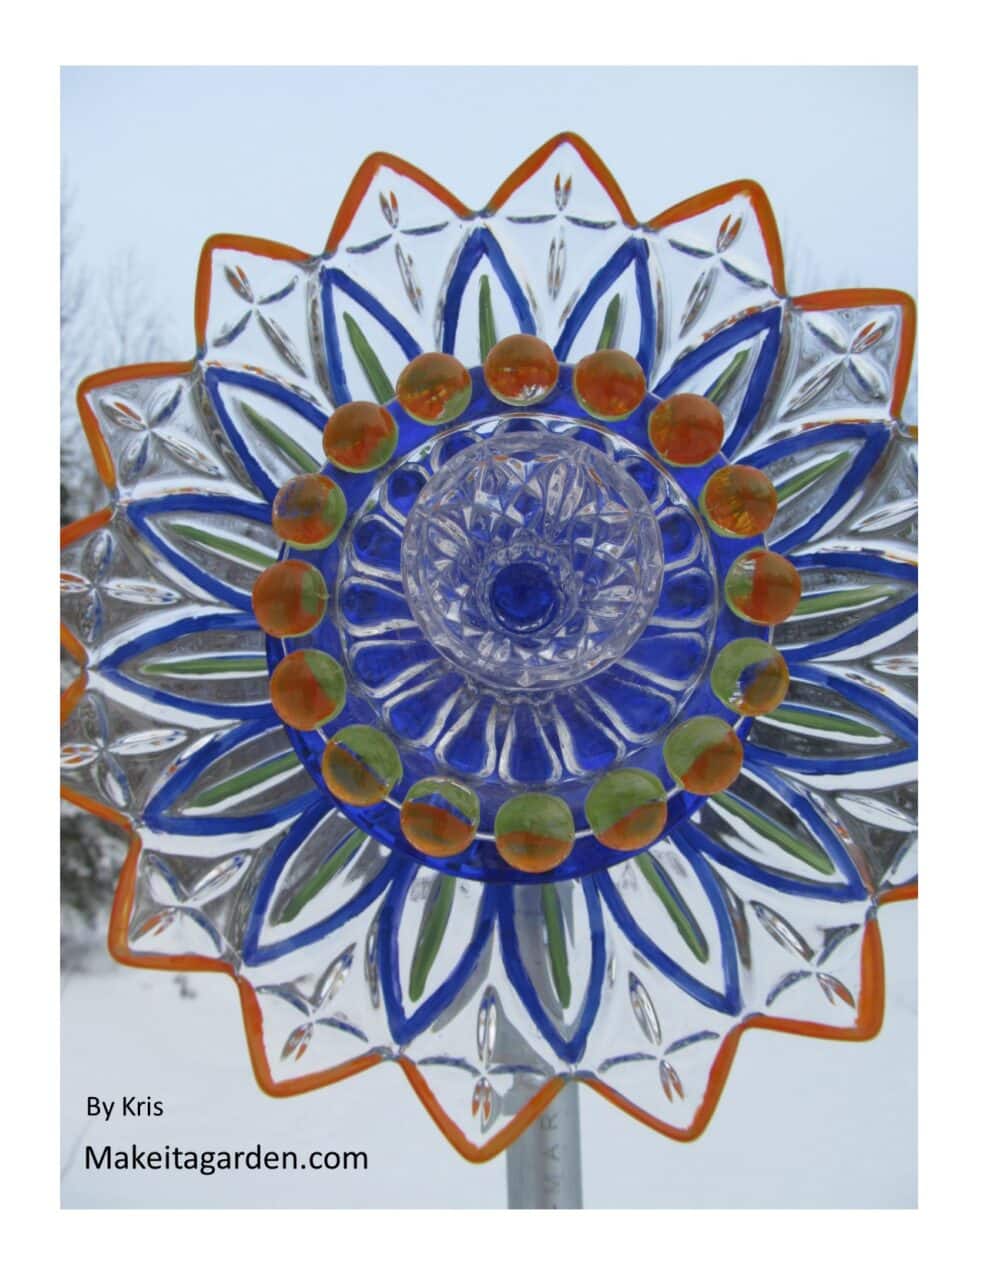
First, let me confess that I am not a painter! Most the time, I just trace and color the lines that are already present in the decor of the dish. (SEE the red & orange sun catcher above) The rear dish was a glass platter with circle shapes and narrow triangles that made a sun-burst shape in the glass.
With basic, simple lines and patterns, you can create beautiful dish flowers to be admired in your garden. Best of all, you can always wash off the paint and start over if you change your mind on color or pattern. With gloss paint, you might have to scrub a little bit if it has begun to dry. But the point is to just have fun experimenting. If you don’t like something simply wash it off, dry, and start over. No big deal!
Some dish flower artists like to paint the entire surface of the glass. That’s simply a personal preference. You can paint a little or a lot. I personally like to leave some of the glass un-painted so it lets the sun refract off the glass. When the sun hits the glass in just the right place at the right angle, it gives off that ‘rainbow’ effect . If one of the dishes is cut glass, it gives the finished piece a brilliant sparkle.
Always paint on the backside of the plate or dish

Example #1: SMALL, CLEAR SALAD-SIZE PLATE Use the flat brush to make straight, fat lines for a cheerful “daisy” design. Brush on from the center, outwards. Use a smaller brush to create thinner line on either side. Paint the middle (always on the backside of the plate). I used a shot glass for the center. E-6000 glue

Example #2: SMALL, CLEAR SALAD-SIZE PLATE Use a dauber or Q-Tip swab in small circular motion to make a swirly pattern for a pretty rose. Paint the center (always on the back side of the plate) I used a red glass bead in the center of a candle holder. E-6000 glue

More Ideas & Inspiration


Paint Curing Process / Baking the Plate
Although it may be dry to the touch in 15 minutes, high gloss paint can take up to 30 days to thoroughly dry (Curing process)
But thankfully we can speed up that process by baking the plate in the oven under medium heat. Directions for this procedure should be on the back of the paint bottle. But I’ll include them here:
Turn your glass dish face down on a baking sheet. DO NOT pre-heat the oven. Place the dish on the baking sheet into a cold oven. Glass is a natural product and contrasts and expands as it heats and cools. So allow it to heat up slowly with your oven, and cool down the same way.
Bake/Cure Procedure
The Folk Art brand says to heat the oven to 350 degrees. Bake 30 minutes. Turn OFF the heat and allow glass to gradually cool down before removing from the oven. Baking gloss paint does have a little bit of a smell to it, but its not harmful. Some people don’t even notice it all that much.


Caption: Trace the pattern already present in a more elaborate dish, platter or bowl.
Protecting Paint from Fading
The same sun that lights up the beauty of your painted plate flowers will also cause the vibrant colors to fade. Red is one of the colors that is more prone to fading. It’s true that the elements are hard on everything in the outdoors.
But there are some treatments you can try to preserve the paint colors. One is clear spray paint. Rust-oleum makes a good one. It says right on the can that it SEALS, is NON-YELLOWING and UV (sun) RESISTANT. The only downside is that it’s hard for a broad application. In other words, you’ll want to protect clear glass on the plate from overspray. That means the tedious process of cutting up strips of painters tape. I discovered that even though clear, the spray adds a film that clouds and dulls the glass just a bit. We’re all different so that might not bother you. It may be worth it to preserve those vivid colors.
What I’m currently searching for is a brush-on product. There are clear preservatives for wood decks and siding, but be careful! Some of these are prone to yellow over time.
I have even researched different brand paints; some even higher quality…but learned they are not recommended for outdoors. When I find something to recommend, I’ll update this tutorial.
Final thoughts & Dish Flower “how to” links
Are you ready to paint on glass plates? I hope this article has been helpful and encouraging. I learned just by playing around and experimenting with different colors, shapes and patterns. If ya don’t like it, wash it off and try something different. It’s as easy as that!
For more information on how to make a complete dish flower for garden art, see the links I’ve provided below. These articles show how to put one together. They cover how to assemble the plates and attach them to posts. Plus, you’ll want to know about the right glue to use!
If you have questions, feel free to leave a comment below or use the contact form. Please accept my personal invite to join our community. I know you’ll enjoy the free newsletter on garden arts & decor…tips, trends and crafts. We only send it once per month. Be sure to like our Facebook page so we can be in touch, personally. And let your friends know about Make it a Garden, too. In the mean time, we’ve got some plates to paint!
More glass garden art topics:
Ultimate Guide to Making a Dish Flower
How to Drill a Plate for Dish Flowers
The form you have selected does not exist.
Kris, Awesome article! I really like the glass dishes you’ve painted, especially the Sun one and the one with roses. Very creative. If you still have the stained glass kit, I’d be happy to buy it from you and I know some girls that would love to paint on windows!
Hi Lorna, thanks for reading the post and for the compliments. Unfortunately, as soon as I discovered it wasn’t the ‘right’ stuff, I re-sold the stained glass paints. That was a couple years ago already. You might try looking on-line…Hobby Lobby or Michaels. With Christmas right around the corner, the girls may enjoy decorating a living room or kitchen window. Good luck!
Ho w long do your flowers painted with the acrylics last outside in the weather?
Hi Ann: Thanks for contacting us! I use only the high gloss ENAMEL(acrylic) paint. I also bake it in the oven according to instructions to ensure the paint is fully cured before I use it outside. That being said, I’ve had painted glass dish flowers in my garden for a few years and haven’t had any issues with fading nor with the paint coming off. That’s why I insist on Enamel. I haven’t heard of any issues to the contrary with the paint. If I hear of anything, or run across something in my research, I’ll be sure to add it to my article. I’d say, go ahead and give it a try! – Kristen/MIAG
Have you ( or your followers) used Pebeo Vitrail for outdoor use?
I have not tried this with my glass dish flowers, but thanks for the tip and I will investigate. These look like acrylic and I’ve been using enamel. Some paints that are designed to give a “stained glass” look are made for indoor crafts or even window painting that can easily be removed. Some paints will also fade outside. But again, I will look into Pebeo Vitrail and if it sounds promising, I’ll give it a try. Thanks for taking the time to comment and visiting my blog. ~ Kristen
Your flowers are beautiful! I am going to give it a try. May I ask, what is the purpose of painting the backside of your plates? I am planning on making some garden glassware mushrooms and wanted to paint them. A bowl is glued to a vase. So, should I paint the inside of the bowl or the outside? Thanks!
Thank you for visiting Make it a Garden, and thanks also for the kind remarks. I paint my dish flowers on the outside surface, so when it is viewed from the front side, it has more of a stained-glass look as the color comes through the glass. There’s no “right or “wrong” just preference. On mushrooms, they are small and would be seen from the top down. You could certainly try it both ways and see what works best for you. But I’d try painting on the outside surface first…it may be that the colors show up better. For outside, I recommend using High Gloss Enamel glass paint from the craft store. It comes in the little bottles like the acrylic paints do. Enamel dries really tough and is less likely to wash off in the rain. If you are using thick, cut glass for the top of the mushroom, you could even bake it in the oven after painting which speeds the curing process…directions for doing that are on the bottle. If you are using thinner glass that wouldn’t be safe heated in an oven…maybe paint on the inside of the dish to protect the paint (if you use regular craft paint) and keep it from washing off. But I think it’ll be fine painting on the outside…and will stand out more in your garden area…or wherever you plan to place them. I haven’t made the mushrooms yet…they sure are cute! Good luck with them and let me know how it goes. ~ Kristen
Can u spray paint dishes and bake in the oven to cure also.?
I would not recommend that due to the chemicals in spray paint. And the way spray paint is designed to cure on it’s own. You really do not have to “cure” spray paint. It dries overnight and most are fully cured in 3 days. Always refer to the instructions on the back of the can. As for water-based craft enamel paint (FolkArt, Applebarrel, Americana etc.) it does give instructions for baking to speed the cure process. So follow the manufacturer’s guidance. Hope that helps. Have fun with your project and thanks for visiting my blog. ~ Kristen
Hey! Love your article and the flowers are very artistic! Im just a beginner so i was wanting to no what glass can u put on oven? I have this fear of glass busting all over the oven !! Lol
Thanks for the question. I had the exact same concerns the first time I baked a painted plate in the oven. The baking of a painted plate is just a method to speed up the paint curing process. It’s not necessary. But to air-dry naturally, I’ve heard it can take up to 20-25 days for gloss enamel to fully cure. And you want it fully cured before putting your painted dish flower out in the garden. You should know that most glass plates are oven safe. (unless it’s really old/antique, thin/super fragile glass). If you can put a glass plate in the microwave, it should be ok in the oven. The paint manufacturer recommends baking at 350 degrees which is not that hot. (I usually turn mine down a bit and bake mine at 320 degrees) Be sure to put it in a COLD oven and then let it heat up gradually. Once it’s reached the set temperature, set the timer for 20-30 min. When the timer goes off, turn OFF the oven and allow the plate to cool down inside until it is cold. I’ve never had a plate break in the oven. You can always experiment by baking it at a lower temperature, too! If you’re not sure a plate is oven safe and you know the manufacturer of the plate, you can look it up on line to see if it is oven safe. Remember, you don’t have to put it in the oven, just let it air cure! I hope that helps Candy. If you have any more questions, please feel free to drop me a line. Thanks for visiting Make it a Garden, Kristen
Good morning. Thank you for the helpful article. I love your work. In one of your flowers (the orange and red flower) you used a plate that has several points. I love this shape! Could you tell me where you found it?
Thanks so much!!
Katy S.
Thank you Katy for the kind words! I always strive with each tutorial to be helpful and your feedback is much appreciated. You’re thinking of the round glass plate with the circles on it (and starburst in the center?) That starburst is a decorative votive candle holder. I find them fairly often at the thrift store in the candle section. Candle stuff makes the best dish flowers. This starburst one was plain,’frosted’glass. But you can paint on it (as I did) and the color comes through. I painted it to resemble a candle flame. If you look closely, you can see the red at the base, then orange, then yellow. Just to give it a more outrageous look to fit with the piece I was creating. Paint can DO that! So keep checking at your local thrift stores…you might be able to find it on line EBay or Amazon? I do not know the company that makes it. Try Value Village if you have one near you. I hope you find one for your next dish flower! ~ Kristen
Morning,enjoy your articles.I have had difficulty on the painting on the plates.
I have followed your instructions and bought the recommended paints and oven directions from the paints and after 3 weeks did a test and ran water on it and it will scape of with fingernail.Help!
Did you use the enamel paints?(Some paints say multi-use including glass, but they are not the same as enamel) Hopefully the surface was clean and free from grease/grime/wax? That being the case, yes, if you scrape hard with your fingernail, the paint will scratch. But the paint will not otherwise come off without force being applied. It will not wash off outside from the rain. I’ve had my painted plates outside in the garden for years. Currently, I have a glass plate I’m still trying to get paint off of after several months. I just did it up real quick to get an idea of what color combos would work…so sloppy job. I set it aside when I should have washed it off right away. Months later… trying to get it off so I can start over. I let the plate sit in soapy water overnight. I used a dish scrubber and some paint came off, but not very much. (And this wasn’t baked!) It would be too tedious to use the end of a paint brush or a blade of some kind, so I’m going to look for a mild paint remover to speed the process. But just ordinary rain water won’t wash the paint off. Sure, it can get scratched like the paint on your car. But it takes some degree of force to scratch which is unlikely to happen just sitting out in the garden. Why not just do the test? Paint up your plate, bake it according to the directions on the bottle, and put it outside and see what happens. Let me know how it goes, ok?
Thanks for your response! I did buy the exact paints you displayed and cleaned as recommended.Also baked per directions.I will do another try and make it thicker.
Will let you know:)
Do you need to seal with a clear coat? Would that make it last longer? Love all your information, thank you for putting it out there!!
Lori – that’s my question too. I’d think it would help but a clear varnish can also yellow over time so maybe not the best idea.
If you use anything, try clear spray paint…Rust-oleum makes a good one. It comes in gloss, semi gloss and matte finishes, I believe. Product says on the can it seals and protects. I have used it on other things but not glass dish flowers. All paint eventually fades. A friend in my neighborhood got about 3 years of good color from the one I made for her before she noticed the fade. It went from a vibrant pink to a soft, pale pink. But the paint (glass enamel) was still intact and held up well. ‘Folk Art’ brand Enamel paint is probably the best paint for outdoor crafts. My next experiment is to try the clear coat and see if it helps prevent fade and give longevity to color. Even lawn furniture needs a touch up at some point.
When you seal painted clear glass with clear uv Rust-Oleum to keep the paint from fading, do you paint both the front AND the backside? Or do you only spray the clear on the painted side?
I only spray the paint, b/c it’s exposed. It seals the paint itself an adds some degree of UV protection. (You’ll have to test that where you live). The layer of glass itself provides protection on the other side. It’s aggravating b/c according to the research I did, the bake-curing process (by baking a painted plate in the oven) IS supposed to “set” the pigment. HA! The only downside with using the clear spray paint is that it seems to dull un-painted glass so it’s not quite as sparkly in the sun. (the clear spray doesn’t show, but I’m extra picky b/c I sell my artwork.) So I have been masking off un-painted glass which depending, can be a tedious process. Therefore, I am also experimenting with using a clear, un-tinted exterior wood sealer which can be applied with a brush. (rather than spraying) A THIRD option: I just recently discovered a different brand of outdoor craft paint that seems to have good reviews. I’ll be writing a blog post about it soon. It’s called Arteza (acrylic) that comes in 24 fade-resistant colors. Maybe this brand will at least look better for longer? Weather is hard on everything outdoors.
Hello!
I am so excited to have come across your articles and detailed instructions for very beautiful projects. I plan to make some of your plate flowers using a set of plain white plates that were meant to go to a thrift store. I am very excited to get started! Thank you for this introduction to a new crafting world.
I wish I had found your articles sooner, as I made a few glass flowers without having your very important tips. Oh well. Now I know.
It’s a learning process for all of us!
I’d like to join the community, but I cannot find a link to do so.
If I need to do something other than give you my name and email below, let me know!
Thanks for the tips!
Thank you Erika, and my apologies. I have discontinued my newsletter. After four years having reached just over 5,000 subscribers, it was getting costly as we have to pay for the newsletter platform. I don’t have ads on my site or sell products. Besides that, I needed to turn attention elsewhere for personal reasons while still maintaining the website and writing new posts. I need to go back through my posts and remove those links for the community. Thanks for your interest though. If you ever have questions, you can always contact me here. Happy Gardening!