
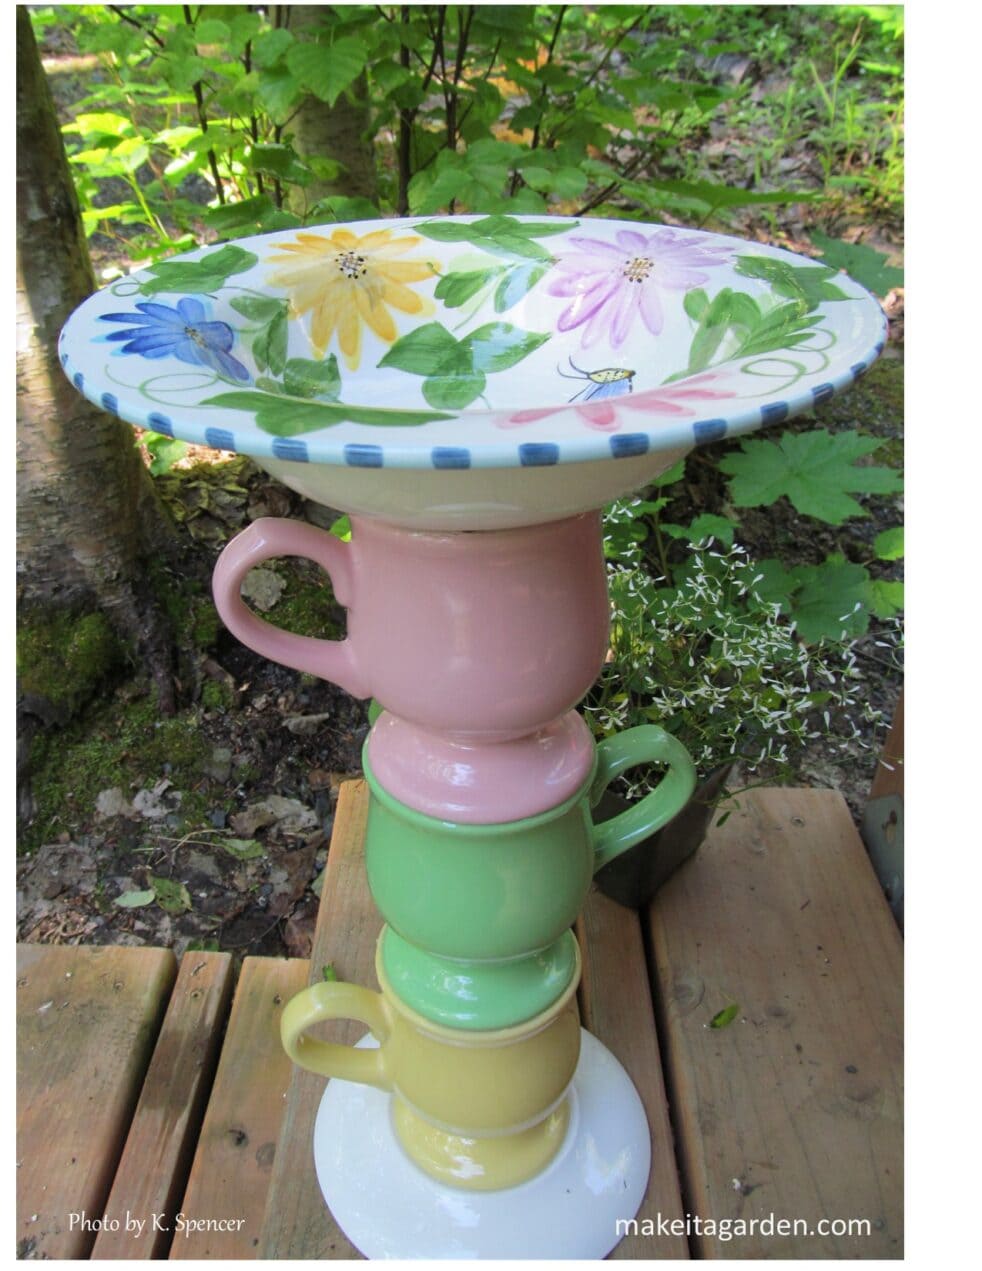

Gallery of birdbaths and feeders
Springtime is Here!
I love to have pretty things in my garden, don’t you? Even if they aren’t used for their intended purpose, my collection of birdbaths and feeders are lovely among the flowers. Plus, they’re a good incentive for weeding. If I don’t get in there and do it, the weeds will grow up and hide my garden decor.
This gallery features handmade birdbaths and feeders made from dishes created by Make it a Garden. I hope it will be a source of inspiration to you if you’re a DIYer wanting to get some ideas for your own projects.
The photos below show how birdbaths and feeders can be made with just a few pieces of dishware. If you’d like to see how I make mine, click the link below:
“How to make the prettiest birdbath in the garden”


You can incorporate Spring and Easter themes by using dishes with bright colors or patterns. You can also include things like bunny figurines, little birds, birdhouse or nest with eggs. In the birdbath below, I enclosed the rabbit in a fish bowl-type vase.


When I use figurines like this bunny in garden art, I always treat it first with a product that helps to delay or even prevent the colors from fading. If you have lawn ornaments you put out each Spring, you might find the link below very helpful:
“How to prevent resin lawn ornaments from fading” by Make it a Garden


Bird Feeders
Hungry birds aren’t picky about how their food is served up. But for you and me, we like to have a little fun in the garden. Using teacups or other vessels that hold birdseed brings some charm to the porch or patio. Feeding birds makes us happy.
Teacup feeders are super simple to make. In fact, it’s a good project to do together with younger children. See my bird feeder tutorial below:
“How to make pretty bird feeders from tea cups” by Make it a Garden


An old gravy boat makes a whimsical hopper for your birds’ favorite treats. There’s room for more birdseed on the bottom plate.


A pretty decorative plate and a couple of candlestick holders make a lovely tray for setting out seeds or other goodies on the back deck. It goes without saying, but to make pretty birdbaths and birdfeeders, use pretty dishes. You might have to shop around a bit at thrift stores and garage sales, but it’s worth it!
Finally, for making your own garden treasures, you’re probably asking the question: “What GLUE do you use?” I’m so glad you asked! In most, if not all of the decor in the pictures above, I use GE 100% silicone. It’s the best stuff there is for exterior use. It’s made to seal the outer edge of windows, so it has superb strength and durability for glass (and ceramic) surfaces. Plus, it’s easy to work with.
Here’s a detailed, but also very helpful introduction to glues and adhesives for garden art. Read it here:
“The Two Best Glues for Garden Art” by Make it a Garden
Thanks for visiting

I hope these photos and useful tips will inspire you to make birdbaths and feeders for yourself this summer. Because there is such a wide variety of dishware out there, you can make garden art to match your style or favorite colors.
I’d love to hear from you, so please leave a comment below. Please “like” our FaceBook Page to see more unique garden art, or consider joining our little group of garden art lovers below. Have a great summer learning and creating!
Learn more about birds: NATIONAL AUDUBON SOCIETY
The form you have selected does not exist.
Thank you, Kris for all the wonderful tips and tricks for creating garden art! I think I’m going to pick up some GE silicone in the next week or so and try my hand at making some myself! Your articles and especially the photos are sure inspiring!
Thanks for your kind words. But you’re doing exactly what I did. I just started picking up some glass and ceramic pieces from my local thrift store and a tube of silicone and began experimenting. Have fun!
Oh, Kristen, I feel like I have found a kindred spirit. 😊 💗 Our tastes are so similar
and I have just been oohing and ahhing
over your creations. You have inspired me to actually put my ideas into action.
You are truly an artist and I love how
giving and sharing you are with information and how to’s…you are a blessing!!
Thank you for your kind words; you lift my spirit. I’m thrilled that you’re going to start making your own things…it’s so much fun! Thanks for taking the time to drop a line. Let me know if you have any questions, I’m always available. ~ Kristen
Amazing… but not w-the dreaded squirrels I have, oh do they stress me out
Kristen, Im sooo grateful to have come accross your blog!! I started creating garden art years ago, before it became extremely popular!! I went through a LOT of trial & error with glues, ways to attach the plates to a post, and using rebar (or not!) inside the posts! It got frustrating at times because there really wasn’t enough information out there to help me at the time, but I LOVE to create and just kept experimenting! Ive moved homes since I stopped making my garden art (3 years ago) and brought most of my creations & supplies (LOTS of plates!!) with me. I always thought I would want to try again “some day”! Having read your posts and seen your beautiful works of art, I am definitely INSPIRED to start again!! Now I am equipped with great & helpful information to make the process much easier & more successful!!!
I really can’t thank you enough for all the valuable information you have provided! 😊👍
I’m so touched by your remarks. Thank you. I’m also glad to hear that you’ll be making things again, because it makes you happy and brings you joy. Feel free to contact me anytime if you have questions.
I especially love the one with the pink twisted center. What was that pink pc originally? I will have to keep my eye out for a shape like that!
You did a great job creating all of them!! ♥️♥️♥️
Referring to the pink-colored birdbath shown with teapot? The pink “twisty thing” is a resin candle pillar spray-painted pink to match the bowl. Candle pillars work well as a base and can be painted all kinds of fun colors!