

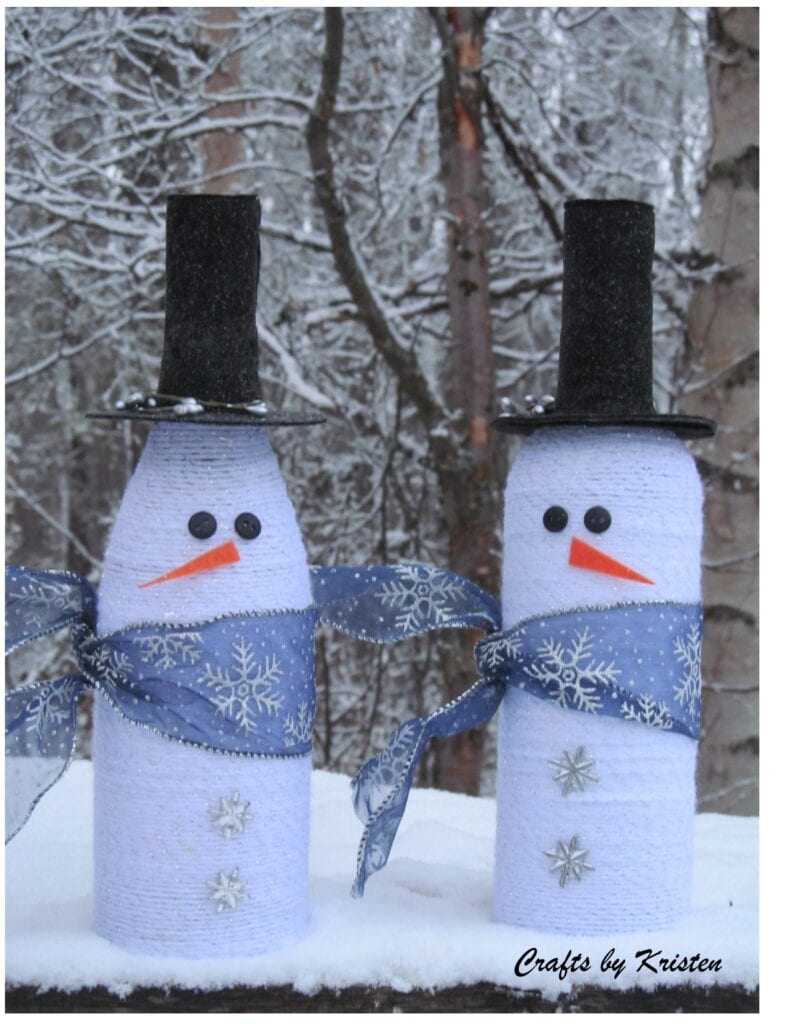
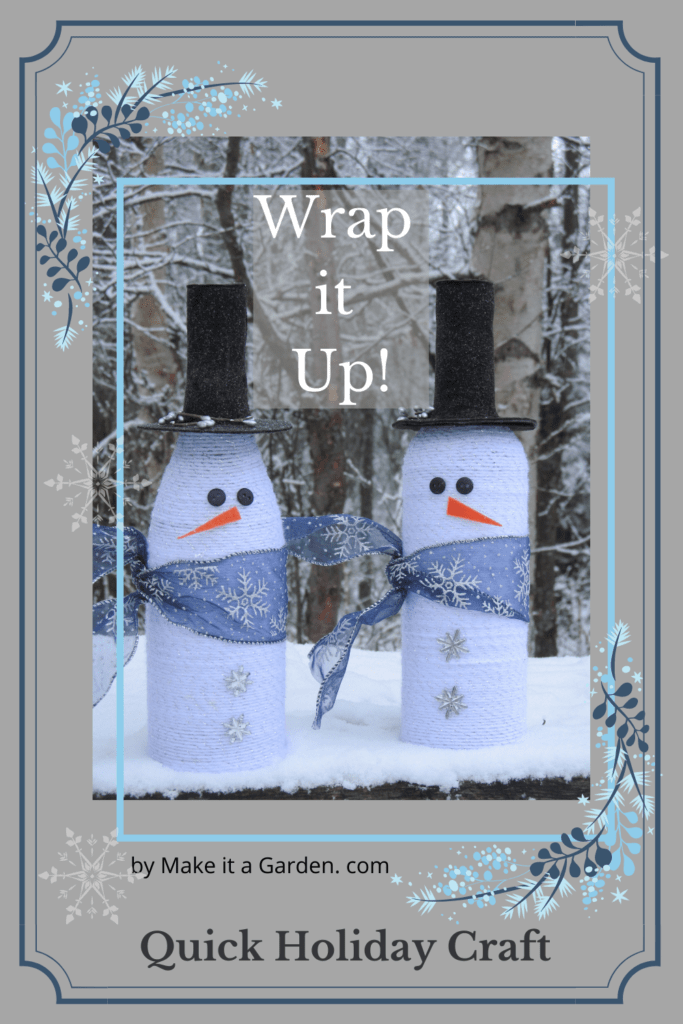
Looking for a last minute holiday craft? Wrap one up in under 30 minutes with this cute wine bottle snowman.
He’ll make great table centerpiece or addition to your snowman collection. Either way, it’s a clever but inexpensive upcycle craft you can make yourself with materials you may already have on hand at home.
Wine bottles are available at some thrift stores. You can also check with your local recycling center that recycles glass. I happened to have a neighbor who was giving away a couple cases of bottles leftover from a wine-making hobby. He just wasn’t doing it anymore and the boxes were taking up precious room in his garage.
Naturally I snatched them right up intending to use them in garden art. But with the holiday season approaching, I discovered a few more fun ways to create with wine bottles.
How to make a wine bottle snowman
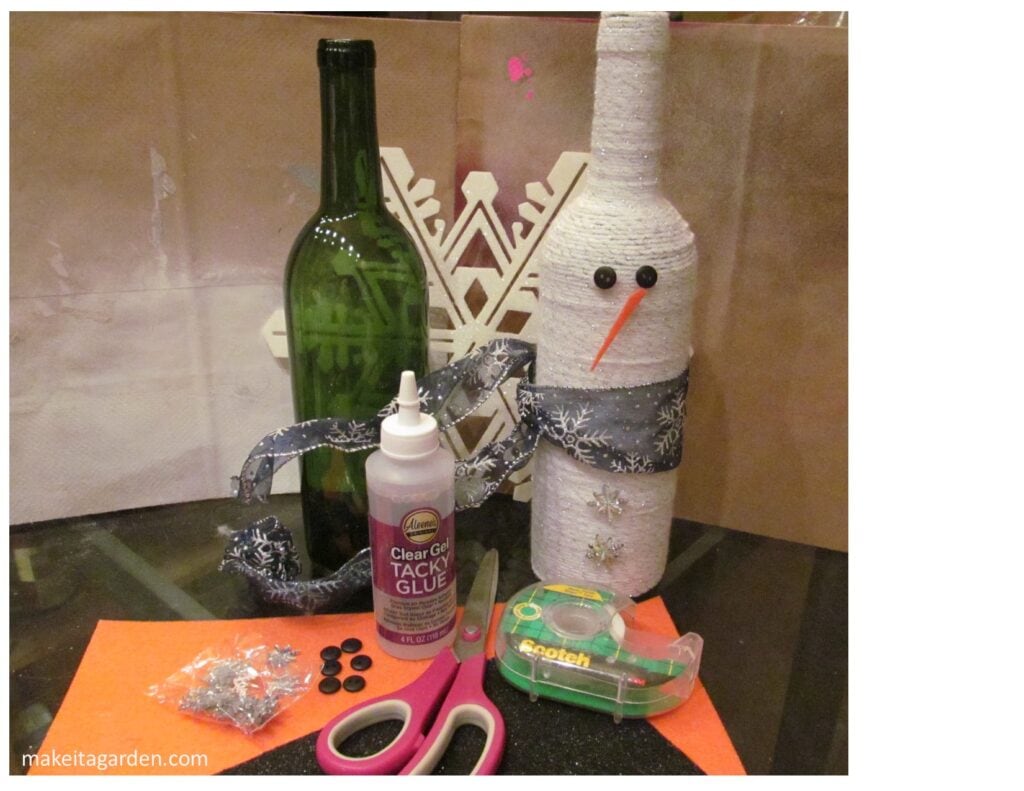
Materials:
- Wine Bottle
- White Yarn
- Glue
- small buttons
- thick Felt, black and orange
- Ribbon or strip of material for scarf
- snowflakes (optional)
- scissors, scotch tape, glue
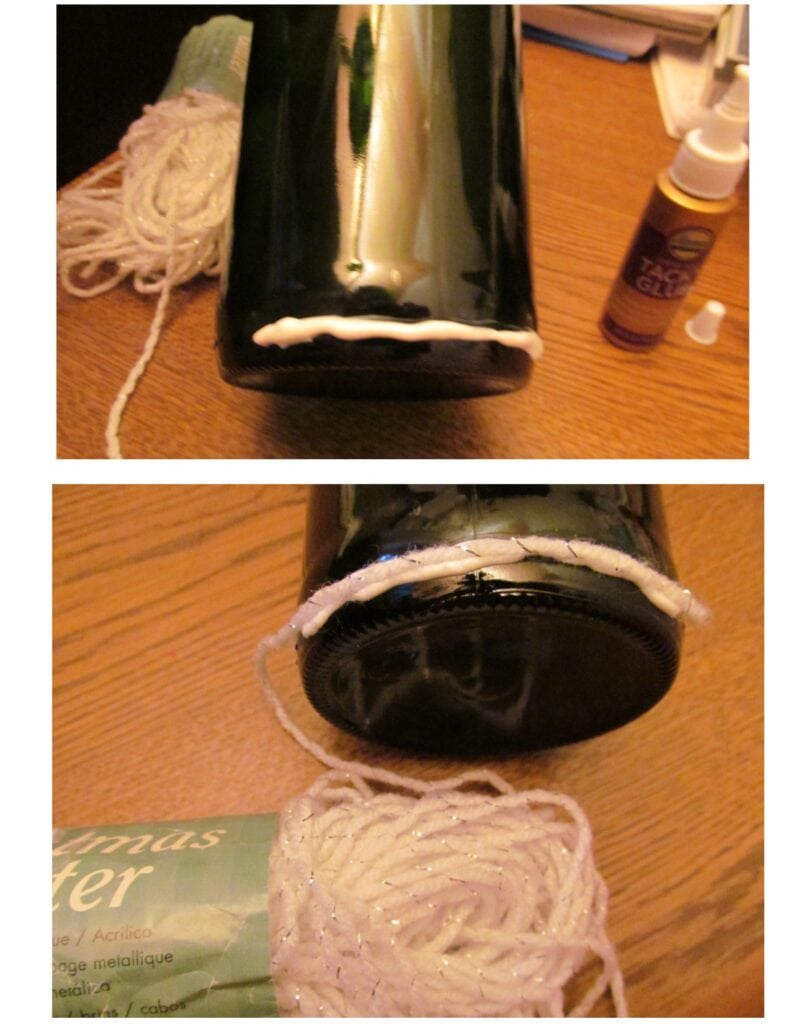
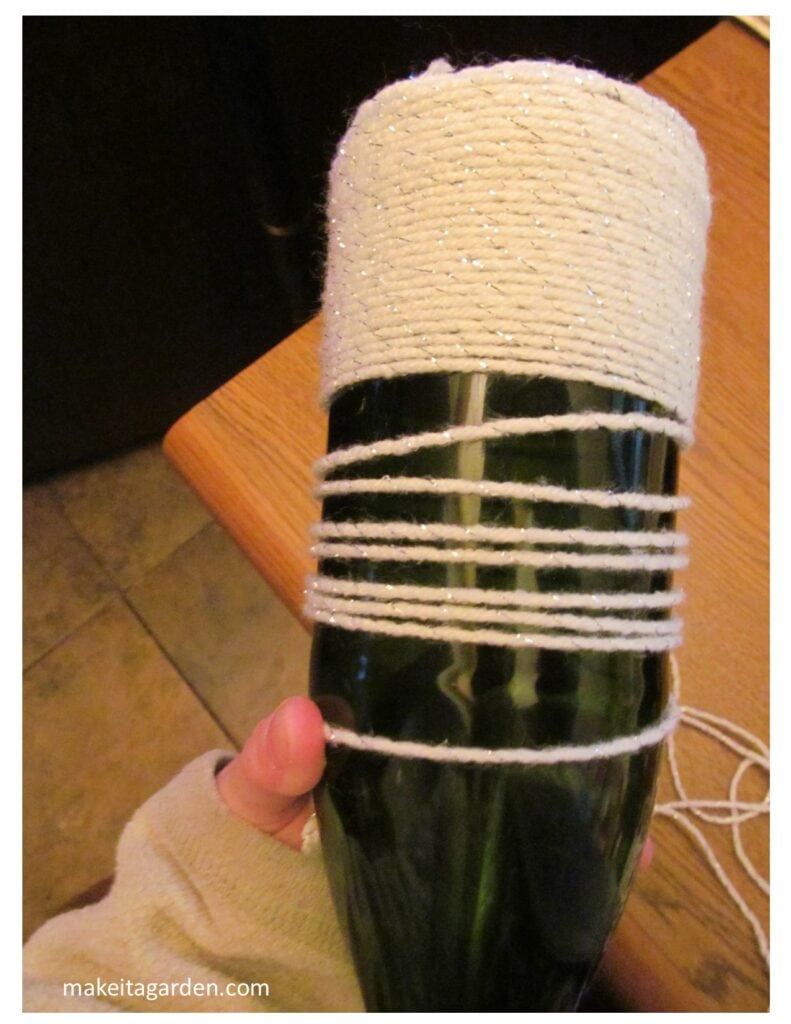
Step 1: Starting the first row of yarn
CLEAN: Wash the bottle inside and out with warm, soapy water. Remove labels (if any) and any sticky residue from the label. Dry with a towel.
WRAP WITH YARN: Starting at the bottom of the bottle, place a thin line of glue along the bottom edge. I prefer clear glue, but it doesn’t show up in a photo.
Lay the yarn on top and press lightly in place. Let it sit for a minute to grip. Lift the bottle and carefully wind 2-3 strands in a row. Gently push the rows of yarn downward against the 1st row. Use a bit of glue if you need to in order to hold the strands in place. Allow it to sit for a few minutes to grip. Once it is “set”, the rest will wind up very quickly without using glue.
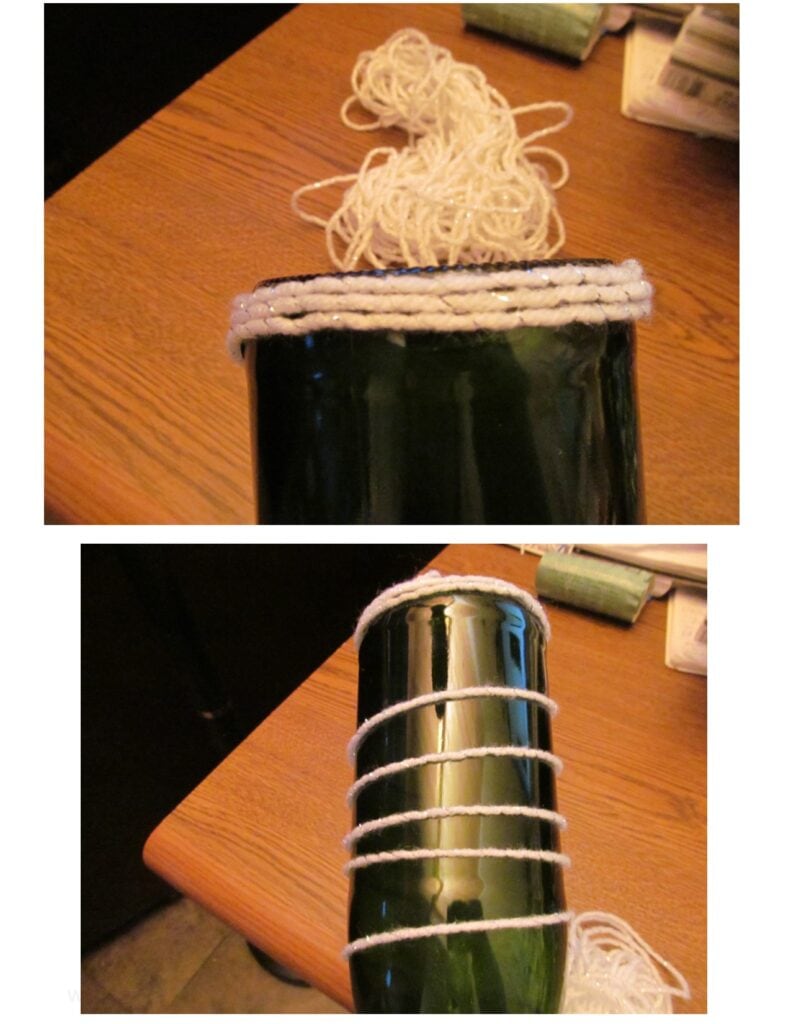
A super quick way to wrap the bottle
With the bottom rows “set”, wrapping the rest of the bottle goes very quickly. You will NOT need any more glue for this part!
This technique is kind of like wrapping kite string around the spool. Hold the bottle by the neck and twirl it around the yarn. Hold the yarn firmly in the other hand, but do not pull it tight. Wrap several rows of yarn around the bottle and gently push them together snugly. The yarn slides easily down the surface of the glass without criss-crossing.
Once you’ve reached the shoulder of the bottle, it get’s a little slippery again. So at this point, you may need a bit of glue again to hold the yarn in place. Continue wrapping all the way up the neck.
At the very top of the neck, you’ll need to glue the top strand of yarn to the bottle to hold it all together. Voila!
Step 2: How to Make the Hat
Creating a pattern
Personally, I like to create a pattern before I cut into my material. To be honest with you, I don’t gauge size real well. How big do I want my hat brim to be? I like to see how something will look first, so I make a paper cut out.
Please know that there is no “right” or “wrong” here… only creative preferences. The hat gives a lot of personality to the finished piece, and I just want to make sure I’ve got the measurements for what I envision. This way, I’m not wasting time or materials.
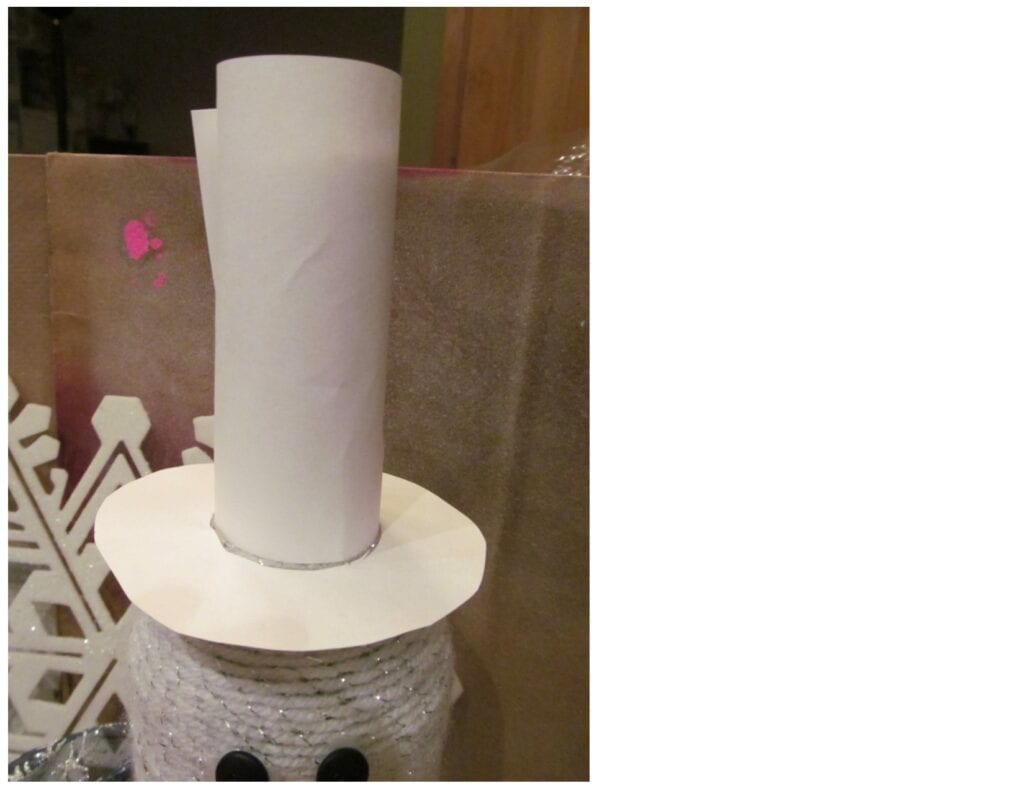
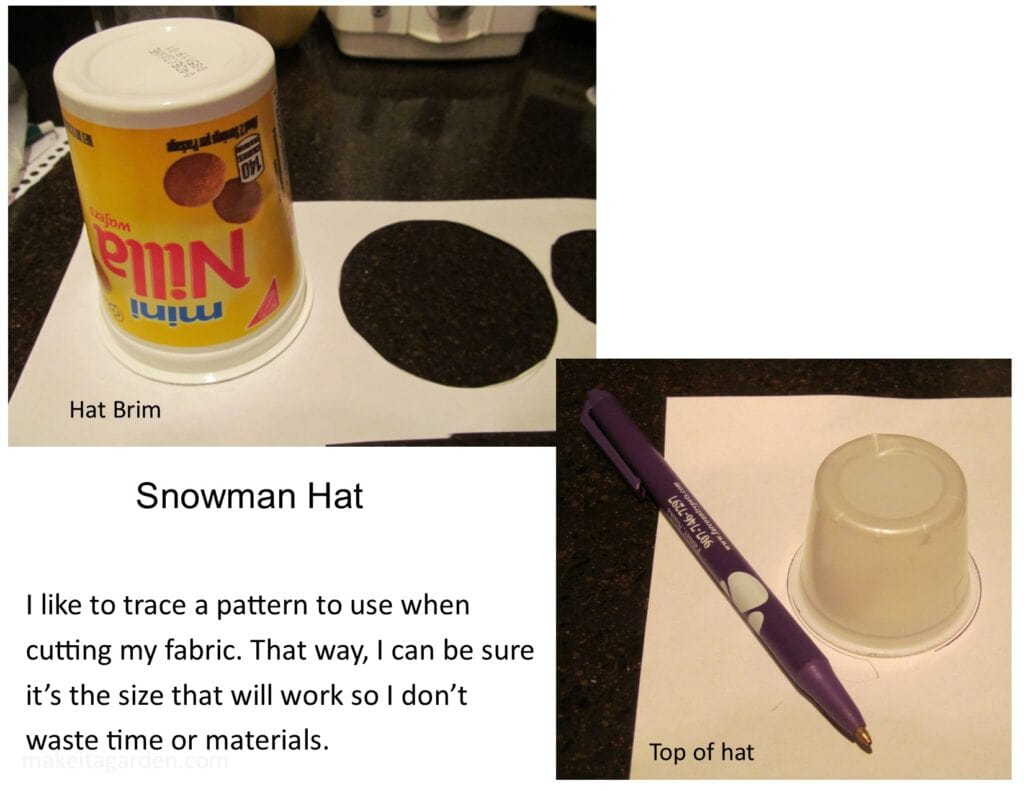
USE THE BLACK FELT to make the hat.
Thicker, stiffer felt is easy to work with and gives a crisp look to the finished piece. Use plastic containers to trace the hat pieces onto the black felt.
Cut a hole in center of hat brim and slip it down over the neck of the wine bottle. Cut a strip of black felt to wrap around the neck of the bottle to make the “crown” (vertical part) of the top hat. Glue it in place. Finally, cut a smaller circle to cover the top of the hat. Glue it in place.
NOTE: The wine bottle gets wider as it tapers, so you may need to cut out a larger center so it fits into position. This will depend on the shape of your bottle.

Step 3: The FUN Part!
Get out your box of craft odds and ends and have fun decorating your wine bottle snowman. You could spritz him with glitter spray. Add buttons or little plastic snowflakes, use ribbon to make a scarf and matching hat band. Give your snowman (or snow girl) a big dose of character!
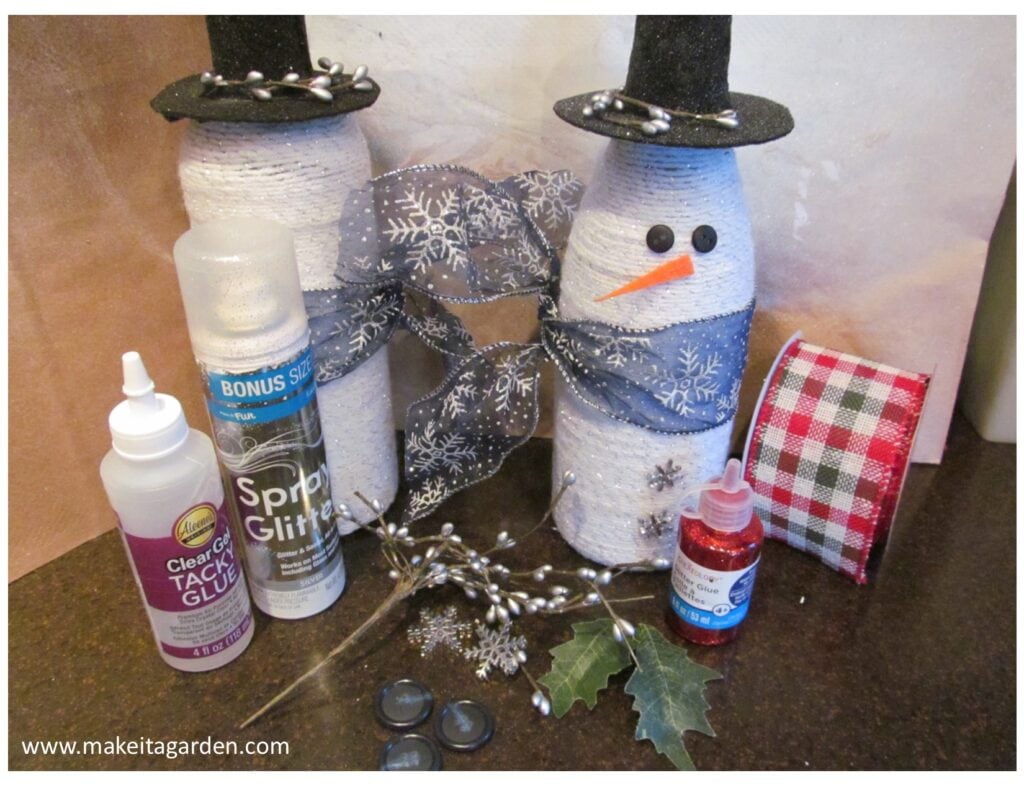
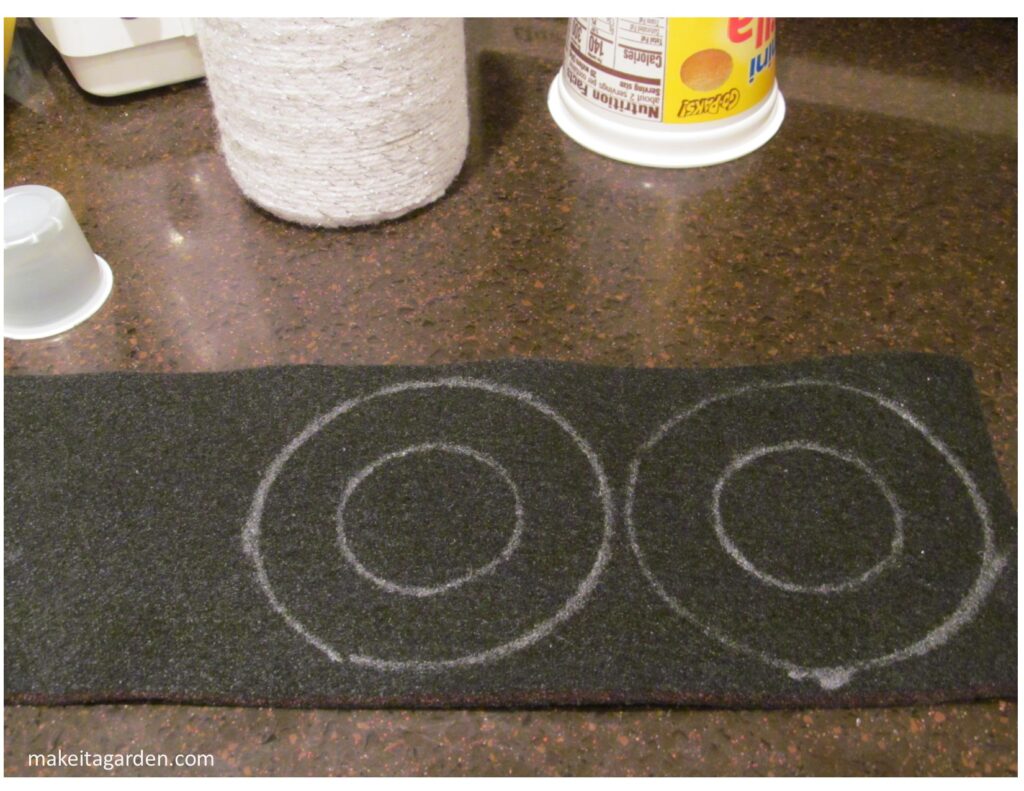
Glue on buttons for the eyes. Cut a sliver of the orange felt and glue on for the nose.
TIP: Not that it matters, but I put the ‘scarf’ ribbon on first because it helps me determine better where to position the eyes and nose. I found a bunch of this glittery wire snowflake ribbon for 50 cents at my local thrift store. The wire gives it some shape and I can just twist it without using glue. But you can cut a strip from any Christmas-y or wintry fabric, depending on how you want your snowman to look.
Final Inspirations
Make it a Garden is all about recycling and re-purposing crafts that are easy and inexpensive to make. These snowman fellas would make a great table decoration for a holiday party or fundraiser. Experiment by using different colors or types of material for the top hat and scarf to fit any style–subdued or outrageous!
After making a couple of these yarn-wrapped wine bottle snowman, it gave me all kinds of other ideas. For instance, use brown yarn and make a reindeer. Use red yarn and make santa! My imagination is really going now. But I’m tryin’ not to use up all my bottles so I’ve got some left for garden crafts.
Did you make the snowmen? What did you think? I sure would appreciate your feedback in the comments below. Thanks for stopping by and Merry Christmas!

Kristen specializes in up-cycled crafts. She has a reputation for quality and attention to detail, and her artworks show it. She takes such joy in making things “extra special”, especially during the holidays. Her craft posts may entail a bit more description geared to those who don’t make crafts on a regular basis. Even if you do, you’ll appreciate the thoughtful insights so your projects turn out beautiful!
More Holiday crafts to explore
Beautiful lighted wine bottles/How to drill the hole
Frosty, the glass block snowman
Make a Christmas flower with decorative plates
The form you have selected does not exist.