
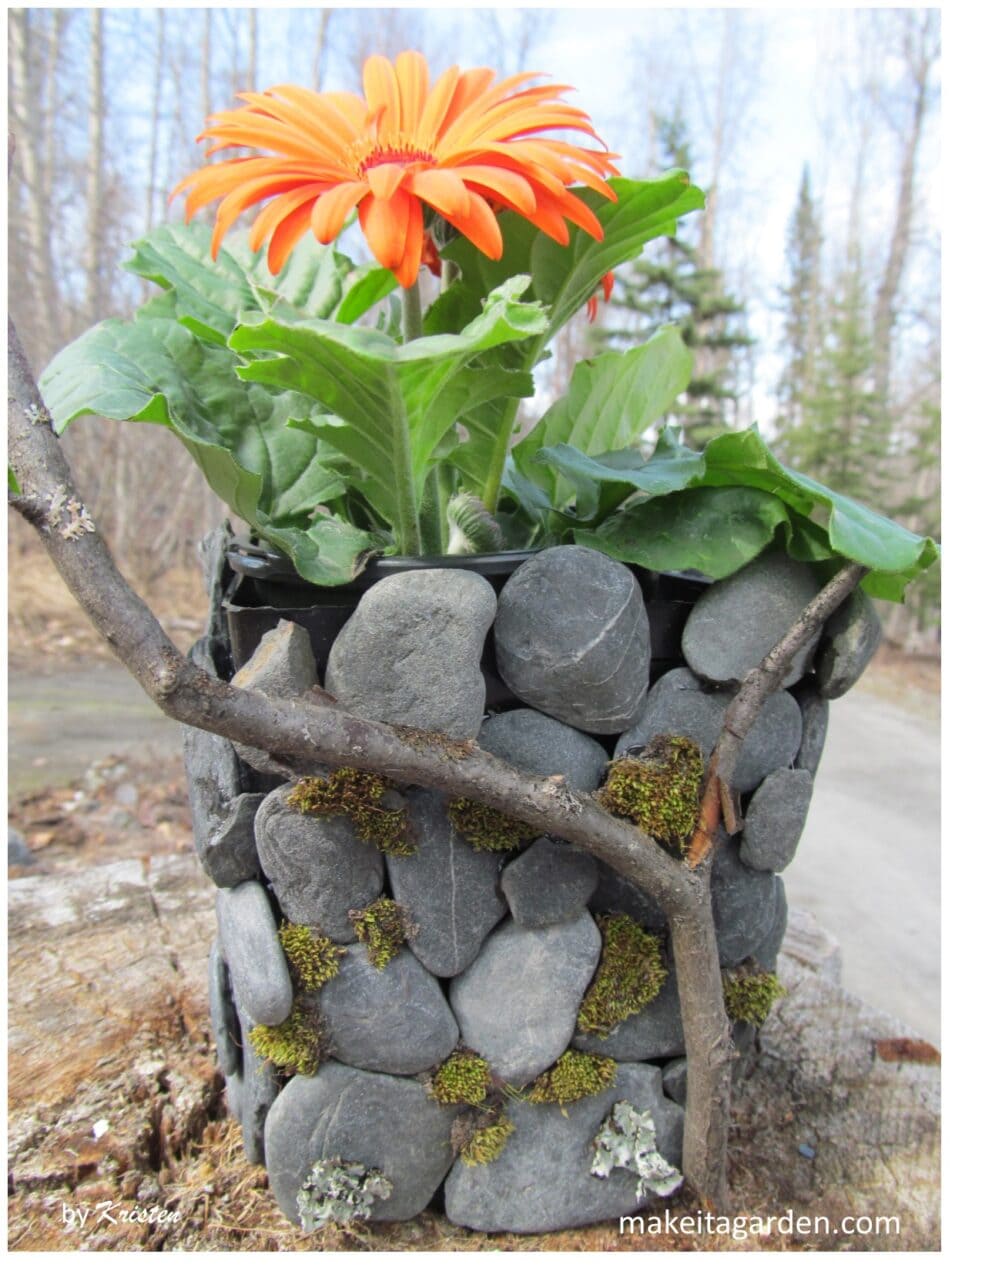

Decorative Flower Pot
Get a custom look by decorating your own flower pots and planters. I like to pick up old pots at garage sales or thrift stores and transform them into beautiful homes for my plants. I’ve also recycled those black plastic pots from the greenhouse. It’s a freebie, right? So why throw it away?
Here’s a way to give an old pot a rustic look with natural stone for use outdoors or indoors.
Instructions: decorative flower pot

Materials
- Black plastic nursery pot, or container of any size (square-sided containers are easiest)
- E-6000 glue(available at box hardware stores or craft store)
- small flat “river rock” type stones no larger than 1-2 inches
Note: try to collect the stones from a riverbank, beach or out in your backyard for your decorative flower pot. You can buy river rock at the craft stores, but its a bit expensive for a simple project like this.
Why use smooth stones?
Smooth stones have more surface that allows them to stick better when glued. That doesn’t mean the other side of the rock has to be smooth. Rocks with a little bit of texture adds interest. But at least one side needs to be somewhat smooth so it grips better.
Directions:

- Use a sieve (mesh strainer) to rinse the stones in water. No need to use detergent
- Lay the rocks out on an old towel to dry. You can even set them outside in the sun
- Wash the outside of the planter so you have a clean surface for gluing
- Lay the pot on its side. (Do one side at a time) allowing time for the rocks to stick before doing another side.
- Start by gluing rocks at the bottom. Make sure the stones are even with the bottom edge so the pot will sit level.
- Glue one rock at a time. Allow the glue a few minutes really stick before adding more rocks.

Why use E-6000?
I use E-6000 because it is made for outdoor projects, so it’s waterproof. It dries to a rubbery consistency that really grips. It doesn’t dry out, crack and fall apart. Nor does it melt like butter in the heat.
It’s a bit on the thin and runny side, but not too bad. And it does have a stinky, chemical odor so make your decorative flower pot in the garage or outside on the porch if you can.
STEP 1
Start at the bottom. Make sure rocks are even with the bottom edge.
Allow the bottom rocks to really dry first, before adding more rocks. Then you won’t have to worry about the pressure pushing the bottom rocks out of alignment. When the bottom rocks are secure, adding the rest of the rocks, are a breeze!

STEP 2
Continue to add more rock. Place them as close together as possible. There will be tiny spaces in between where the black pot shows. Don’t worry. Just fill in the gaps with smaller pebbles.
Be artsy! Rocks don’t have to be perfectly lined up. Place some rocks vertical, some horizontal. Maybe one sticks up a bit higher than the one next to it.
The top edge does not have to be even. Let rocks can peak up above top lip of the container.

Alternative ideas for decorative flower pot

Instead of rocks, use pieces of bark, sticks or twigs or a pinecone
Use a ceramic pot, instead of a plastic one
Spray paint the rocks for a more contemporary look
Paint someone’s name, a phrase, or a little flower on the rock.
Being somewhat of a nature girl, I like the natural stone. To give it an even more “earthy” look, I glued on some pieces of moss, lichen from a birch tree and a twig.
Final thoughts
I hope you’ll have fun communing with nature during this little project. This is a great craft for older kids and teens. Encourage them to collect things they find on your next outing to the park. Then, after you get back home, they can use those interesting things they found to decorate a flower pot!
Speaking of which, please recycle those black plastic greenhouse pots. Don’t throw them away. If your local greenhouse doesn’t take them, try a botanical garden or your local Garden Club. Members can always re-use pots of any size for classes or growing more flowers and vegetables.
DON’T FORGET YOUR FREEBIE! I hope you’ll join our art and garden lover’s Community. Scroll down just a bit to sign up! You’ll receive “10 Artistic Ways to Make Your Garden Beautiful” and our monthly newsletter. No weeds (or spam)…I promise!

Thanks for stopping by and Happy Gardening!
More fun planter ideas to try
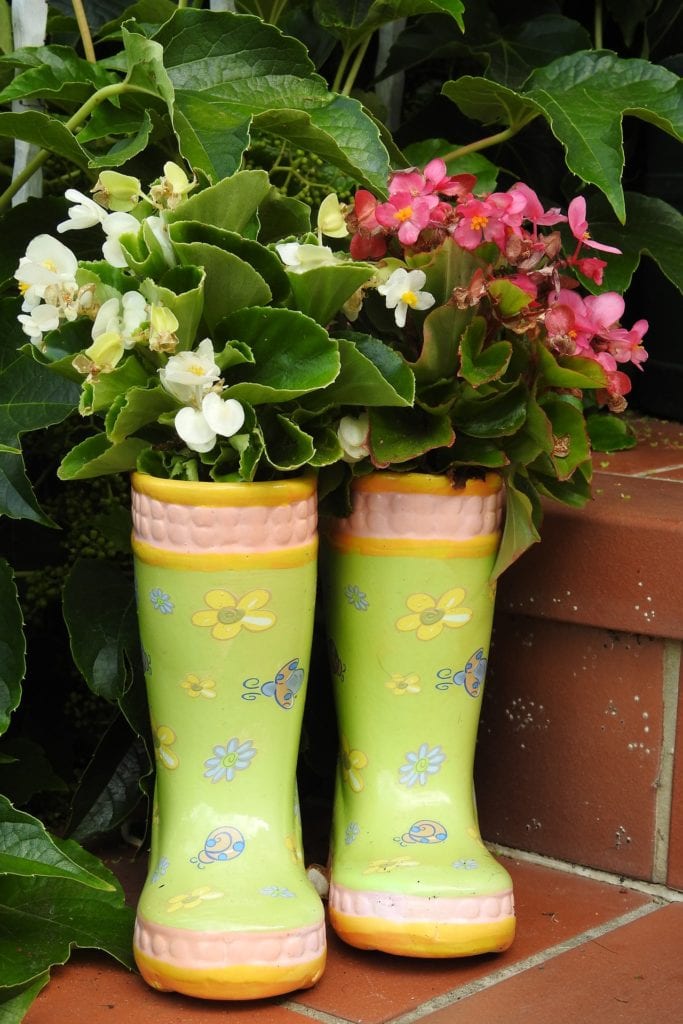
Boots make fun planters for flowers

Unique faux stone head planter
Bicycle and flower baskets display
The form you have selected does not exist.