

Styrofoam Head Planter
Would you like to add an exotic touch to your decor? Here’s a fun little DIY project that can go off in a lot of different creative directions. I first saw these on Pinterest and immediately had to try one.
The use of human form in garden art really intrigues me for some reason, so I was ready to experiment with this inexpensive craft project. There’s plenty of good tips along the way and additional ideas at the end, too!
This version is fairly simplistic. It’s also the first one I’ve ever made. You may find it a little “different”. But if you end up liking it, then you can try some of the other approaches and kick your creativity into high gear.
Materials for styrofoam head planter
- Styrofoam Head (most craft stores like JoAnn or Michaels)
- Faux stone spray paint (Hardware stores like Lowes or Home Depot)
- Small drop cloth
- Pen or magic marker
- Tape measure or ruler
- Serrated kitchen knife or other similar cutting tool
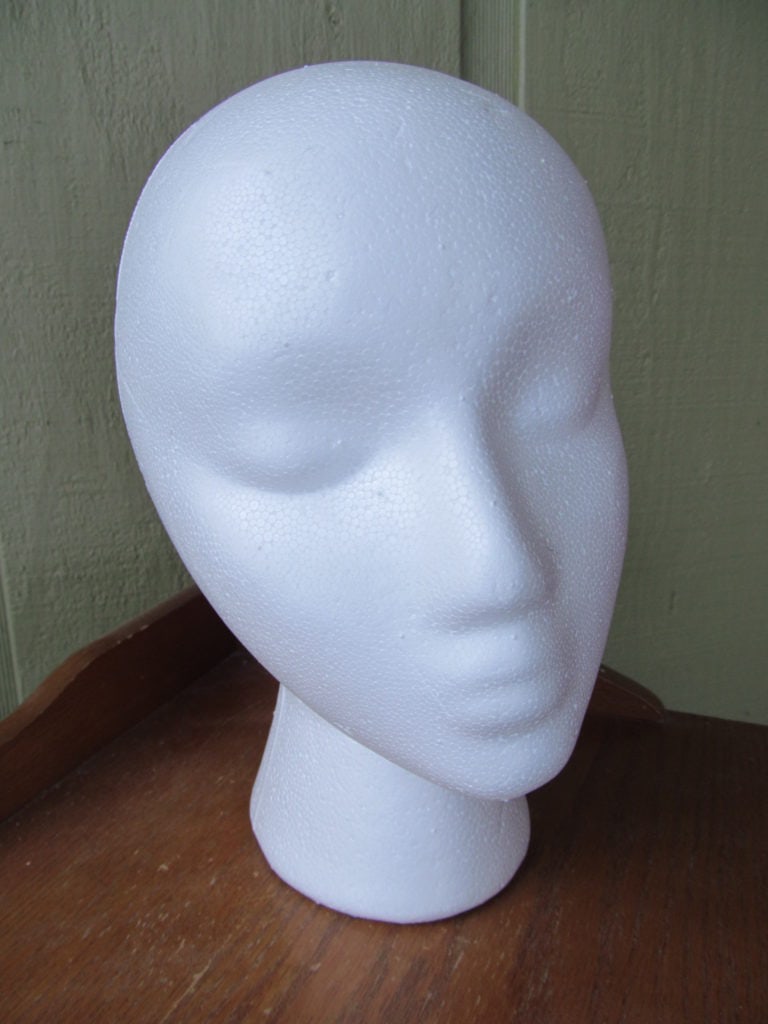
Styrofoam heads are readily available at craft stores like Michael’s or JoAnn for around $10.00 dollars. They are typically used by crafters to display knit or crochet hats, or polar fleece hats and headbands.
Directions for styrofoam head planter
TIP: working with styrofoam is messy! There will be lots of tiny styrofoam particles from cutting and scooping, so do this out in the garage or outside and use the drop cloth to contain particles. Prevent styrofoam particles from going down a drain.
1) Start by slicing off the top part of the head.

Mark your cut about 1-1/2″ above the eyebrow. The best way to do this is to turn the headpiece on its side. Use a serrated kitchen knife and cut straight across like you were cutting a melon.
Be very careful! Styrofoam is a bit difficult to cut. It’s not a smooth motion and you’ll have to do a bit of sawing.

2) Hollow out or “core” the center
Scoop to form a cavity. Don’t go too thin. Leave about 1/2 inch thickness around the edge.
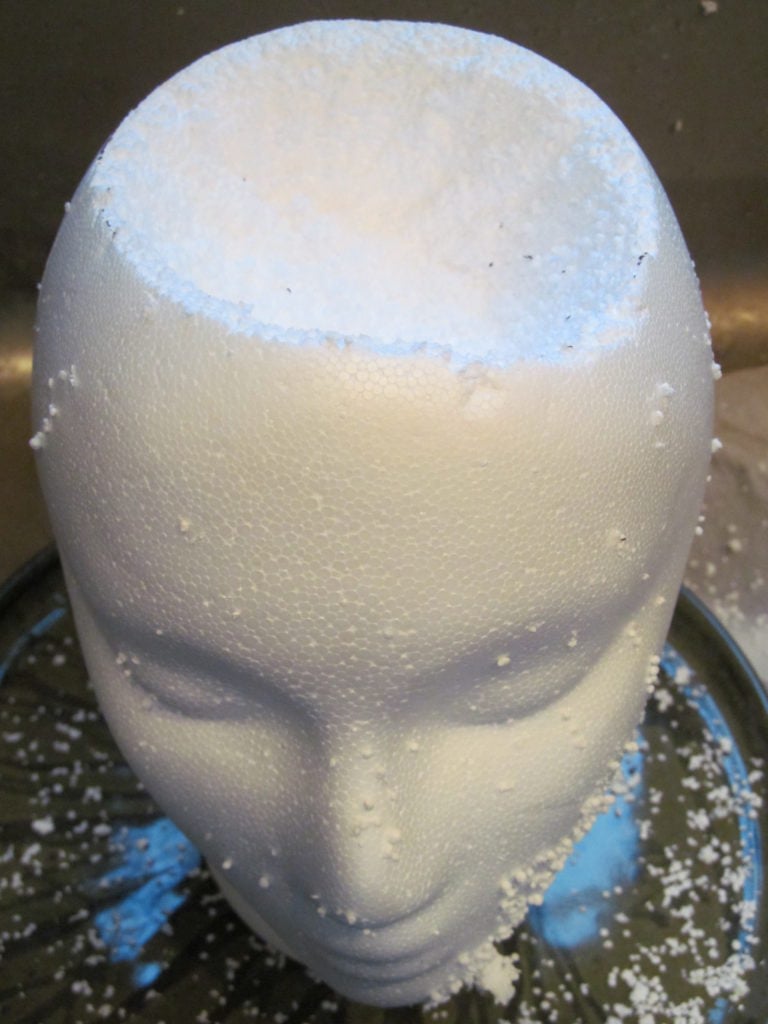
This step is similar to a Halloween pumpkin. Only it’s fussier with styrofoam. This part will also produce lots of particles. I tried using a small knife to core out the center, but again, it requires a bit of effort. You might also use a spoon to scrape the insides. Whatever works!
Use a file tool to smooth and even out the edge.
3) Make drainage hole
There’s a small diameter hole in the bottom of the headpiece, so you can punch right through to make a drainage hole for the plant.
Spray paint the head
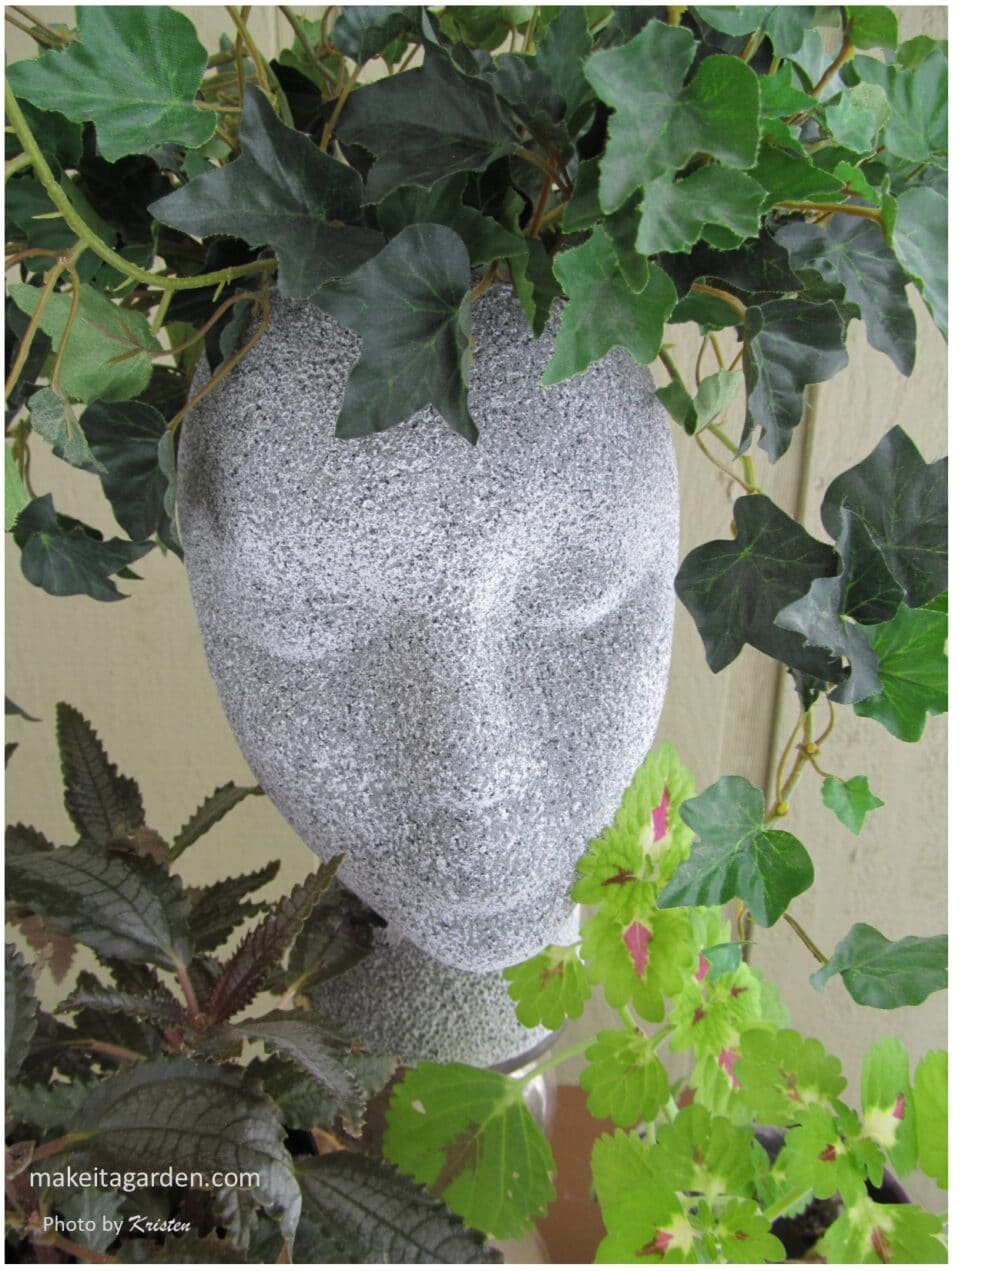
Spray paint the head with a gray-colored spray stone texture. I used this product by Rust-oleum, but anything similar will work. It has a really strong odor. Be sure to read and follow directions on the can.

TIP: secure the headpiece before spraying or the force of the spray may knock it over. It’s shooting bits of texture. One solution is to insert a wooden dowl or post into the bottom of the head. This will hold the head in place while you spray.
Note: The styrofoam will have a bit of a reaction to the paint. The chemical acetones in the paint dissolve (melt) the styrofoam creating lots of little pock marks. This does not “ruin” the piece as it’ll be hard to see. Actually, it helps to give it more of a natural stone look. But the texture conceals a lot of this anyway.
The product is coarse and surprisingly thin. The directions on the can recommend a light coat. Wait 15 minutes for it to begin to set up before adding a second coat. I suggest waiting longer, even until it’s dry to the touch. If it doesn’t dry enough, a second coat just gets runny. I used 3 coats on mine, to really get that desired stone look, but you do what you like.
ATTENTION: DO NOT place your styrofoam head planter outdoors where it will be exposed to rain. It will wash off. But under a dry, covered porch it will do just fine. I have heard some people suggest a sealer topcoat, but I’m not sure how that would work with styrofoam.

What kind of plant to put in it?
Styrofoam head planters look awesome with succulents, ivies, or a trailing flower such as bacopa. Verticle plants give a spiky, punk look, while trailing plants and flowers are soft and classical.
Creative Alternative ideas
Add Moss:
Some people dip a fine, ‘powdered’ moss in an adhesive and pat onto the headpiece to give it a more ancient appearance.
Get Artistic:
If you really want to go wild, you can spray paint the head any other-worldly color. Just a reminder that the spray-paint will produce pock marks. However, what at first may seem like imperfections actually adds to the ‘exotic’ look, not detract from it. Next, become a “make-up artist” and apply colors with a paintbrush. Add a headband, funky sunglasses and earrings (from the thrift store).

If you do not like the look of the pock marks and want a smooth finish on your face, here is a method to try. It begins with treating the headpiece with a coating of Elmer’s Glue. Video is just 3 minutes.
One more great idea involves a product called “ShapeCrete” which is pliable like clay and dries like concrete. It’s Portland cement-based. Use the styrofoam headpiece as a mold and highlight facial features to make an even more stone-appearing planter. See the excellent tutorial from Lily Ardor HERE.
In closing
I hope you’ll enjoy experimenting with a new craft. It’s fun to make your own whimsical planters. That makes it practical, too! If you enjoy these types of things, why not be a part of our art and garden community? Scroll down just a bit to sign up. I’ll send ya “10 Artistic Ways to Make Your Yard or Garden Beautiful”. Have fun and thanks for dropping by.

More unique garden crafts
Make a modern garden scarecrow with scrap wood
The form you have selected does not exist.
Very cool craft idea! I’ve also seen some green Styrofoam-like items such as animals in some of the craft stores.
Thank you Lorna—yes, like I said, there are LOTS of different spin-offs with styrofoam crafts. Many fun and whimsical ideas out there!
This was great. Thank you so much. I can’t wait to get started.
Thanks for visiting Make it a Garden. I hope you have a lot of fun and creative endeavor with your project! – Kristen
Just wondering if there is some way to seal the paint so you can have it outside .
Apologies for the delay. Concerning sealing styrofoam, I have wondered the same thing, myself. You could try a clear spray-paint top coat. The thing is, there will be tiny little pin-hole sized holes in the styrofoam that can trap water and dust/debris in the outdoors, which could promote mildew or moss eventually. You could also try researching on-line to see what ideas are out there that might work. I will try to do the same and if I discover something that works, I’ll update this post. Thanks for visiting Make it a Garden ~Kristen
I’m new! Very new!
Just wondering about the plant. Will the cut out head hold a small plant in a pot or do you plant directly onto the styrofoam?
Hi Carla, you can do either or…if you insert a plastic nursery pot, you would need to hollow out the head a bit more to accommodate the pot. But there’s more room for the plant if you just fill with potting soil. Remember, if you use the stone textured spray, it will wash off when exposed to weather. The styrofoam planter is better for a covered porch or patio or used indoors. I think these are so cool, I’m glad you like the idea, too! Let me know if you have further questions. Thanks for dropping by! ~ Kristen