

I’m not an expert gardener. The reason I’m writing this post is to share the benefit of my first-hand experience with strawbale gardening.
I’m not here to sell you on anything or get you to buy a product. Nope. This is just a straight forward, first-timers attempt at growing veggies using this method of gardening. We’re just a couple of neighbors talking over the fence.
I’ll tell you about the process, the results, and then give you my final verdict.
Strawbale gardening
I don’t know what you’ve already heard, but strawbale gardening is “different”. Therefore, a lot of people have their reservations about trying something unfamiliar. If you’re like me, you may have wondered how anything can grow in a bale of straw.
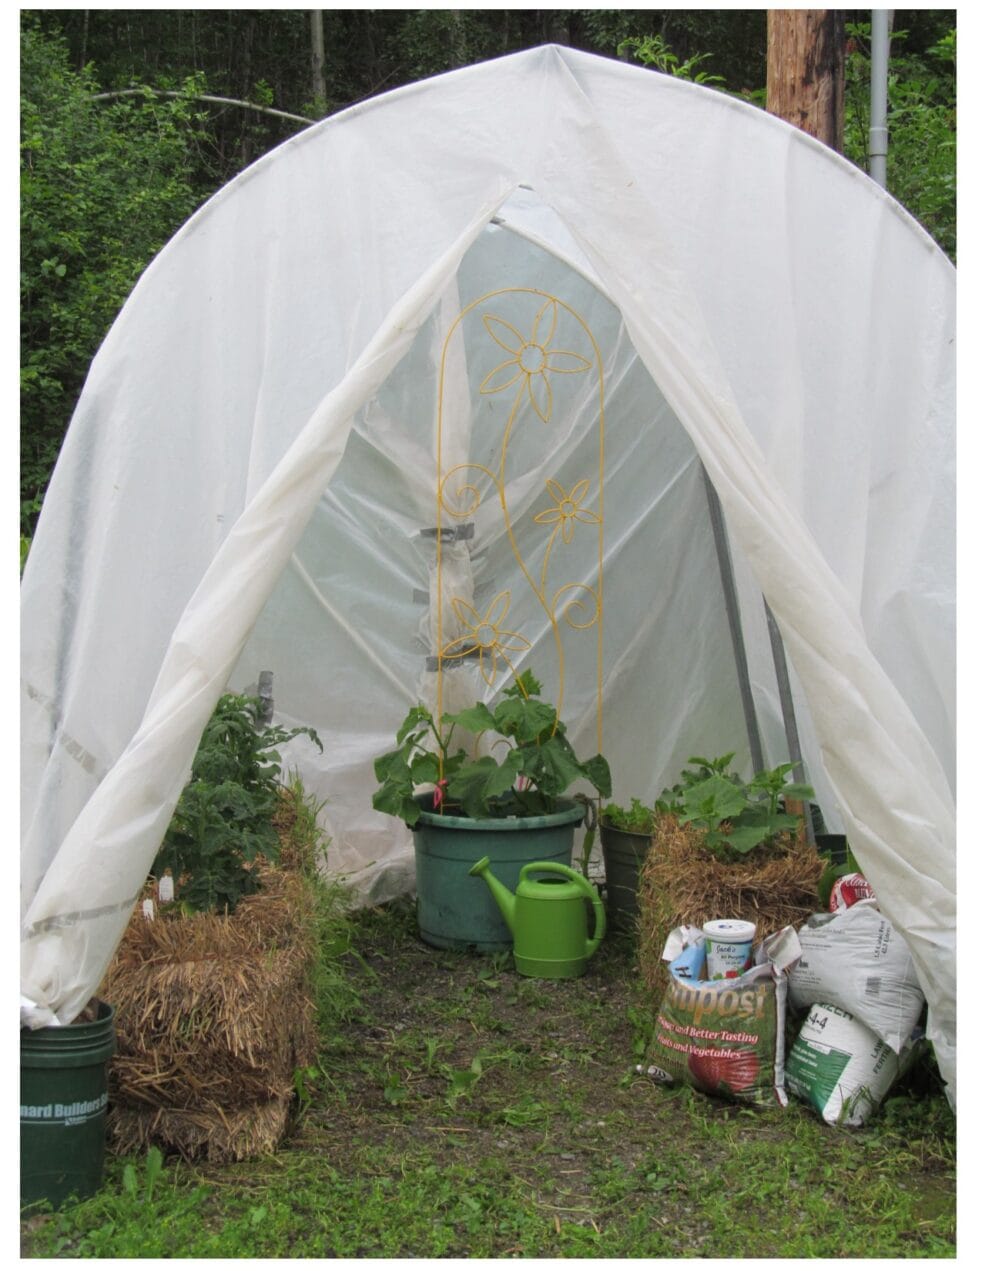
You almost have to know someone who’s doing it. And I happened to have a friend–a very accomplished backyard gardener– who talked me into trying the straw bales. She also gave me her old hoop house, an offer I couldn’t refuse!
A few good points
- bales are much less expensive than developing an in-the-ground garden
- similar to raised beds, keeping plants above ground for ease of care
- little to no weeding required
- straw allows for good root development
- bales essentially become as compost and provide nutrients (mycorrhiza)
I was open to giving it a try. Though I had always intended to get a greenhouse and plant a vegetable garden ‘someday’, things were not working out as planned. Going through a rough time financially made strawbale gardening a more attractive alternative. My friend referred me to a fellow who was known to have good quality bales at $10 dollars each. (be sure to get straw, not hay!)
Getting started
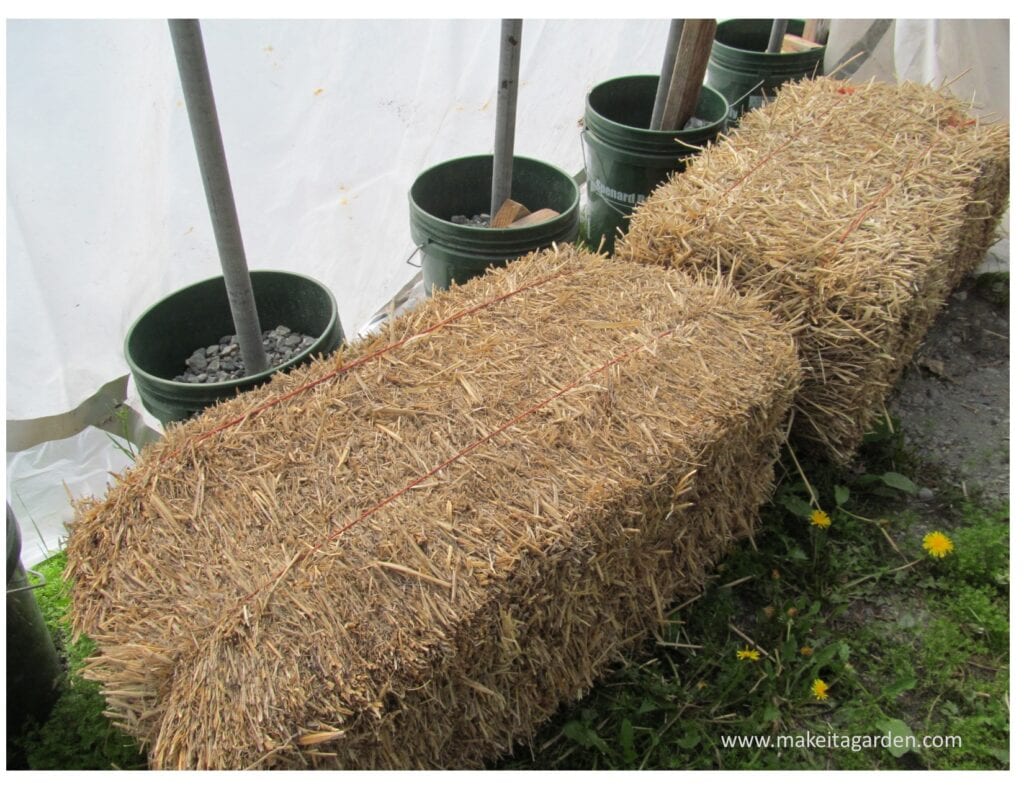
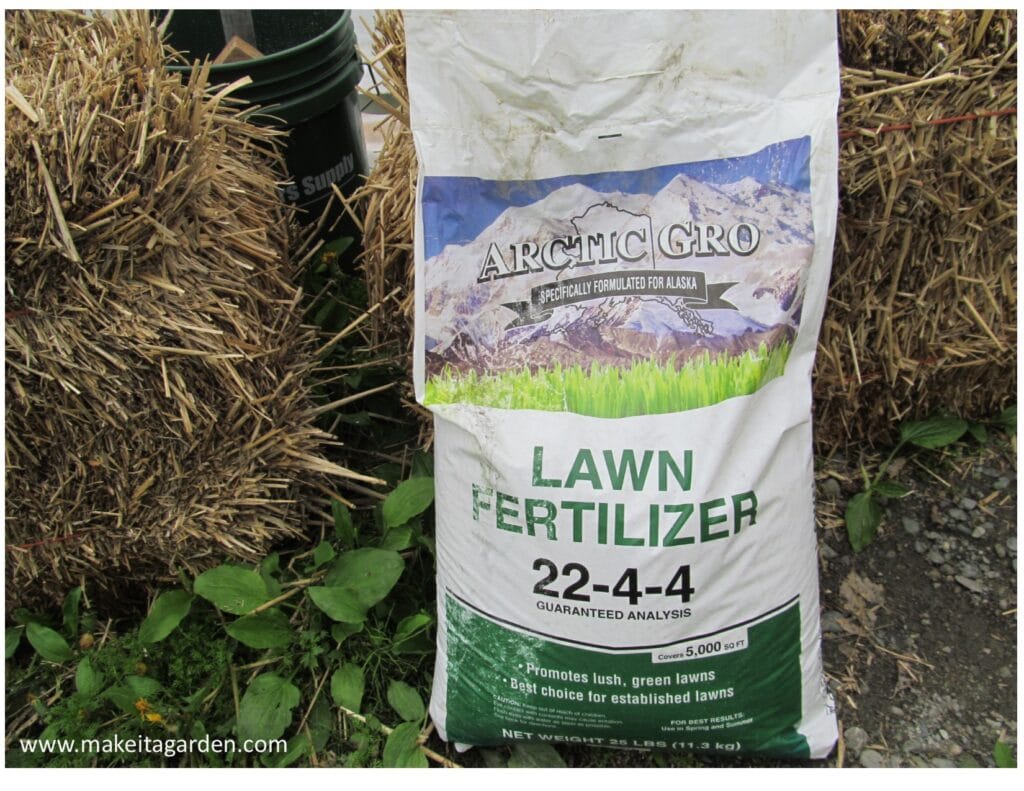
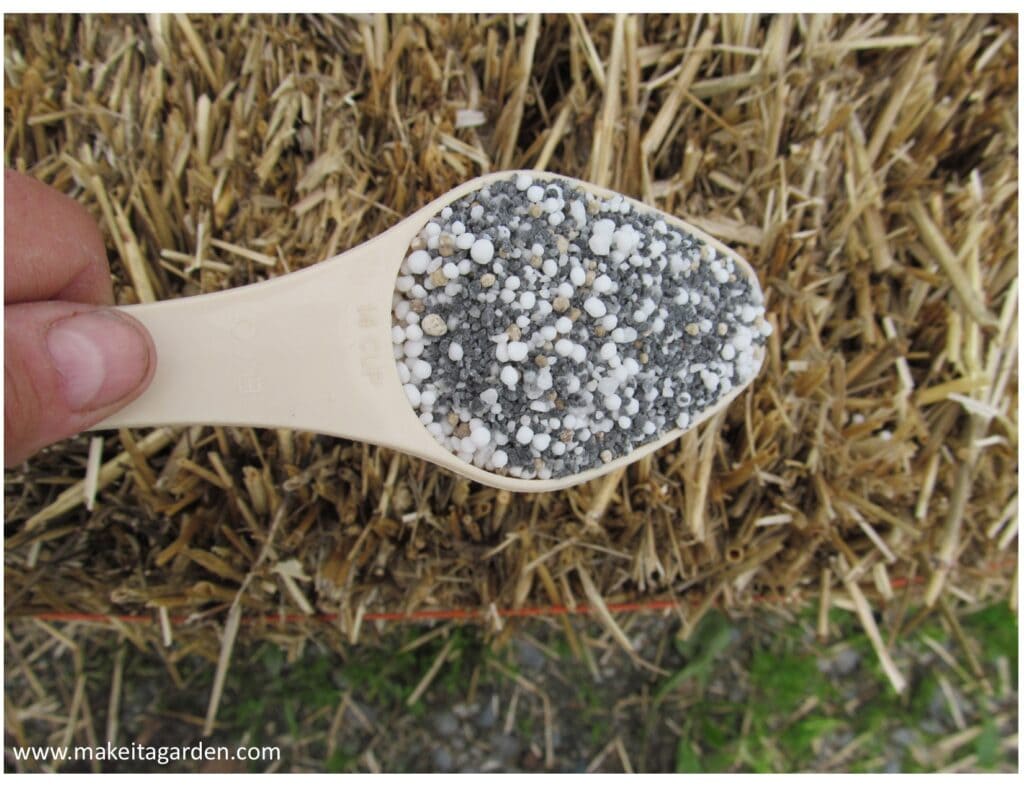
Straw bales require a 2-week period of conditioning to get them ready to plant. So you have to back time if you want to stay on schedule for your particular growing season. Each day during the process, you’ll be wetting down the bales and applying a high nitrogen fertilizer. (the 1st number) The water and fertilizer together helps to get the decomposition process going.
If you prefer, you can use an organic fertilizer such as bone meal, blood meal, or feather meal. Though I would dearly love to go organic, I live in bear country. I don’t want to attract them with delicious smells wafting from my hoop house, so I went with the standard 22-4-4 lawn fertilizer.
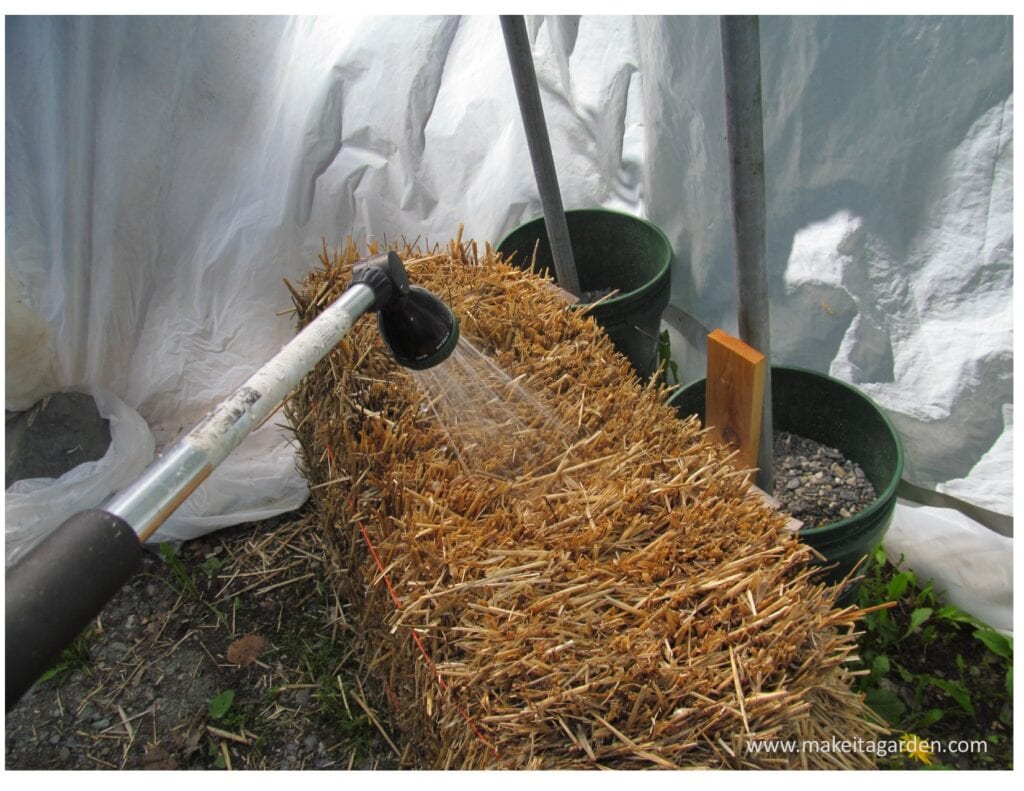
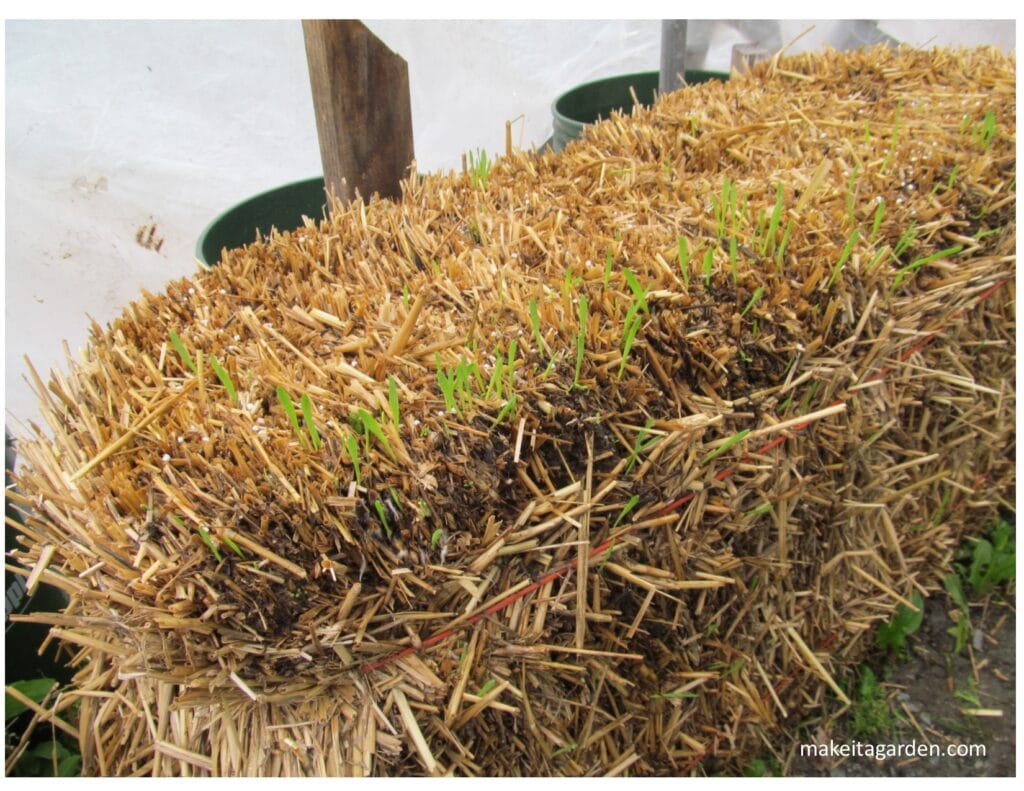
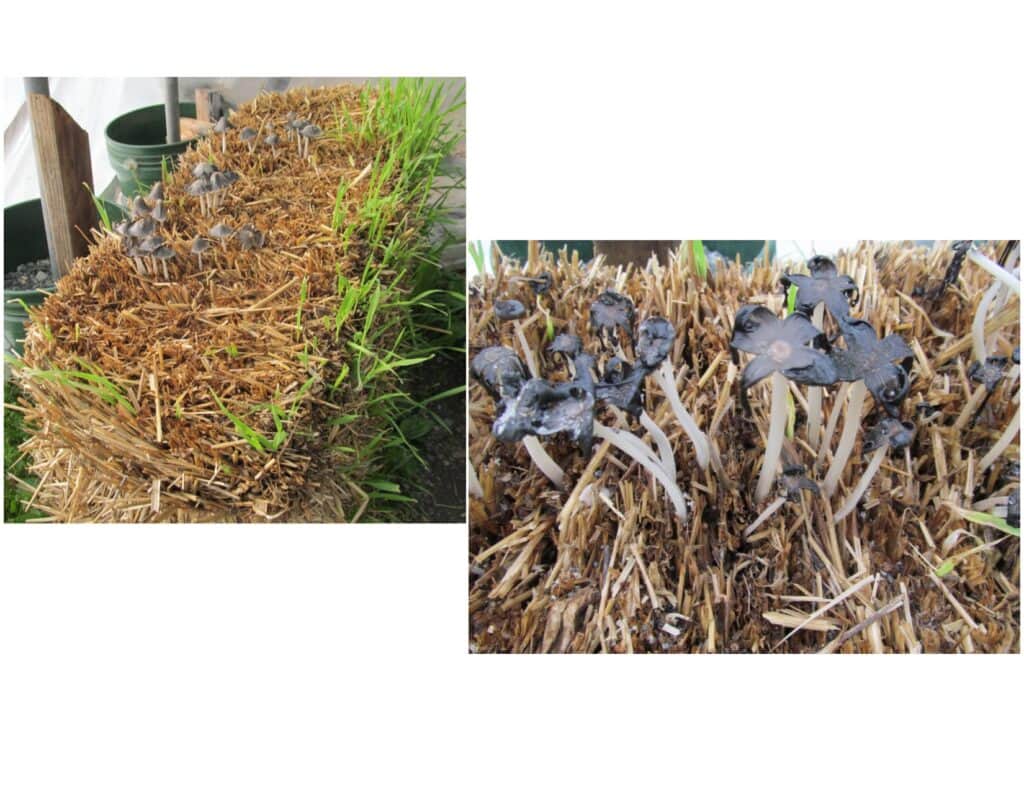
Here’s where straw bales get a little funky. After about of week of watering and fertilizing, bales have a tendency to sprout like chia pets. This is the only ‘weeding’ you’ll have to do. You can pluck it out by hand. You’re also likely to get a good crop of icky mushrooms. (not edible)
Believe it or not, this is actually a good sign that the conditioning process is working and the bales are breaking down and decaying. About this time, you’ll notice a slightly unpleasant odor kind of like ammonia. Both the mushrooms and the odor disappear in a few weeks. Again, it’s an indicator that things are progressing well.
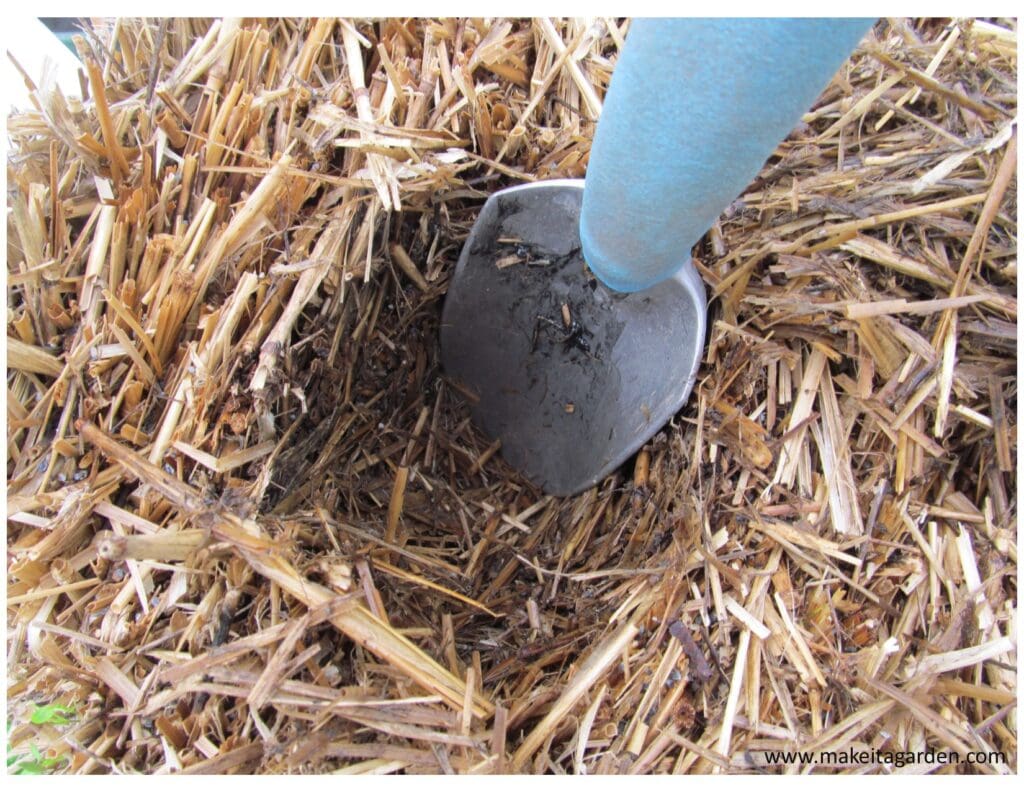
Planting in straw bales
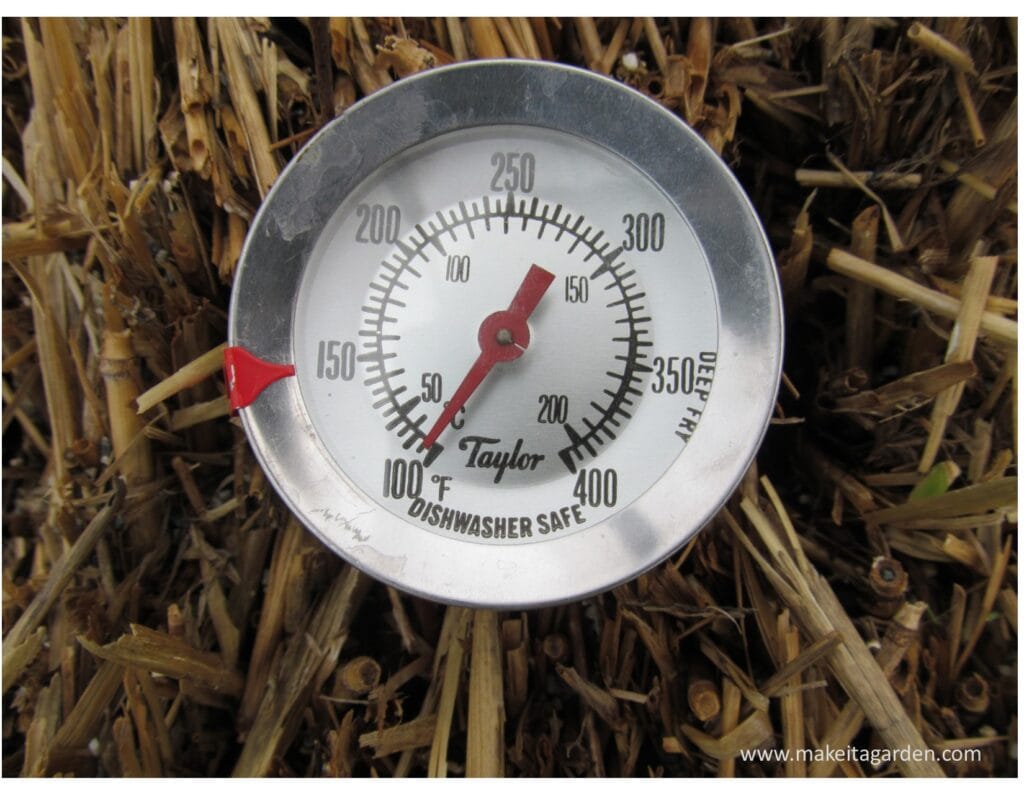
The final days of the two-week conditioning process is a time to allow the bales to cool down before transplanting your veggies. If you’ve ever done any composting, you’re aware of the heat that is generated in the natural breakdown of organic materials.
By now the straw is soft and mushy. I stuck my bare hand down into the bale and could feel the heat. My bales registered 105. Before you plant, you have to wait a few days until it cools down and feels lukewarm to the touch.
Things you can grow
You can grow just about everything in straw bales. My gardening friend who had some experience with it, grew a lot of herbs. But basically, anything that grows above the ground can be grown in straw bales. Here’s a short list:
- leaf lettuce, kale and cabbage
- broccoli
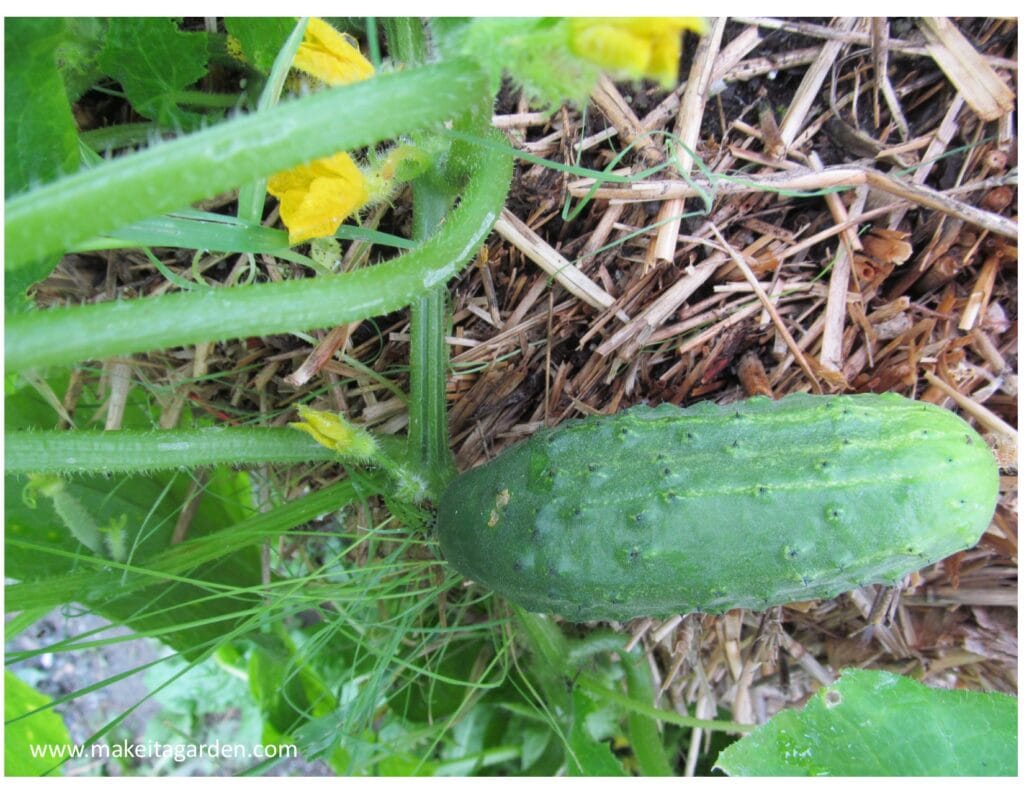
- tomatoes & cucumbers
- Swiss chard
- peas, peppers
- pumpkins, squash, zucchini
- strawberries
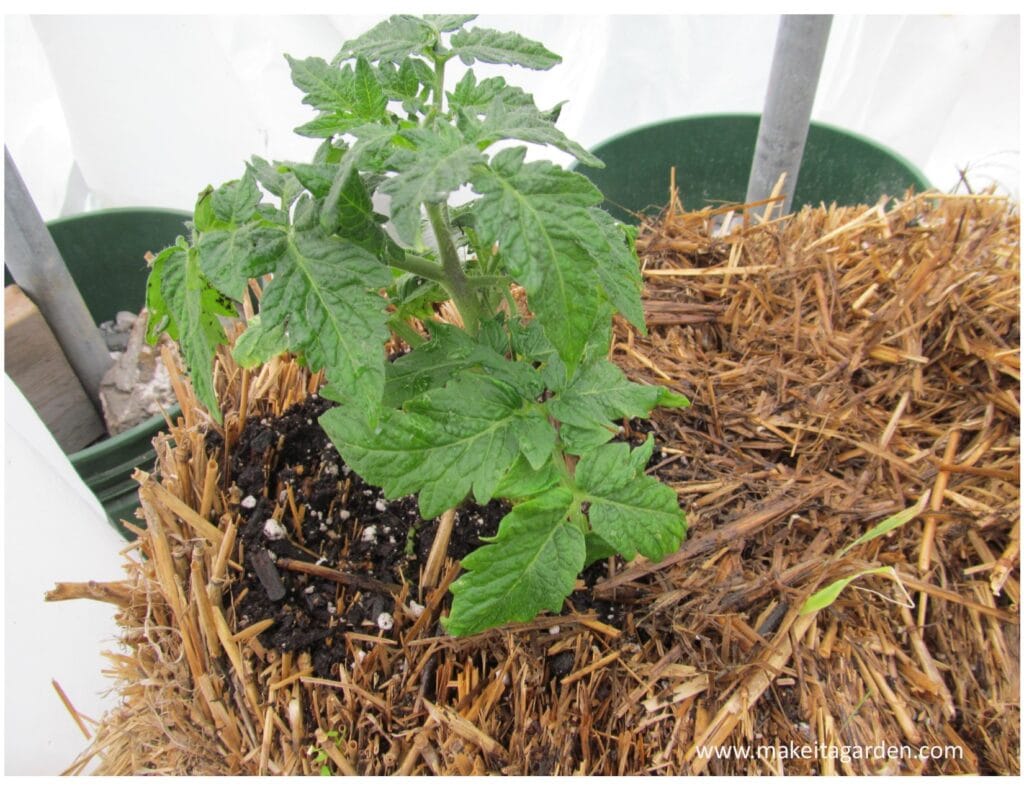
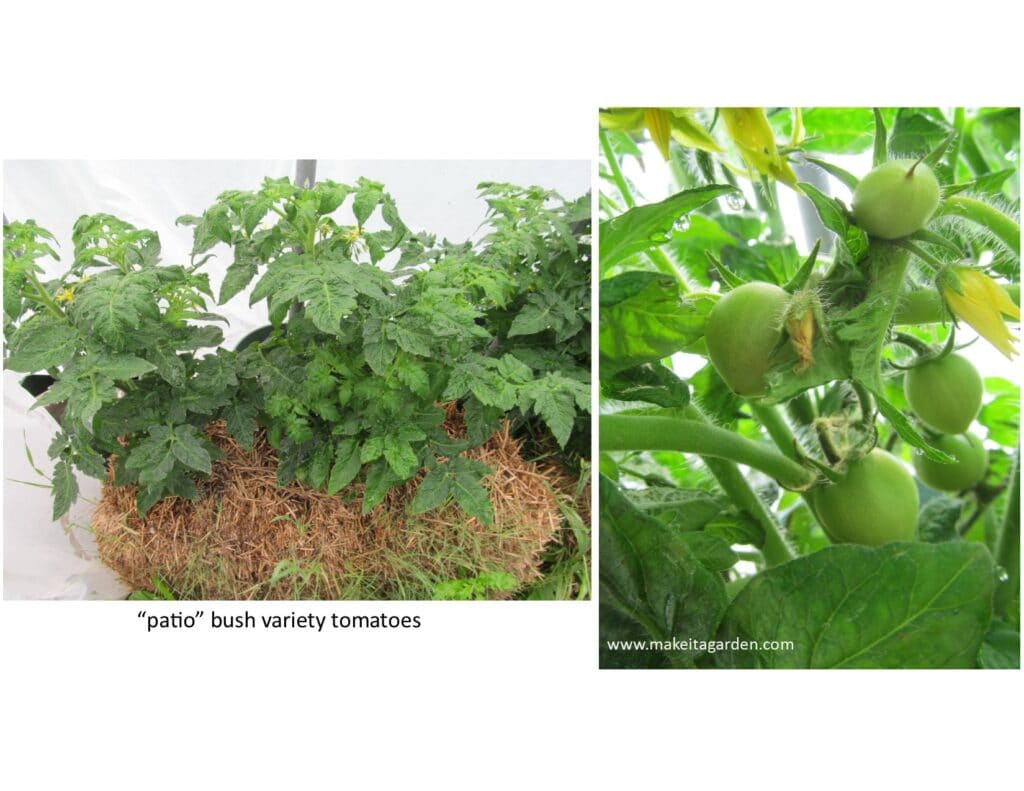
I decided to grow salad basics: tomatoes and cucumbers. To keep it simple, I chose bush varieties that didn’t need staking. Summers are short in my state, so my strawbale veggies were all grown inside the hoop house.
I planted starts from my local nursery, but you can even throw down a thin layer of potting soil and plant seeds right on top of a bale!
You dig a hole in the straw, and plant just like you would in ordinary dirt.

Care and Maintenance
Once you get everything planted, then caring for your garden is just like any other garden. You’ll need to water and fertilize now and again, but you won’t do hardly any weeding. Like raised beds, there’s much less stooping and kneeling. It was easy to inspect plants for the usual culprits like slugs and aphids.
Every couple of weeks, it’s good to fertilize your plants. Use a good vegetable fertilizer; one with high 2nd and 3rd numbers (phosphorous and potash) that helps establish a good root system.
The straw stayed moist under humid conditions inside the hoop house, which meant less watering for me. It may interest you to know that you can hook up a drip irrigation water line for your straw bales, just like you would in a regular garden. I don’t have any of that fancy stuff, but it sure takes a lot of the hard work out of watering!
Harvest Time
Once established, the tomatoes, beans and cucumbers I planted took right off. They were continually strong, healthy plants that produced many flowers. My sense was that they were in an excellent medium for root development and getting exceptional nutrients from the decaying straw.
The hoop house may help extend the season a little further. Although it was a late start for me (due in part to the two-week conditioning process), cucumbers were ready to harvest by the first week of August. I was actually a little impressed!
Strawbale gardening: Final Analysis
Now that I’ve come to the end of the season, the question remains: would I do this again next year?
Like anything, strawbale gardening takes a bit of getting used to. And like I said at the beginning, I’m not an expert gardener…not with growing vegetables, anyway. After my first year with the straw bale experiment, I wouldn’t say I’m ecstatic. But I am intrigued enough to give it another try.
The positives:
Growing veggies from a straw bale was doable for me, being fairly inexpensive. It’s also a lot cleaner and easier on my back. No getting down on my knees in the dirt, or pulling weeds. Were I still in my 20’s or 30’s, this wouldn’t be an issue. So anything that makes gardening a little less physically stressful is a game changer.
The negatives:
It’s a bit cumbersome and time-consuming to prep the bales. You have to remember to back-time so the straw will be ready to plant according to schedule. If you don’t have a way to pick up the bales yourself, you’ll have to arrange for delivery.
Bales have a tendency to sprout oat grass, and some type of mushrooms. Neither will hurt anything. You can pluck the blades of grass by hand. The mushrooms will die out in a couple of weeks. Kind of a nuisance, though.
Unlike planting a garden in soil, you may have to purchase fresh straw bales each year. It may be possible, however, to reuse bales a second year. It’ll depend on a lot of factors, but some people have been able to do this.
A helpful guidebook
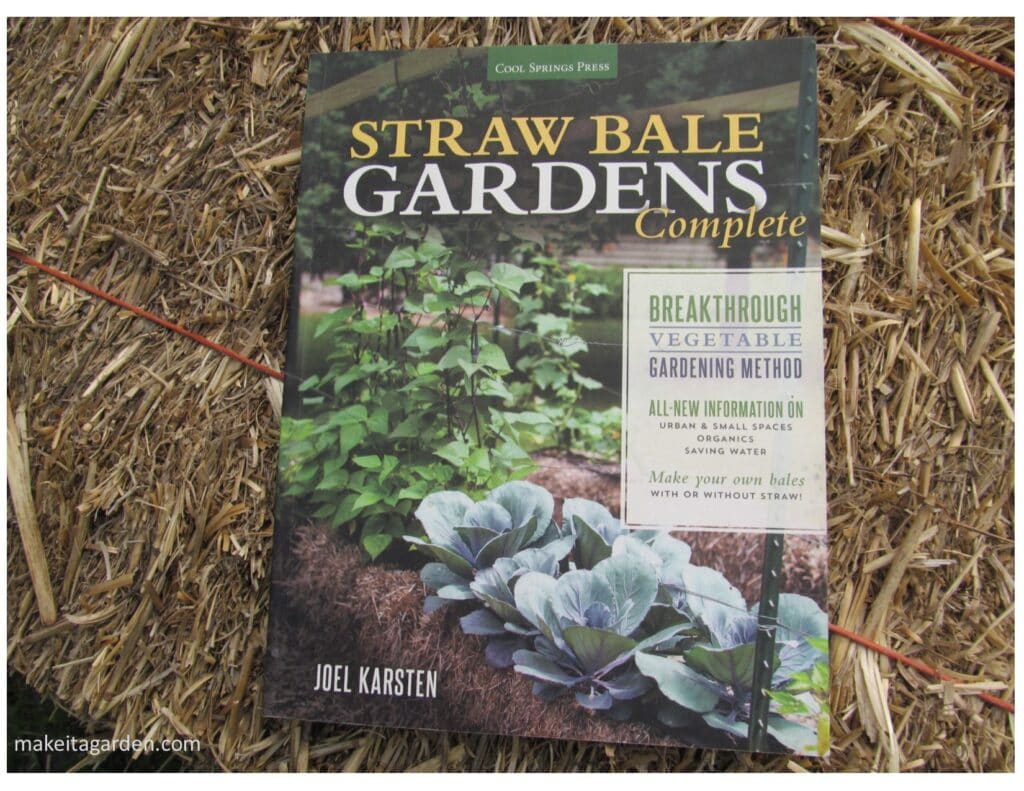
My friend lent me her book on “Strawbale Gardens” by Joel Karsten. StrawbaleGardens.com
An extremely helpful and well-written guide jam-packed with great photos and easy to read information. The book answers all kinds of questions and reservations a beginner would have. Accordingly, it’s one of the best out there.
Please note that I suggest this book to help you, the reader. I don’t profit from any mention of it on this site. Nor do I know the author personally.
Likewise, I hope this little review of strawbale gardening has been helpful. While the focus of Make it a Garden.com is on garden art and design, most of us also enjoy vegetable gardening or have a greenhouse. So before you go, you might wanna take a look at some of these other articles.
Peace and happy gardening!
Related gardening posts you may enjoy
How to build a simple Hoop House
Upgrade your greenhouse with drip irrigation
How to care for perennials in early Spring
The form you have selected does not exist.
So interesting! I love my diet garden bed, I certainly wouldn’t miss the weeding in a straw bale though!
I started SBG in the summer of 2021. I also have a 4×8 raised bed. I find that disease prone veggies like tomatoes, cucumbers and eggplants benefit greatly from gardening in SB. One doesn’t have to worry about rotation. How would I rotate in. 4×8!