

Ready to try the EASIEST snowman pallet art you’ll ever make? Because this project is by far the simplest and cheapest pallet art you can throw together in a few hours. No major cutting! No nails or screws! (depending on what you make, of course)
(1) CRAFT PAINT (2) WOOD GLUE = the only 2 items you need!
I’ve always wanted to try my hand at creating pallet art. It makes wonderful decor for a front porch display and is quite popular at holiday bazaars. There were only a few problems. First off, I have very limited carpentry skills and own none of the power tools needed to cut shapes out of pallets. Prying shipping pallet boards apart was out of the question. (a difficult task beyond my ability)
Then, I considered the pallet-look-alike stuff from the craft store. The sizes were too small and more than I was willing to spend. Besides, I wanted to use the “real” stuff. That’s when I remembered the wood pallet panels (pallet “sections”) that I had stored in my crawl space. I used to work in the garden center of a big box store many years ago. I saved these single-sided pieces to use for future art projects but never got around to it.
If you can find what I’m describing here…then all you need is a paint brush and a little imagination. No assembly or dis-assembly required!
Snowman Pallet Art Made Simple:
A wood pallet panel is ready to go “as is” without having to do anything to it. I personally like things that are simple. “Simple” as in it doesn’t even require blades…or a lot of careful measuring in order for the finished art work to look great. Now that’s MY kind of project!
NOTE: If you have a power saw, it’s easy to cut the panels from a standard shipping pallet. You can get two panels from a single pallet as they are double-sided.

How to find the right pallets
To make the snowman pallet art, you’ll want to keep an eye out for smaller-sized PANELS (as in the photos above). They have a dimension around 22″ x 19″. The ones that are typically used in hardware store displays. Maybe you’ve noticed them. These are individual, single-sided wood PANELS that are used as racks or light weight shelving to hold things like seed starting kits and boxes of tulip bulbs. Pallet-panels are also designed to be “slats” that slide into a wooden frame to make the 4-sided walls of a square bin. The bins may hold plastic snow shovels, pumpkins, or other bulky items.
These wood panels are not the same as shipping pallets. Therefore, they are not re-used and the store simply throws them away. Therefore, your chances of picking some up may be pretty good. Ask the store manager.
TIP: You can also look on Craig’s List or your area’s local ‘Buy/Sell/Trade’ as people often offer pallets for free or very low cost.
Painting images on your pallets
You can use the pallet in a vertical position (like the jolly snowman in our feature photo) OR you can turn the same pallet horizontal to do something like THIS, below. It doesn’t even have to be a snowman. Just whatever scene or character you’re inspired to paint. SEE my Easy-to-Paint Lighted Reindeer Pallet.
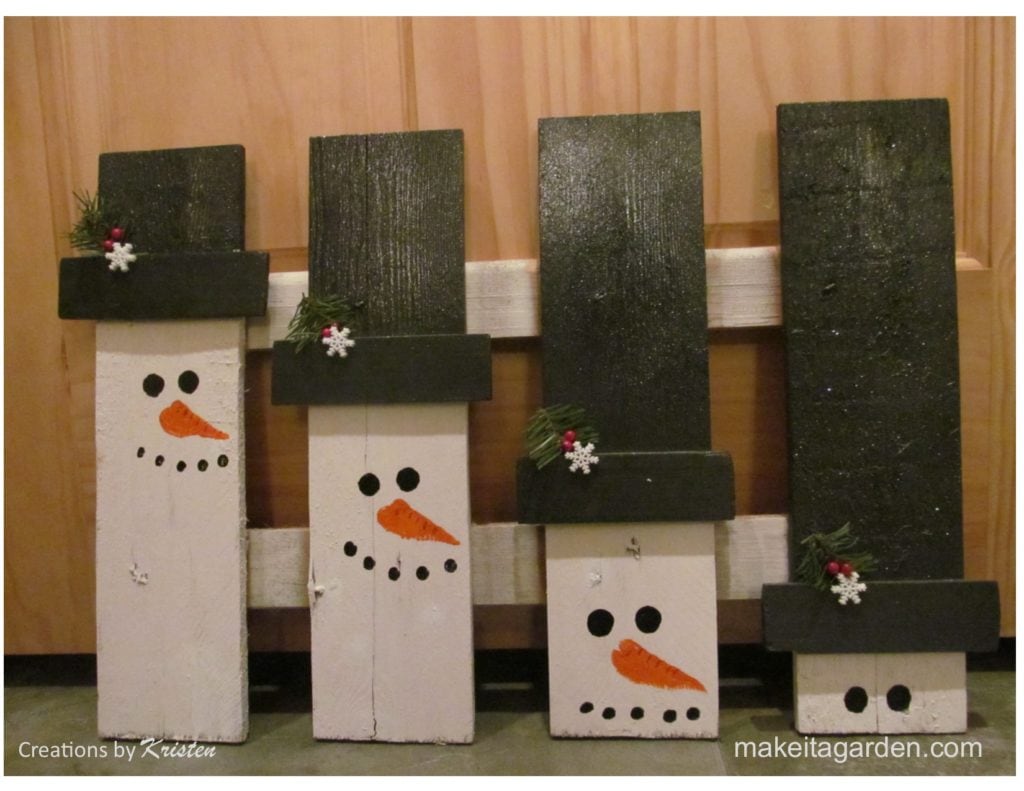
For the four snowmen above, I made the hat brim (the cross piece) with a thin strip of scrap wood about 1.5″ in width. I cut off the lengths I wanted with a hand saw. But that’s a very simple and easy cut to make. Four straight cuts under 2 inches across. I sanded the rough edges with sandpaper. Then I glued the brim piece on with wood glue (instead of nails or screws) and then painted it with craft paint.
For a bit of holiday sparkle, I sprayed the hats with glitter spray. Then I added the little decorative faux pine branch and snowflake to give the piece an extra special touch. You can use whatever craft items you have on hand.

How to paint a snowman face
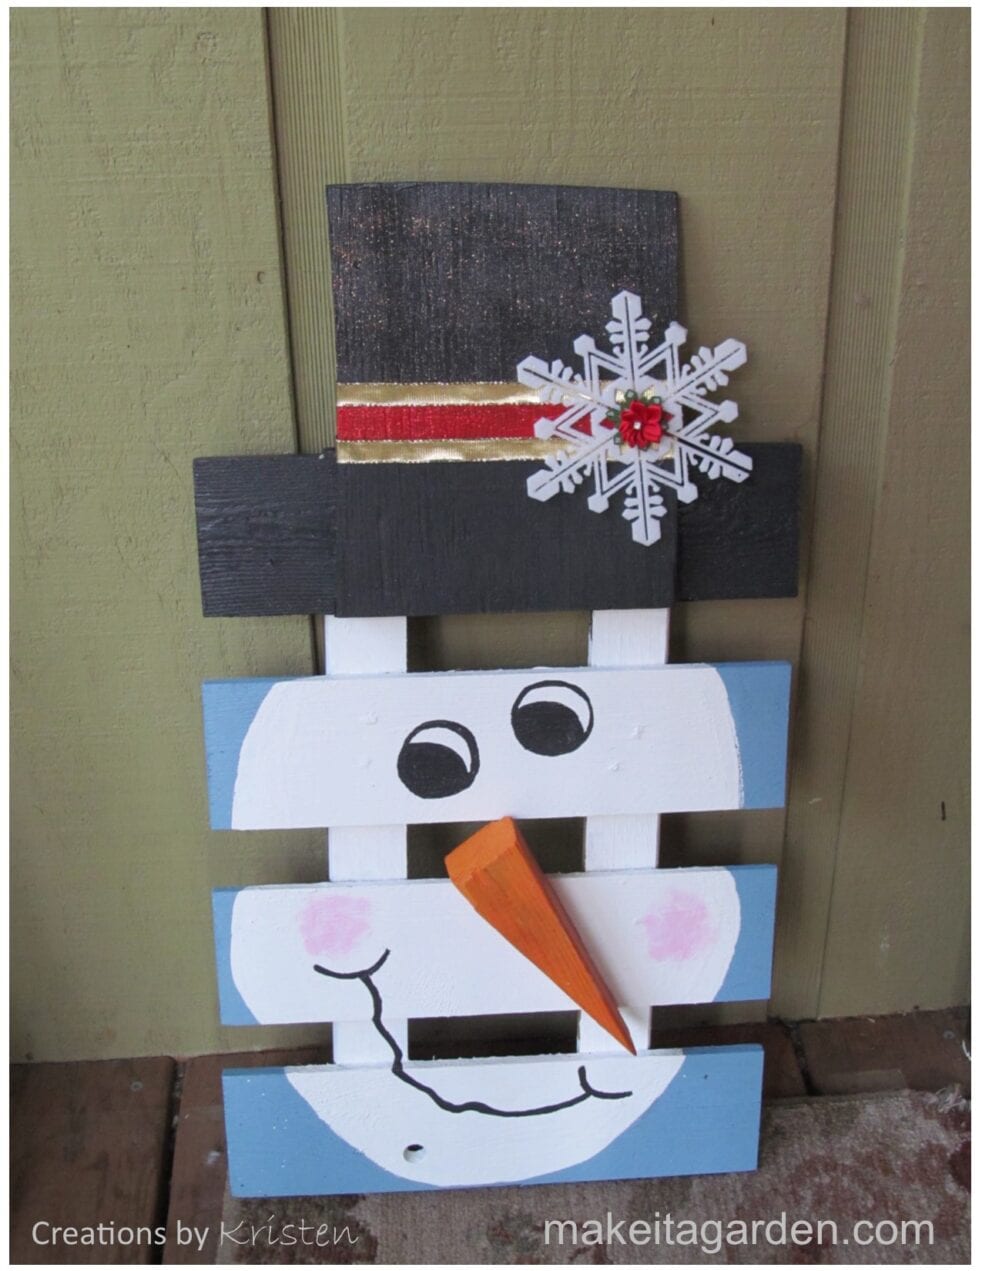
For the snowman in the feature photo, I wanted the top hat to stand out above the pallet. Again, I found a thin piece of scrap plywood that was close to the right size, and used a hand saw to cut off a piece for the top hat.
Everything is simple, straight-edge cuts. The board just so happened to be the right width, I just cut off the length I wanted and sanded the edges. One simple cut for the whole thing!
Although it looks like there is a hat brim, the ‘brim’ is actually the top board of the pallet. I just centered the square “top hat” piece of wood in-between the vertical slats on the back side. Once painted, it looks like one solid piece.
You can use imperfect wood for this project and it will still come out super cute!
Because the board used for the top hat was a little warped, I thought a couple of screws might hold it in place better than wood glue. So, I screwed it in from the backside so the screw heads would not show. SEE? You can use imperfect wood for your project and it will still come out super cute!
I used another piece of scrap wood for the carrot nose. No cuts required on that one. The original plan was to paint the nose on the pallet. But the piece of wood gave Mr. Snowman the 3-D effect. It absolutely made the piece “pop”, and gave it some whimsy which I liked much better. But I leave those details up to you and what you think looks best with your art piece.
Directions:
- Make a stencil or draw an outline for your snowman face on the pallet. Although you can buy face decals, I want to encourage you to use these examples to draw your own facial expression.
- Paint the background first. A dark color makes the white snowman pop!
- Paint the face area (if you make a mistake, just re-paint over the top)
- Make a stencil or draw outline for the eyes. Experiment on paper for different expressions and placement of eyes.
- Use a black paint pen to draw the mouth. It gives you more control and a sharp clean line.
- Use a dauber to color the cheeks
Other decorative items to consider
- Ribbon or Fabric (hat band)
- Snowflakes
- Buttons (for eyes or mouth)
- Googly eyes (craft store)
- Glitter Spray
Wrappin’ it up:
I hope you’ll have as much fun making the snowman pallet art as I did. The idea was to encourage you to experiment by using pallet panels that are small and easy to handle without having to do a lot of “wood shop” stuff.
Finally, if you enjoy arts and crafts projects like this, why not be a part of the Make it a Garden community? Scroll down just a bit to sign up and receive some free tips on using garden decor as my thank you gift to you. Have a wonderful Christmas and happy crafting!

Kristen specializes in up-cycled crafts. She has a reputation for quality and attention to detail, and her artworks show it. She takes such joy in making things “extra special”, especially during the holidays. Her craft posts may entail a bit more description geared to those who don’t make crafts on a regular basis. Even if you do, you’ll appreciate the thoughtful insights so your projects turn out beautiful!
More Jolly Snowman Crafts
Ceramic Plate Snowman Wall Hanger
The form you have selected does not exist.
I love your pallet snowman! Do you ever add a clear coat in top of your outdoor projects like this one to protect the paint?
Hi Lorna, thanks for your feedback! Per your question…a clear top coat could certainly be added. I usually don’t go that extra step as Mr. Snowman will be part of a front porch display where he’ll be plenty protected. I used stain and/or exterior paint on projects like that, but regular craft paint still holds up well. I try to keep craft projects simple and cost effective. If someone wanted to add a final protective coat, I recommend using the stuff that comes in a spray can such as Valspar ‘Project Perfect’ Top Coat or Varathane’s Spar Urethane. They are both available in gloss or matte finishes.