

Garden Art that’s light and cheerful
You can do this!
Love those whimsical dish flowers but not the weight of multiple glass and ceramic plates? Well, then, why not make dish flowers out of pie tins? You probably already have most everything you need to make one. Best of all, no special tools or know how is required!
Making dish flowers out of pie tins is sooooo easy! The’re just as cute as their glass and ceramic sisters, yet are super light weight and much less fussy to plant in the garden. Less breakable as well. They can even be used indoors. For that reason, dish flowers out of pie tins are a hit with senior citizens and others who don’t want to have to wrestle with the more elaborate set ups needed for the glass and ceramic ones. I know because I make them, too!
I can’t think of a more simple, low-cost outdoor craft that has such a big pay off. I’ve often marveled at the infinite number of little art projects you can do with just a can of spray paint. You can make these for your own yard or garden, and they make wonderful gifts for practically any occasion! Even someone who lives in a condo or apartment can stick one of these sweeties in a large pot with a houseplant. So, ready to give it a try?
What you need to make dish flowers out of pie tins

Pie Tins
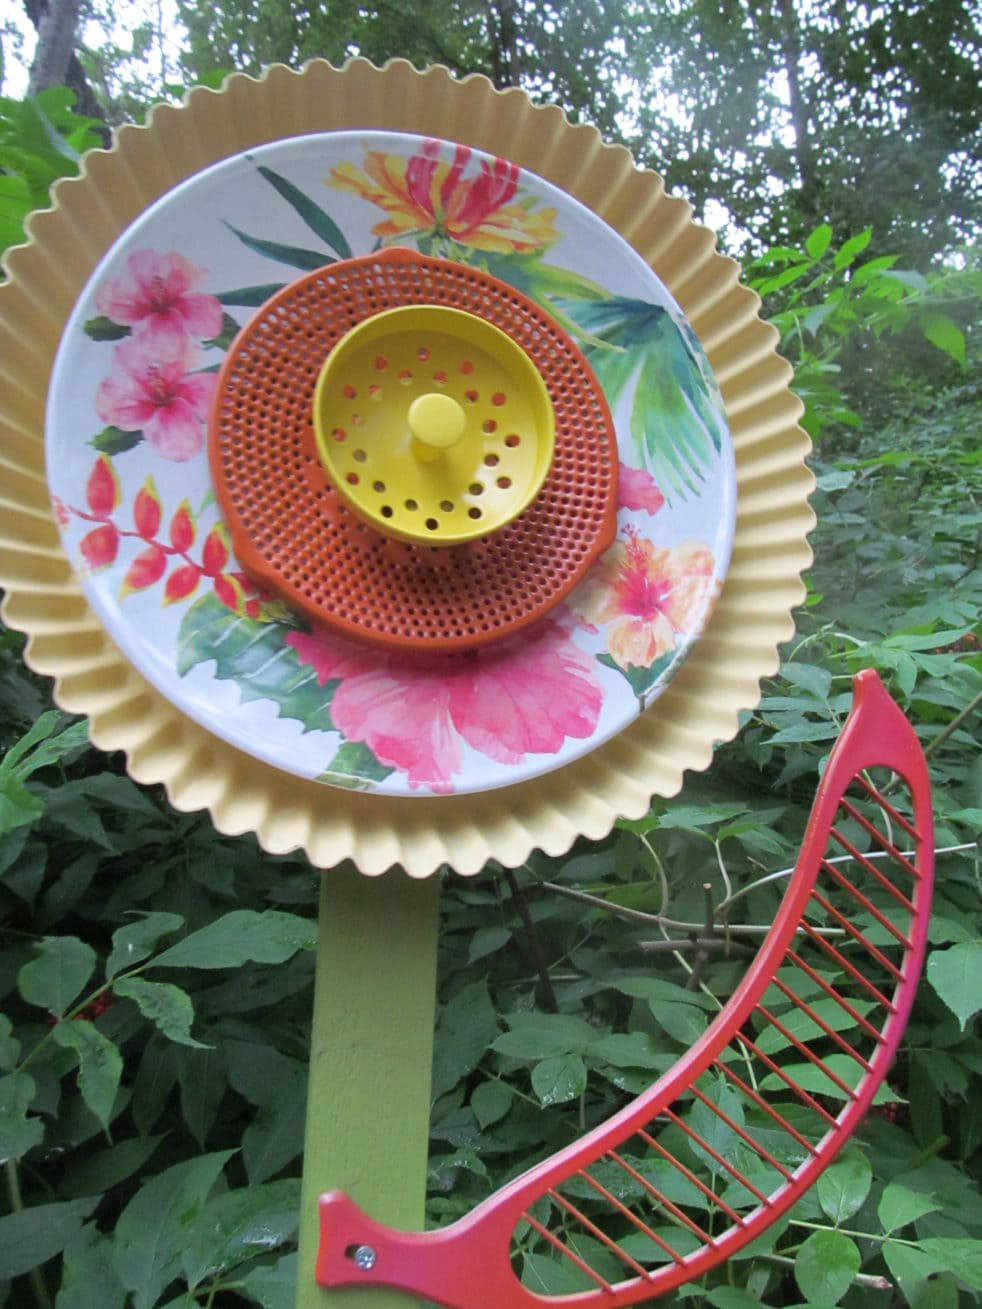
Just breeze on through your local thrift store/dollar store to pick up your pie tin(s) and additional flower parts. You’ll need a middle piece that could be a tin or aluminum or a plastic/melamine plate or bowl or other item that is fairly flat, and a smaller center. Look for things that have a scallop edge or a flower-like shape to them such as jello molds. More great centers for dish flowers are found among the candle stuff (like the gold frilly one in the picture above). Let your imagination run wild!
Wood Stakes
Next, stop off at the hardware store for a wood survey stake. I like to use the ones that are 3ft x 1/2 inch. The only problem here is that most big box hardware stores sell wood stakes in bundles. The ones I bought were in bundles of 10 for $20 bucks. TIP: If you don’t want to have leftovers, ask the store if they have any singles from broken bundles or find a store that sells survey stakes individually.
Paint
Pick your favorite spray paint colors for your flower (at least two that will look good together). I use a separate primer on metal pans. You’ll also need a small can of green exterior paint or stain for the wood stake which will be the stem for the flower. THRIFTY TIP: if you’re only painting a few wood stakes, you won’t need much paint. Many stores sell a small “sample size” for a lower price.
Approx TIME to make: 1-2 hours. Note: This is a 2-part project as spray paint needs time to dry thoroughly before assembling the flower.
TOOLS & MATERIALS
- Pie tins and flower parts
- Wood stakes
- Spray Paint (2 colors) + Primer (optional)
- Green exterior paint or stain for wood stake
- Drill and drill bit 11/64 (You don’t need a large hole for this)
- 3/4″ wood screw #8-32 OR 1 1/2″ machine screw #8-32 & nut
- Exterior glue such as E-6000
- newspapers or drop cloth
Directions Part 1
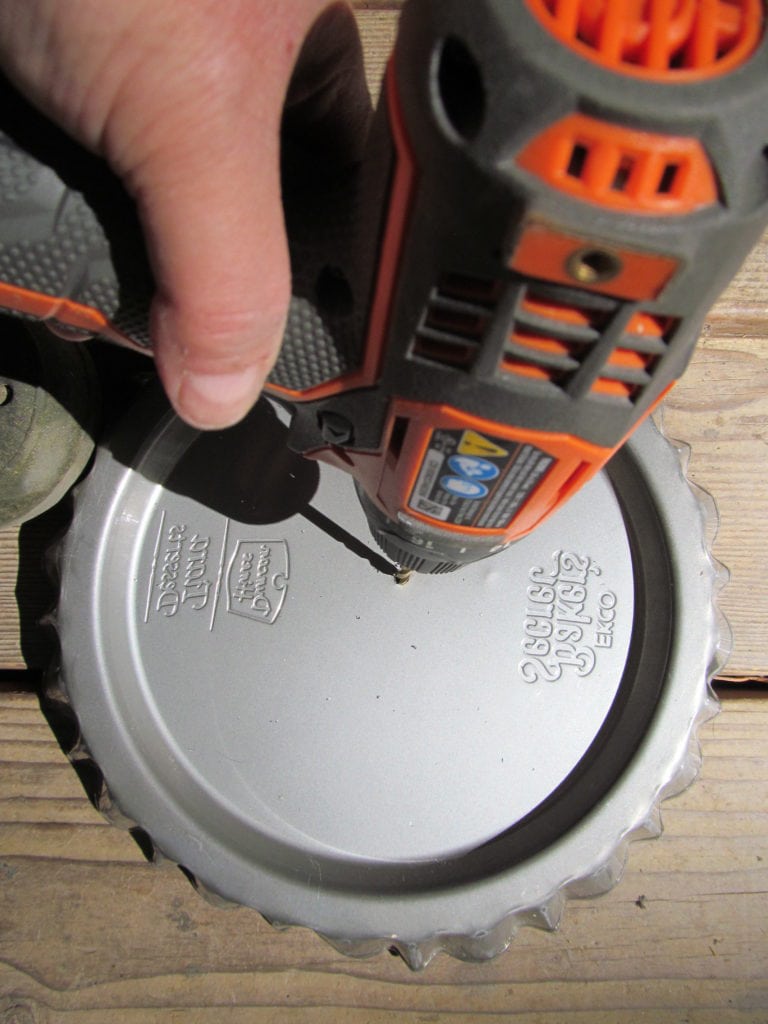
- Drill hole in the center of pie tin. Note: Pie tin and wood stake are both soft materials and are quick and easy to drill through with a regular drill bit.

2. Apply a primer coat to the pie tin(s) and flower parts. Follow directions on can. The primer dries very quickly and can be sprayed with your favorite colors in just a few minutes.

3. Apply your spray paint colors. Follow directions on the can.

4. Paint the wood stakes. Since they will be used outdoors, I usually do 2 coats. It dries fast.

Part 2
5. Attach the pie tin to the wood stake with a 3/4″ wood screw. If you’re using a machine screw, instead, you’ll have to drill a hole thru the wood stake and insert the screw.

6. Glue center pieces to the pie tin using an outdoor glue such as E-6000. For best results, put a bead of glue around the entire outside edge.


Because the wood stakes have a nice pointed edge, the dish flower can easily be planted anywhere you like in the yard or garden. They look cute in planters, too!
I make a lot of these to sell at the Palmer Senior Center. We’re very fortunate to have a modern, bright and cheerful place for such a small town. Older seniors have said that the ones on wood stakes with their pointed tips are so much easier to stick into the ground and are not heavy. That makes them more manageable for some.
Because they cost less to make and don’t involve as much labor as my elaborate glass and ceramic dish flowers do, I offer them at discounted prices for our seniors. Proceeds from the gift shop sales support programs for Mat-Su Senior Services.
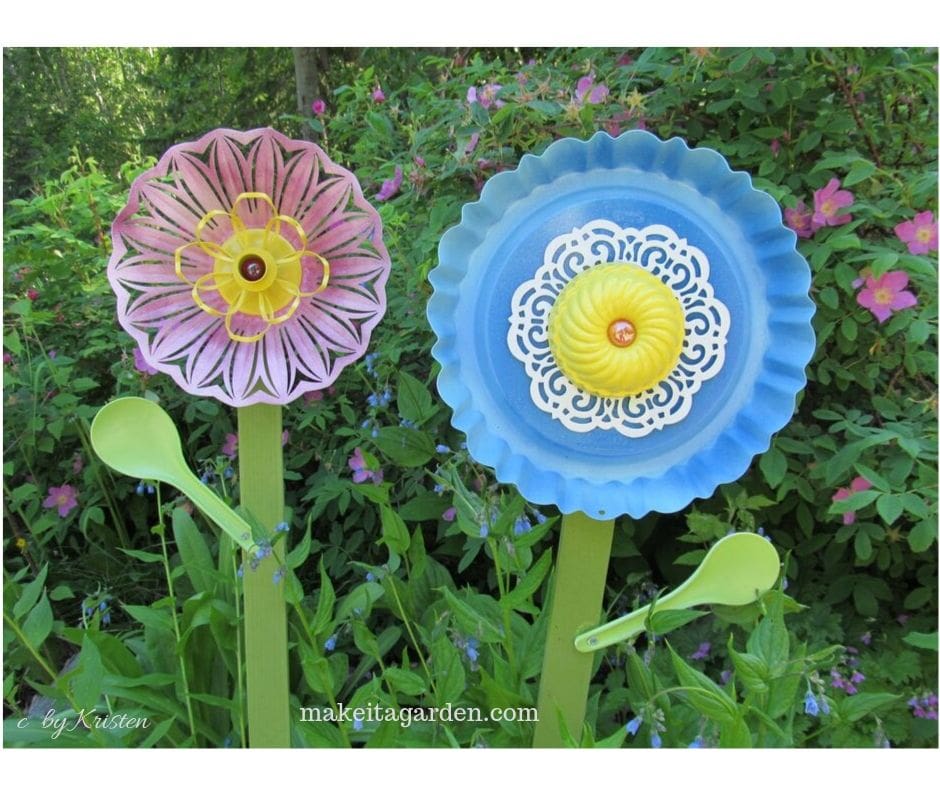
I do hope that you’ll make some dish flowers out of pie tins. You can even add a spatula for a leaf if you like! Plant 3 or 4 of them together in a group for nice outdoor display, sure to bring on the compliments. I’d love to see what you come up with. Send me a photo and I’ll share your creativity with the whole world!
Other super easy crafts you may enjoy:
How to Make Simple Bundt Pan Flowers
Plant Flowers in a Boot Just For the Fun of It
The form you have selected does not exist.
Aw, this was an incredibly good post. Taking a few minutes and actual effort to make a good article… but what can I say… I hesitate a whole lot and don’t manage to get nearly anything done.
Thanks for your kind remarks. I hope you’ll try this project,though. It’s one that’s not terribly time-consuming.
Hi Kris, I love all of your posts! I am more inspired by the way you make your glass dish flowers than other peoples way. I went out & bought myself a cordless drill & my dining room now looks more like a thrift store with all my collectibles! I can’t wait to get started. I’ve also been collecting different metal dishes & pieces & this post has great info on those ideas. Is it necessary to prime the metal pcs before painting, even though I’ll be using the colors of Rust-oleum paint & primer spray paint. BTW I read that you bring your pcs to the Palmer Sr Center. I just moved to IN a few months ago, but lived in AK for 36 yrs (Delta for 24 & Seward for 12) I do miss that beautiful state!!! ❤️
Thanks so much Nadine. Yes, you now know what my dining room looks like (ha ha)! But I don’t have a garage or workshop yet. I’m so very glad you got yourself a drill and are learning how to drill dishes. Good for you! Once you get this skill down, there’s all kinds of crafts that you can do. For the holidays, you can drill holes in glass bottles or glass block and insert those battery mini lights to set a festive mood indoors or out. On the metal pans, no, there’s really no need to use a separate primer. I don’t, except for rare instances. You and I are sourdoughs, practically. I’v been up here a long time myself and love it. The Palmer Senior Center is a very nice place with nice people. I was selling at the gift shop until it was closed last year for the virus. Thanks so much for visiting my blog. I hope one day I can see all the nice things you are making.
Can you use Melanie dishes?
Oh, YES! Here’s a link to my tutorial if you’d like to take a look https://makeitagarden.com/plastic-dishes-make-cheerful-flowers-for-the-garden/.
I’ve had hub caps sitting around for the past 4 years and haven’t gotten around to making flowers with them. I think it’s time lol. I have a suggestion for you. To help prevent leaves etc from getting in your paint, get house if a pop up beach tent. Do your spraying in there. It’s shallow enough that you physically can be outside if it and still spray your projects inside. Then add a flap to the front and flip the flap down. That’s how I do any of my spraying projects. I started that because I didn’t want to have overspray from wind blowing on and or my neighbors car or home, plus the dust and big factor. I love your tutorial very easy for people to follow
Ah ha…VERY smart idea! And probably not very expensive, either…maybe a used one could be found on marketplace
I have typos on my previous post that I can’t correct as it’s waiting to be approved. Feel free to make corrections to it.
*get one of those pop up beach tents
*outside (of) it
*blowing (mine), or